Latest Entries »

The last straws of the migration process to the new server. The old server will expire in a few days, so, the last bits are to be migrated.

Migrating the git repository is quite straight forwarded. Just copying the gisosis directory over, and setting the directory. Please note, on debian, gitweb is, unlike on archlinux, a separate package

apt-get install gitosis gitweb

As the installation provided by OVH created two partitions, / and /var, I have to change the home directory of the git user accordingly, as the default location is /srv/gitosis, which would be located on the / directory.

Another thing that’s to be moved are the mailing lists. According to this site migrating mailman is just as simple as copying over the data. However, ISPConfig3 has some mailing list support, to the stuff has to be integrated as well.

To integrate mailman with the ISPConfig3 configuration, add the following to /etc/aliases, then run the newalises command

mailman:             "|/var/lib/mailman/mail/mailman post mailman"
mailman-admin:       "|/var/lib/mailman/mail/mailman admin mailman"
mailman-bounces:     "|/var/lib/mailman/mail/mailman bounces mailman"
mailman-confirm:     "|/var/lib/mailman/mail/mailman confirm mailman"
mailman-join:        "|/var/lib/mailman/mail/mailman join mailman"
mailman-leave:       "|/var/lib/mailman/mail/mailman leave mailman"
mailman-owner:       "|/var/lib/mailman/mail/mailman owner mailman"
mailman-request:     "|/var/lib/mailman/mail/mailman request mailman"
mailman-subscribe:   "|/var/lib/mailman/mail/mailman subscribe mailman"
mailman-unsubscribe: "|/var/lib/mailman/mail/mailman unsubscribe mailman"

And some additonal configuration

# ln -s /etc/mailman/apache.conf /etc/apache2/conf.d/mailman.conf
# /etc/init.d/postfix restart
# /etc/init.d/apache2 restart

Well, ISPConfig3 has to know about the lists, so I guess, I should add the lists first in the web interface, and then copy over the directories (lists and archives). When copying over the directories, keep in mind Arch has a different uid/gid for the mailman user (which it called list) so you have to chown the files accordingly.

Please note, due the new configuration, the URL for the web interface has changed from
http://lists.blaatschaap.be/mailman/listinfo to
http://lists.blaatschaap.be/cgi-bin/mailman/listinfo

To fix the URL, issue the following command

# /var/lib/mailman/bin/withlist -l -r fix_url bscp -u lists.blaatschaap.be

I guess I should make up some site at the lists.* subdomains on my server, well, just to redirect to the listinfo page. Anyways… migration of the mailing lists completes. Now, just some more sites, and I’ll also have to take a look at the gitweb, to finally move the BlaatSchaap Coding Projects page.

Yesterday, I tried logging in to my Raspberry Pi server from my phone using ConnectBot, an Android SSH client. It was disconnected immediately. Something is wrong. When being back at home, I tried logging in from my desktop, with the same problem. Pre-authentication disconnect.

It appears, when being booted headless, the Raspberry Pi enables a console at its composite port. Being located behind my tv, it’s easy to plug in a cable. systemctl status sshd indicated an error state, and it refused to start again. It would immediately get killed by a sigbus. A sigbus??? wtf?

The logfiles show the following error:

Mar  9 17:55:19 rpi-server sshd[21742]: Inconsistency detected by ld.so: dl-version.c: 224: _dl_check_map_versions: Assertion `needed != ((void *)0)' failed!

I assumed some upgrade I ran earlier upgraded some libraries, conflicting with some in-momory code, therefore I decided to reboot the Pi.

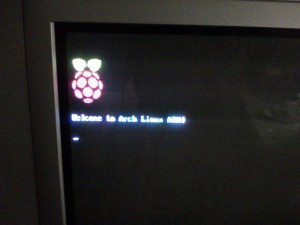
It comes up with the Raspberry logo, saying welcome to ArchLinux ARM, but then it just hangs. Nothing else happens. Nothing.

rpi_noboot

To verify if it’s the Pi, I decided to boot it up using the SD card from my other Pi. Since it boots fine, there is something wrong with the content of the rpi-server’s SD card, which seems to be confirmed by

Mar  9 17:55:14 rpi-server kernel: [3514985.125660] EXT4-fs error (device mmcblk0p2): __ext4_ext_check_block:475: inode #699: comm systemctl: bad header/extent: inval
id extent entries - magic f30a, entries 223, max 340(340), depth 0(0)

I have made an image if the SD card’s current state. I can restore the SD card with an earlier image I’ve made when installing rpi-server. I think I have changed some things since I’ve made that image, but the basic functionality, such as NFS, CUPS and SANE should be on there. (As I’ve mentioned I was going to make this backup in a post mentioning sane.

So, this seems to be a case of file system corruption. The question remains what caused this corrupt file system? Is there something wrong with the Pi? the SD card? Is there a bug in the kernel used by ArchLinuxARM? Was the system possibly hacked?

I ran fsck -y /dev/mmcblk0p2 on the SD card. I have a backup anyways, so the -y won’t hurt. I have mentioned, even though I marked it as “should be checked on boot” in my fstab, it doesn’t appear to be doing so for the rootfs. (It checks the bootfs during boot) But since this system is supposed to be always up, a check during boot shouldn’t make much difference. And in principe, the file system should not get corrupted. So…. why did it become corrupted?

Anyhow, getting multiple claimed blocks. Therefore I say it’s no use to continue, I should just write the old image back and that be it…. thinking about what I’ve installed afterwards… one of the things would be apache I guess…


My laptop’s SD slot stopped working due overheating. The samn /etc/cpufreq-bench.conf was set to governor ondemand. I have set it to powersave a dozen times, but it keeps popping back to ondemand, probably during the installation of updates. I don’t know why, but I need to clock down my laptop to the lowest possible speed or else it will overheat. The SD slot is the first thing to give issues when this happens.


Running on the image I put back, and performed an upgrade, I see these messages in my logs again:

[ 1417.529973] EXT4-fs error (device mmcblk0p2): ext4_ext_check_inode:462: inode #55228: comm pacman: bad header/extent: invalid magic - magic f34a, entries 1, max 4(0), depth 0(0)

I did the upgrade immediately and rebooted, so it is still either the SD card or the current kernel.

Server migration

As I’ve been mentioning before, the content is this server (ks26301.kimsufi.com) will be migrated to a new server (ks3291437.kimsufi.com). These are dedicated servers from http://www.isgenoeg.nl. The ks26301 server, which I have been using since April 2009, is their 2008 model. Back in 2009, their services got introduced in the Netherlands, and the first 1000 subscribers got a year free. I was one of the lucky.

Anyhow, this is a server from 2008, and the price hasn’t changed (apart from the taxes, that is). The point is, for the same price they offer much better specs. So, it makes sense to migrate. Also, over the past years I am hosting services for certain people, which makes the configuration I’ve been using since 2011 less optimal. I never enticipated the fact I would be offering hosting services to third parties, so even more reason to migrate my services to a new server.

At this point, I would like to highlight one of the issues that arrises during such a migration, and provide a solution for it. The problem is the way DNS works. When I change my DNS entries, it takes a while to propagate through the internet. The old IP address might be cached at some DNS server and so on. Therefore, during the migration, requests may arrive at both the old and the new server. So, how to make this situation transparant to the user?

First, let’s have a look at Apache. We’re going to use the mod_proxy for this purpose. I had this module already installed on my system, therefore, in my /etc/httpd/conf/httpd.conf I have

LoadModule proxy_module modules/mod_proxy.so
LoadModule proxy_connect_module modules/mod_proxy_connect.so
LoadModule proxy_ftp_module modules/mod_proxy_ftp.so
LoadModule proxy_http_module modules/mod_proxy_http.so
LoadModule proxy_scgi_module modules/mod_proxy_scgi.so
LoadModule proxy_ajp_module modules/mod_proxy_ajp.so
LoadModule proxy_balancer_module modules/mod_proxy_balancer.so

I might check later on a different (non-production) server which of these are actually required for this purpose.

Anyhow, in my /etc/httpd/conf/extra/httpd-vhosts.conf, I use the following to proxy the connection to the new server. Please note my old server resolved the domain.tld to the new server. Just to be sure it won’t get caught up in a loop, I might add it to /etc/hosts as well. (I’ve kept the DocumentRoot in there, but it has no real purpose anymore. Merely a fallback in case the mod_proxy isn’t loaded)

<VirtualHost *:80>
  ServerAdmin webmaster@domain.tld
  DocumentRoot "/path/to/documentroot"
  ServerName domain.tld
  ServerAlias www.domain.tld
  ErrorLog "/var/log/httpd/domain.tld-error_log"
  CustomLog "/var/log/httpd/domain.tld-access_log" combined

  <IfModule mod_proxy.c>
    <Proxy *>
      Order deny,allow
      Allow from all
    </Proxy>
    ProxyRequests off
    ProxyPassInterpolateEnv On
    ProxyPass / http://www.domain.tld/ interpolate
  </IfModule>

</VirtualHost>

Next issue, is incoming mail. For now, I start at migrating the websites, and later I will migrate the mail. But as a proof-of-conecpt, I have tested this for one domain which only has a catch-all-forward.

The ks26301 runs exim as smtp server, well, basically, we’re going to tell it to forward mail for the specific domain to the ks3291437 server.

Just below begin routers in the /etc/mail/exim.conf file, we add

send_to_new_server:
  driver = manualroute
  domains = "domain.tld"
  transport = remote_smtp
  route_list = * ks3291437.kimsufi.com

These configurations should make the transition to the new server transparant to the end-user.

As I’ve been telling before, due the increased number of sites on my server, I’m hitting its limits. Mainly the fact the server got only 1 GB of RAM is putting limitations. Recently the server was acting up again, and I assumed it was caused by resource limits, therefore I attempted to tune the configuration a little more to use less resources, without any luck.

I started to notice this problem showed different characteristics the problems I’ve been experiencing before. Mainly because it seemed also to influence the mail system rather then just the webserver. The problem seemed to be linked to the mysql server. Restarting the server didn’t work as it should. Defenately something with mysql…. So I decided to start mysql in a console to look and I saw

mysqld: Disk is full writing './mysql-bin.~rec~' (Errcode: 28). Waiting for someone to free space... (Expect up to 60 secs delay for server to continue after freeing disk space)

The problem: the root file system was full: In all the time the server was running, of course I have frequently been upgrading the system. During all this time, packages were downloaded to /var/cache/pacman/pkg and never removed. So… it was eating a couple of gigabytes…. and the root file system is just a small filesystem, just for the OS. The data is elsewhere.

Another mystery solved.

I remember having trouble to get this working. After installing gitosis…. how to get the damn thing working.

Edit the gitosis-admin/gitosis.conf file:

[repo example]
owner = andre@hp

[group mygroup]
members= andre@blaatkonijn andre@hp
writable = example

and commit it

[andre@hplaptop gitosis-admin]$ git commit -a -m "added example repo"
[andre@hplaptop gitosis-admin]$ git push

On the server,

[git@rpi-server repositories]$ mkdir example.git
[git@rpi-server repositories]$ cd example.git
[git@rpi-server example.git]$ git init --bare --shared

On the client:

[andre@hplaptop git-ehv.blaatschaap.be]$ git clone git@ehv.blaatschaap.be:example
Cloning into 'example'...
warning: You appear to have cloned an empty repository.
[andre@hplaptop git-ehv.blaatschaap.be]$ cd example
[andre@hplaptop example]$ cp ~/example/* .
[andre@hplaptop example]$ git commit -a -m "initial commit"
[master (root-commit) fb33879] initial commit
 4 files changed, 326 insertions(+)
 create mode 100644 test.css
 create mode 100644 test.css~
 create mode 100644 test.html
 create mode 100644 test.html~

So far so good, but there are some additional command required before it is actually usable. I have been searching this for hours when I first set up my gitosis. Last may I wrote I still had to blog about setting up gitosis, but it seems, I haven’t done so, until now, now I’ve set up another gitosis installation. I said back then, I am behind with stuff I am supported to blog about, and it seems, that’s still the case. For example, I still haven’t written about certain USB problems I have been experiencing. Anyhow…. let’s look at git again. The missing link is:

[andre@hplaptop example]$ git branch example
[andre@hplaptop example]$ git checkout example
Switched to branch 'example'
[andre@hplaptop example]$ git push origin example

For quite a while, I have been using hexchat in stead of xchat on my laptop. Hexchat is a fork of xchat. Basically, there is nothing wrong with xchat, but its latest release was in May 2010. Hexchat started out as XChat-WDK, which was a windows build of xchat, with some Windows-specific patches. But since the original xchat seems to be no longer under active development, they went multi-platform. Hence the need for a namechange as the W from WDK means Windows. Well…. this is not my story to tell anyway. Just providing a little background information.
Look over here for the announcement. (it’s on facebook, so don’t click when you’re paranoid)

Anyhow, it wasn’t installed yet on my desktop machine (blaatkonijn.) Migration from xchat to hexchat, here we go:

[andre@blaatkonijn ~]$ cd .config
[andre@blaatkonijn .config]$ ls -n ~/.xchat hexchat
[andre@blaatkonijn hexchat]$ ln -s xchat.conf hexchat.conf
[andre@blaatkonijn hexchat]$ ln -s xchatlogs/ logs

In earlier builds, the config file was still called xchat.conf, but it got recently renamed. I was like, wtf?!? after an update as my settings were gone. Anyhow, I discovered the namechange of the config file.

Anyhow, I could just have moved and renamed all the config files, however, when creating just symlinks, I remain compatible with the original xchat, meaning I could start that as well if I wanted to.

Another note: freenode has a slow nickserv. This causes messages like

-NickServ- This nickname is registered. Please choose a different nickname, or identify via /msg NickServ identify .
* #raspberrypi :Cannot join channel (+r) - you need to be identified with services

and seeing in the one-but-last channel to join

-NickServ- You are now identified for AndrevS.

The solution for this problem, to increase the delay between connect and joining the channels

/set irc_join_delay 10
irc_join_delay set to: 10 (was: 3)

My server Pi, well… it still needs some server stuff to be installed. Installing git has been forever on my TODO list. One of the things that are supposed to be handles by this git server is nightly backups of my dedicated server, which hosts this blog among a number of other sites. Originally, my BeagleBoard was supposed to have this role, but due its instabilities, I have never set it us as a git server. At some point in time, Eileen wanted to set up a server at her place, and asked me to help her with configuring it. So I asked if I could have some space on that server for backup purposes. Unfortunately, that machine was unstable as well, so it shut down as well.

To manage git, we’re going to use gitosis. The very same way as is done on my dedicated server (at ovh). But we’re going to use a different configuration. The ovh server exports all repositories, while here we’re going to set up private repositories. But we also want to have the possibility to have public repositories. We will also configure gitweb to have a nice interface to those public repositories.

This configuration is performed on a Raspberry Pi running ArchLinuxARM. However, this guide could be applied to regular ArchLinux on i386 or x86_64 as well.

Let’s get started, shall we?

[andre@rpi-server ~]$ yaourt -S gitosis-git

We have to create set the home directory for the git user manually:

[root@rpi-server home]# mkdir /srv/gitosis
[root@rpi-server home]# usermod -d /srv/gitosis/ git

Since we’re hosting this on a raspberry pi, and don’t want to store the repository on the SD Card, we’re going to apply the same method as we’re dong during the setup of the NFS shares: We add the following line to our fstab

/home/gitosis   /srv/gitosis    none    bind    0   0

Which basically means we mount the /home/gitosis directory to /srv/gitosis. Of course we could simple have made a symlink as well. Anyhow, let’s continue.
***** TODO **** use a symlink after all???

[root@rpi-server home]# mkdir /srv/gitosis
[root@rpi-server home]# mkdir /user/gitosis
[root@rpi-server home]# mkdir /srv/gitosis
[root@rpi-server home]# chown git:git /srv/gitosis
[root@rpi-server home]# chown git:git /home/gitosis/
[root@rpi-server home]# mount /srv/gitosis

Now, I am going to initialise gitosis. I will do this as the git user. So, I su to root and then to git, like this:

[andre@hplaptop ~]$ su
Wachtwoord: 
[root@hplaptop andre]# su git
[git@hplaptop andre]$ cd
[git@hplaptop /]$ 

I have placed a file in the home folder containing my public key. I will try to initialise gitosis using this key:

[git@rpi-server gitosis]$ gitosis-init < andre\@hp.pub 
fatal: unable to access '/home/andre/.config/git/config': Permission denied
Traceback (most recent call last):
  File "/usr/bin/gitosis-init", line 9, in 
    load_entry_point('gitosis==0.2', 'console_scripts', 'gitosis-init')()
  File "/usr/lib/python2.7/site-packages/gitosis/app.py", line 24, in run
    return app.main()
  File "/usr/lib/python2.7/site-packages/gitosis/app.py", line 38, in main
    self.handle_args(parser, cfg, options, args)
  File "/usr/lib/python2.7/site-packages/gitosis/init.py", line 136, in handle_args
    user=user,
  File "/usr/lib/python2.7/site-packages/gitosis/init.py", line 75, in init_admin_repository
    template=resource_filename('gitosis.templates', 'admin')
  File "/usr/lib/python2.7/site-packages/gitosis/repository.py", line 54, in init
    raise GitInitError('exit status %d' % returncode)
gitosis.repository.GitInitError: exit status 128

Apparently, it tries to access file in my (andre) home directory, while its running as git. It shouldn’t know about me, right? Well….

[git@rpi-server gitosis]$ set | grep andre
MAIL=/var/mail/andre
XDG_CACHE_HOME=/home/andre/.cache
XDG_CONFIG_HOME=/home/andre/.config
XDG_DATA_HOME=/home/andre/.local/share

So, there is still a reference to my config directory in the enviorement, lets unset this shit and continue:

[git@rpi-server gitosis]$ unset XDG_CACHE_HOME
[git@rpi-server gitosis]$ unset XDG_CONFIG_HOME
[git@rpi-server gitosis]$ unset XDG_DATA_HOME

Now, we can initialise gitosis:

[git@rpi-server gitosis]$ gitosis-init < andre\@hp.pub 
Initialized empty Git repository in /srv/gitosis/repositories/gitosis-admin.git/
Reinitialized existing Git repository in /srv/gitosis/repositories/gitosis-admin.git/

Now, we're going to install and configure the web server:

[andre@rpi-server ~]$ yaourt -S apache

We're going to do the mount bind again

/home/http   /srv/http    none    bind    0   0
[root@rpi-server ~]# mkdir /home/http
[root@rpi-server ~]# mount /srv/http/
[root@rpi-server ~]# chown http:http /srv/http/
[root@rpi-server ~]# chmod g+w /srv/http/

I'm going to add myself to the http group.

[root@rpi-server http]# groupmems -a andre -g http

As I've mentioned before, I wish to host gitweb as well. Gitweb is in the git package, so it's already installed, just making a symlink is enough, which I can do as myself, as I am in the group http. I've also downloaded the "unknown" folder from my ovh server, which is the page that displays the "domain not served as this server" page in case an unknown vhost is requested. I will move this as well:

[andre@rpi-server ~]$ ln -s /usr/share/gitweb /srv/http/gitweb
[andre@rpi-server ~]$ mv unknown /srv/http

As the fact I am putting my "unknown vhost" page on this server, it will be supporting vhosts. If a requested domain doesn't match any VirtualHost in the apache config file, it will serve the first entry in the config file, therefore we will edit the config file /etc/httpd/conf/extra/httpd-vhosts.conf and put the following in

NameVirtualHost *:80

<VirtualHost *:80>
    DocumentRoot "/srv/http/unknown"
    ErrorLog "/var/log/httpd/unknown-error_log"
    CustomLog "/var/log/httpd/unknown-access_log" combined
</VirtualHost>

However, Virtual Hosts aren't enabled yet. We need to edit the main config file in order to include the vhosts config file. We need to open /etc/httpd/conf/httpd.conf and uncomment the virtual hosts line:

# Virtual hosts
Include conf/extra/httpd-vhosts.conf

The "unkown vhost" page is written in php, so we're also going to install php:

[andre@rpi-server ~]$ yaourt -S php-apache 

And add it to the apache main configuration file again: we need to load the library, and include the configuration file:

LoadModule php5_module modules/libphp5.so
Include conf/extra/php5_module.conf

We also have to add something for the gitweb configuration to the config file

<Directory "/srv/http/gitweb">
   DirectoryIndex gitweb.cgi
   Allow from all
   AllowOverride all
   Order allow,deny
   Options ExecCGI
   <Files gitweb.cgi>
   SetHandler cgi-script
   </Files>
   SetEnv  GITWEB_CONFIG  /etc/conf.d/gitweb.conf
</Directory>

To finish the configuration, we're going to add an actual virtual host to the config, which also serves the gitweb. So we're going to edit the vhosts config again:

<VirtualHost *:80>
    ServerName ehv.blaatschaap.be
    Alias /gitweb "/srv/http/gitweb" 
    DocumentRoot /srv/http/blaatschaap.be/ehv
    ErrorLog "/var/log/httpd/blaatschaap.be-ehv-error_log"
    CustomLog "/var/log/httpd/blaatschaap.be-ehv-access_log" combined
    <Directory /var/www/gitweb>
       Options ExecCGI +FollowSymLinks +SymLinksIfOwnerMatch
       AllowOverride All
       order allow,deny
       Allow from all
       AddHandler cgi-script cgi
       DirectoryIndex gitweb.cgi
   </Directory>
</VirtualHost>

Now, this part of the server is configured. What still has to be done is putting the backup repository so far on the Pi server, and adjusting the script on the ovh server to make backups to this server.

Also, pretty soon I will be getting a new OVH server, as they're offering much better specs for the same price, and I am going to convert to Debian for a server. ArchLinux is great for desktops, but the changed in a rolling distribution such as ArchLinux are not convinient for a machine that's supposed to be always up. Especially the transition from sysvinit to systemd is giving me a headache, as sysvinitscripts are no longer supported... and I am a bit uncomfortable about chaging stuff in the boot loader as I don't have any serial console or anything. If it reboots, I just have to wait till it comes up, if it doesn't.... bad luck.

Besides, I am hosting a few sites for third parties. In order to keep overview, and offer my users a convenient interface I am considering usingISPconfig on my new server. As I have paid for the current server till 15 April, I should have finished the transition by then. I have paid till April since I have renewed my contract just one day before the VAT was increased from 19% to 21%. Anyhow. I plan to order the new server in February, so I have plenty of time for testing.

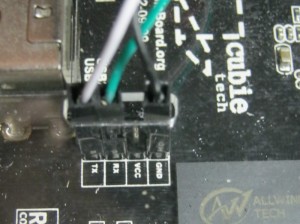
Just a few words about the serial connection on the CubieBoard. I have bought my CubieBoard during the indiegogo campaign, and I have bought the Rich Package. This Rich Package also includes a serial cable. This serial cable is an USB to 3.3 Volt UART, which is based upon the pl2303 chip. It has four connectors, Rx, Tx, Ground and 5 Volt.

pl2303 from cubieboard rich package

The red cable is a 5 Volt power supply. Since the I/O lines on the CubieBoard are 3.3 Volt, this should not be connected. Besides, the Vcc pin on the serial connected is a power source, not a power input. So, when using a pl2303, the Vcc should not be connected.

CubieBoard Serial TTL

If you’ve read my previous post, you see the problem I’ve encountered: when there was already a USB serial device inserted, the device got a different device name. /dev/ttyUSB0 /dev/ttyUSB1 etc, depending on the sequence they were plugged in, or, at boot time, the port in which they are plugged. So, for this reason, I would like to use real RS-232 ports in stead of those USB UART devices.

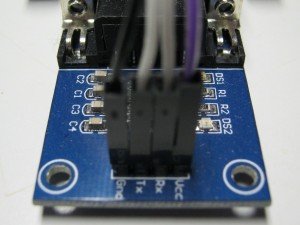
My BeagleBoard got an R-S232 port, so I just plug in a nullmodem cable and that’s it. On the CubieBoard, as mentioned before, the signal levels are 3.3 Volt. A MAX3232 based board can be used to convert the signal levels. I’ve bought such a board at dealextreme. When we use this, we will need to connect the Vcc line.

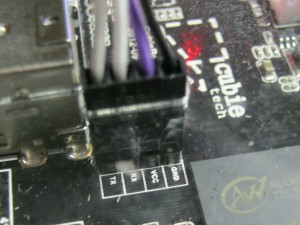
We connect the Vcc on the CubieBoard to the Vcc on the MAX3232 board, the Ground to the Ground, but the Tx and Rx we have to swap. Tx is transmit and Rx is receive. But what the Cubieboard sends is what the RS232 port on my computer will receive, vice versa.

MAX3232 Board

CubieBoard to MAX3232

The colours you see in these pictures are no standard colours whatsoever. I just have these wires for general purpose. From what I have read on various places on the internet, the connectors are called dupont connectors. I never knew they were called like that. (Actually, I have no clue how an native English speaking person would pronounce that… it *looks* French to me)

Rainbow dupont flatcable

Anyhow, mentioning I/O Voltages, I would like to add, the CubieBoard and Raspberry Pi use 3,3 Volt I/O, but the BeagleBoard uses 1.8 Volt I/O. Keep this in mind when interfacing hardware. Different voltage on the BeagleBoard!

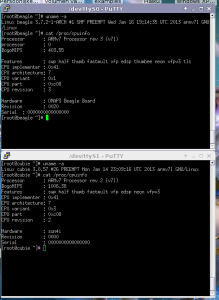
serial-consoles-putty

Yesterday, my new Fritz!BOX 7360 arrived. This afternoon I hooked it up. All Fritz!BOXes use the same power adaptor, so just swapping the cables is enough. At first, it didn’t synchronise, but when I tried to configure it again, it worked fine. However, it didn’t obtain an IPv6 address.


26.01.13 12:42:10 Could not obtain IPv6 prefix. Reason for error: 0 ()
26.01.13 12:38:48 Internet connection established successfully. IP address: 83.160.145.152, DNS server: 194.109.6.66 and 194.109.9.99, Gateway: 194.109.5.203
26.01.13 12:38:45 DSL is available (DSL synchronization exists with 16392/924 kbit/s).
26.01.13 12:38:30 DSL synchronization starting (training).

Actually, this is expected behaviour. I have learned this from the discussions on the IPv6 Pilot mailing list, of which I was part. When one connects a different device to the IPv6 line, it can take over an hour to obtain an IPv6 address. The ISP has still cached the old modem, and will only give out an IPv6 address when the cache expires. I am aware of this behaviour, however, it was nowhere mentioned in any documentation provided with the new modem.


26.01.13 13:45:51 IPv6 prefix obtained successfully. New prefix: 2001:980:55e0::/48
26.01.13 13:45:51 IPv6 Internet connection established successfully. IP address: 2001:980:55e0::1

In the end, everything works as expected. Even though it only has one analogue phone port. But that phone port works perfectly fine with pulse dialing, so there ain’t any problem there. I am supposed to have a double plug somewhere to connect both phones. However, as these are phones with physical bells, I wonder if the Fritz!BOX provides enough power to ring them both. (In the old configuration, they used to ring one at a time)

Anyhow, next Tuesday my connection is supposed to be converted to VDSL.

Let’s go straight on to installing ArchLinuxARM on the CubieBoard. Currently I am using my phone’s 8 GB µSD card. I have bought a new 16 GB µSD card for use with the CubieBoard, so I can put the 8GB one back into my phone, and be able to listen some music while being away from home.

Creating a bootable media is straight forwards. There is a script that does all the work. The boot process is similar as I have described for the BeagleBoard, there is a pre-boot loader (sunxi-spl.bin) which loads the boot loader (u-boot.bin).

Let’s begin, shall we?
Download https://raw.github.com/linux-sunxi/sunxi-bsp/master/scripts/sunxi-media-create.sh
Download http://dl.linux-sunxi.org/amery/sunxi-3.0/latest/cubieboard_hwpack.tar.xz
Download http://archlinuxarm.org/os/ArchLinuxARM-sun4i-latest.tar.gz

As with the BeagleBoard guide, I am linking to the latest versions above. Things might change. This guide is based on the versions stated below:
http://os.archlinuxarm.org/os/sun4i/ArchLinuxARM-2012.08-sun4i-roofs.tar.gz
http://dl.linux-sunxi.org/amery/sunxi-3.0/20130114-2310/cubieboard_hwpack.tar.xz

Please note: the script required sudo to be installed. I am not fond of sudo, and usually don’t have it installed. I don’t like the idea my user password grating root rights. I prefer that root rights require a different password, therefore I use su to gain root rights on my systems. So, don’t forget to install sudo if you don’t have it, or modify the script.

Update: On a CubieForums thread, someone had a problem with the script and suggests a patch. For me the script worked fine, but if you’re having problems with the script, take a look at this post

[andre@hplaptop cubieboard]$ ./sunxi-media-create.sh /dev/mmcblk0 cubieboard_hwpack.tar.xz ArchLinuxARM-sun4i-latest.tar.gz 

===
=== Partitioning /dev/mmcblk0 ===
===
[sudo] password for andre: 
1+0 records gelezen
1+0 records geschreven
1048576 bytes (1,0 MB) gekopieerd, 0,206529 s, 5,1 MB/s
Even controleren of iemand deze schijf nu gebruikt...
OK

Schijf /dev/mmcblk0: 476416 cilinders, 4 koppen, 16 sectoren/spoor
sfdisk: /dev/mmcblk0: onbekend partitietabeltype

Oude situatie:
sfdisk: Geen partities gevonden.

Nieuwe situatie:
Eenheden: sectoren van 512 bytes, tellend vanaf 0

 Apparaat Opst    Begin     Einde  #sectoren  ID  Systeem
/dev/mmcblk0p1          2048    133119     131072   c  W95 FAT32 (LBA)
/dev/mmcblk0p2        133120  30490623   30357504  83  Linux
/dev/mmcblk0p3             0         -          0   0  leeg
/dev/mmcblk0p4             0         -          0   0  leeg
Waarschuwing: er is geen primaire partitie gemarkeerd als opstartbaar.
Voor LILO maakt dit niets uit, maar DOS MBR zal niet van deze schijf opstarten.
De nieuwe partitietabel is met succes weggeschreven.

Herinlezen van partitietabel...

Als u een DOS-partitie gemaakt of gewijzigd hebt, bijvoorbeeld /dev/foo7,
gebruik dan dd(1) om de eerste 512 bytes nul te maken:
  dd if=/dev/zero of=/dev/foo7 bs=512 count=1  (zie man fdisk(8))

===
=== Format Partition 1 to VFAT ===
===
mkfs.vfat 3.0.13 (30 Jun 2012)

===
=== Format Partition 2 to EXT4 ===
===
mke2fs 1.42.6 (21-Sep-2012)
Verwerpen van blokken: voltooid                        
Bestandssysteemlabel=
Soort besturingssysteem: Linux
Blokgrootte=4096 (log=2)
Fragmentgrootte=4096 (log=2)
'stride'=0 blokken, 'stripe'-breedte=0 blokken
950272 inodes, 3794688 blokken
189734 blokken (5.00%) gereserveerd voor systeembeheer
Eerste gegevensblok=0
Maximum aantal bestandssysteemblokken=3888119808
116 blokgroepen
32768 blokken per groep, 32768 fragmenten per groep
8192 inodes per groep
Superblokreservekopieën opgeslagen in blokken: 
	32768, 98304, 163840, 229376, 294912, 819200, 884736, 1605632, 2654208

Reserveren van groepstabellen: voltooid                        
Schrijven van inodetabellen: voltooid                        
Aanmaken van journal (32768 blokken): voltooid
Schrijven van superblokken en bestandssysteem-metagegevens: voltooid


===
=== Extracting HW Pack ===
===

===
=== Extracting RootFS ===
===

===
=== Copy U-Boot/SPL to SD Card ===
===
20+0 records gelezen
20+0 records geschreven
20480 bytes (20 kB) gekopieerd, 0,0171501 s, 1,2 MB/s
169+1 records gelezen
169+1 records geschreven
173412 bytes (173 kB) gekopieerd, 0,0428142 s, 4,1 MB/s
Copy VFAT partition files to SD Card

===
=== Copy rootfs partition files to SD Card ===
===
Standard rootfs

===
=== Copy hwpack rootfs files ===
===
Done.

We are using a hwpack from linux-sunxi.org. Linux-sunxi.org works on Linux support for Allwinner SoCs. This is still under active development. Therefore we aren’t using an Arch kernel. The Arch kernel fon sunxi just panics when trying to boot it on the CubieBoard. The script installs the kernel and kernel modules on the µSD card. I don’t really like the idea of having files in my file system the package manager isn’t aware of. I might have a look at creating a package for those files.

Anyhow, there are differences between various Linux distros. The µSD card as produced by the script won’t work completely for ArchLinux. Now, the sudo-using script is done, give me real root, and let’s rock on! In the hwpack, there is a file /etc/modules, in which modules to be loaded at boot time are listed. However, on ArchLinux, modules to be loaded during boot are stored at /etc/modules-load.d/*.conf. Therefore we execure the following commands:

[root@hplaptop cubieboard]# mount /dev/mmcblk0p2 /mnt/b
[root@hplaptop cubieboard]# cd /mnt/b/etc
[root@hplaptop etc]# mv modules modules-load.d/cubieboard.conf

Apart from the way to specify the modules to be loaded during boot, another difference is the location of modules. The hwpack still uses, what ArchLinux used to do, /lib/modules, however, nowadays the location should be /usr/lib/modules

[root@hplaptop etc]# cd /mnt/b/lib/modules/
[root@hplaptop modules]# mv * /mnt/b/usr/lib/modules
[root@hplaptop modules]# cd ..
[root@hplaptop lib]# rmdir modules

Update: Also, the other libraries will have to be moved to /usr/lib, otherwise the system will not be able to upgrade afterwards. This is what happens when you put files in your file system the package manager is not aware of. I need to package those files!

Update: The libraries seem to be available in an AUR package mali400, therefore they may be removed at this stage and installed later. Just to be safe, keep a copy of them. Also note, to compile xf86-video-mali you need the headers for libump, which is not in the mentioned mali400 package. I am still investigating this, but I should write about X configuration soon. However, I got a lot of things I am working on. As always, no promises.

[root@hplaptop b]# mv lib/framebuffer/ usr/lib/
[root@hplaptop b]# mv lib/x11 usr/lib/
[root@hplaptop b]# mv lib/libvecore.so usr/lib/
[root@hplaptop b]# mv lib/libMali.so usr/lib
[root@hplaptop b]# mv lib/libUMP.so usr/lib

In theory, we’re ready to boot now. However, there are a few more adjustment I would like to make before actually booting. One of the things about the CubieBoard is, it doesn’t have a MAC address burned in its EEPROM. Therefore it will have a random MAC address every time it boots. This is undesirable, therefore I will have to fix a MAC address. As explained on http://linux-sunxi.org/EMAC, we can configure the MAC address in the the script.bin file, a configuration file that holds information about the board. In order to manipulate the files, we need the tools bin2fex and fex2bin. We can find those tools in the AUR repository, package sunxi-tools-git.

The fex file is a human-readable version of the configuration file. First we decode the binary configuration file to a fex file, and we create backups of both the binary and text versions.


[root@hplaptop ~]# mount /dev/mmcblk0p1 /mnt/a
[root@hplaptop ~]# cd /mnt/a
[root@hplaptop a]# cp script.bin script.bin.bak
[root@hplaptop a]# bin2fex script.bin script.fex
fexc-bin: script.bin: version: 0.1.2
fexc-bin: script.bin: size: 43216 (76 sections)
[root@hplaptop a]# cp script.fex script.fex.bak

Now, I will edit the script.fex file and add a MAC address. I am using one of the MAC addresses it dynamically configured before I was using my own script.bin file. PLEASE NOTE: DO NOT USE MAC ADDRESS BELOW! MAC ADDRESSES ARE SUPPOSED TO BE UNIQUE


[dynamic]
MAC = "8a413f5bf892"

Convert the fex file back to its binary equivalent:


[root@hplaptop a]# vim script.fex
[root@hplaptop a]# fex2bin script.fex script.bin

So far so good, now we’ve fixed the MAC address, I can configure my “DHCP server” (inside the Fritz!BOX) to give it a static IP address, so I can always SSH into the box from my LAN. It’s really annoying when you never know what IP address the box will have.

But, I would also like to connect a monitor to my CubieBoard. What I wrote about this last December is already outdated. Like I said, the Linux kernel for this board is under active development, and stuff that didn’t work yet in December, may work in January. Back in December I wrote, configuration of the resolution goes through the script.bin file, which I’ve just mentioned. However, according to the fex guide, in hdmi mode, I can only specify “tv” resolutions, but my monitor got 1280×1024. The current kernel however, is able to parse the EDID and select the correct resolution, just like the Raspberry Pi does. However, on the CubieBoard it didn’t work quite well. I will investigate this later, but for now, another new feature is the possibility to specify a resolution as a kernel parameter. This is what I am using now to boot up my CubieBoard. The parameters are explained on a Google Groups post about a Fedora release for Allwinner based devices.

According to the parameters explained in that post, I would need to use disp.screen0_output_type=3 disp.screen0_output_mode=1280x1024p60
Put the following in uEnv.txt on the FAT partition


boot_mmc=fatload mmc 0 0x43000000 ${fexfile}; fatload mmc 0 0x48000000 ${kernel}; bootm 0x48000000
extraargs=rootwait disp.screen0_output_type=3 disp.screen0_output_mode=1280x1024p60
fexfile=script.bin

Well… I suppose this is it for now. I am not discussing configuration of the system for the BeagleBoard and CubieBoard now. That’s not board specific, and I have thoroughly discussed this for my Raspberry Pi. A thing I might be discussing in the future is how to configure hardware video acceleration for both BeagleBoard and CubieBoard. However, I will have to investigate this first, so no promises.

Regarding the hdmi/dvi output: It is not working perfectly, as I have to specify the resolution as a kernel parameter. Moreover, when my monitor is directly connected over a hdmi->dvi cable, the monitor complains I should configure a resolution of 1280×1024@60Hz. It thinks I am giving it 1282×1026@60Hz. So, in both directions two pixels too much, and it displays those as a row/column of purple pixels at the left and bottom of the screen. However, when I use my HDMI->VGA adaptor, the screen happily accept the signal as 1280×1024@60Hz.

I will investigate the display issues later, including what the kernel thinks about my EDID. I will also look at how it behaves with the HDMI->VGA adaptor without extra resolution hints in the uEnv.txt, and also connect a CRT monitor, as those are usually a little more flexible in supported frequencies.

The fact I have a working output at the desired resolution now makes my project to hook up a VGA connector to the CubieBoard get a lower priority. However, I intend to still investigate this, as this information is of interest to the CubieBoard community. Besides, yesterday I found the 2mm dupoint cables in my mailbox, so I am finally able to connect something to the CubieBoard I/O pins. Well… that’s a disadvantage of the CubieBoard. All I/O pins are 2mm, for which the cables are not so common.

Edit: One more after-boot comment
After upgrading packages ( # pacman -Syu ) open the uEnv.txt file on the FAT partition and add init=/usr/lib/systemd/systemd to enable systemd, otherwise you will still be using the old rc.conf initscripts.