Archive for July, 2016


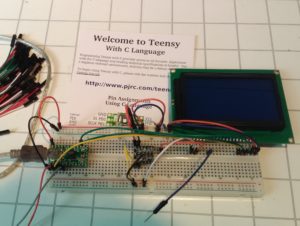
So the adventures with my Teensy 2.0 continue. I wasn’t really pleased with the DS18B20 library I found. Too simple, no support for multiple sensors, and it just didn’t work when the CPU was clocked at 16 MHz. Therefore I went to look for other libraries. I’ve found a library that seems more complete. Support for multiple sensors, reading their serial numbers, determining how they are powered, etc. The complete list. It can be found here.

As expected, the specific ATMEGA32U4 I have, was not supported out of the box. This Teensy 2.0, is it using such a rare chip no projects I encounter have support for it. So, again, the issue was the UART. I tried modding the defines in the UART library in their example project, but I gave up on that route, and decide to add the UART library I already got working to the project, and compensate for the API differences. Which resulted in a project running, capable of reading out multiple sensors connected. Tres bien. If I only knew where I put the waterproof sensor after moving… but for now, I can do experiments with the TO-92 versions.

Next thing to look at is some Real Time Clock. I’ve got two of those laying around, a PCF8563 and a DS1307. Looking at the capabilities, the PCF8563 also has timers and alarms, which could be rather useful in this setting: making measurements at regular intervals, preferably aligned with the clock time. The DS1307, it’s good if you just need to know the time. Back when I ordered them, that was the idea, to add an RTC to a Raspberry Pi. I bought two different models to evaluate them and see the differences. These RTCs have been laying around for years, and the batteries are completely depleted (0,4 Volt remaining in a 3,0 Volt battery) . Perhaps I should replace them. But for now, let’s see if we can communicate with the PCF8563.

I’ve found a library here and it seems to work as-is. No changed needed, it just works. At least, as far as reading the current time, which, the RTC thinks is 1900, due the empty battery.

Okay, so, we can have the PCF8563 generate a signal on the interrupt pin. How to handle that on the ATMEGA32U4. It seems, it has four interrupt pins, but those are in use by the UART and I²C bus. The ATMEGA32U4 also has “pin change interrupts”, which are all mapped to pins on Port B. The interrupt pin from the PCF8563 required a pull up resistor. I am using the internal pull up resistor in the ATMEGA32U4.

ISR (PCINT0_vect){
   // When PIN 7 on Port B is low
   if (!(PINB & 1<<7)) {
        uint8_t flags = PCF_GetAndClearFlags();
        printf("Interrupt!!!!!");
    }
}

void setup_pb7_int(){
        DDRB &= ~(1  << PB7); /* Set PB7 as input */
        PORTB |= (1 << PB7); /* Activate PULL UP resistor */
        PCMSK0 |= (1 << PCINT7); /* Enable PCINT0 */
        PCICR |= (1 << PCIE0); /* Activate interrupt on enabled PCINT7-0 */
        sei (); /* Enables interrupt */
}

Quite a while ago, I believe it was back in January 2013, I ordered some Teensy microcontrollers. I ordered a Teensy 2.0, a Teensy++ 2.0 and a Teensy 3.0. Now, three and a half year, I finally started to play around with them. Yesterday I started with the Teensy 2.0. This is an Atmel ATMEGA32U4 micro controller.

The project, an idea that is almost as old as my microcontrollers, is basically a temperature logger. Log the temperature measured using a DS18B20 to an SD card. However, that’s the final goal. My first idea was to interface with an LCD screen. I’ve got a model 128×64 pixels, which appears to be ST7920 based. These can be addressed in parallel or serial mode.

IMG_20160716_171341I’ve found a library to control LCD displays on microcontrollers: u8glib. This library has support for many LCD displays. So it would make switching to a different type of display as simple as changing one line of code, and everything works again.

However…. I didn’t get this thing to work. Basically, what I am trying to do is to compile the ATMEGA “Hello World” example. I have changed the Makefile to reflect that I am using an ATMEGA32U4, and added the initialisation code for a 128×64 pixel ST7920. However, nothing appeared on my screen.

I have tried to address both parallel and serial mode. Note that my display was hard wired to parallel mode using a solder bridge. Well, that’s easily fixed, but still nothing appears on the screen. There is a pot meter on the back to set the contrast, but spinning that thing around doesn’t help either.

Well… the purpose was getting some output. Next thing, the UART. I googled around and found a simple uart with avr libc. However, after adjusting the Makefile to reflect I am using an ATMEGA32U4, the thing doesn’t compile. It seems, the ATMEGA32U4 only has an UART1 and no UART0. After changing the numbers, the code compiles just fine.

Now, trying the make upload fails. It turns out, the Teensy uses a bootloader not supported by avrdude. The Teensy comes preprogrammed with the HalfKay bootloader. The code is closed and proprietary. (Some info about bootloaders) For now, I use the flashing tool supplied by PJRC. A precompiled binary, which required me to install an old version of libpng.

Nevertheless, I can upload the compiled hex file to the microcontroller, and attach an USB TTL serial device. But at his point, all I got was mojibake. At least something shows up. IMG_20160717_005547Well…. mojibake on a serial connection usually means the incorrect bitrate has been used. After tweaking around in the code, I got readable output when loading the program from the bootloader, but when I powercycled, the output was mojibake again.

What’s going on? I made incorrect assumptions on the CPU speed of this device. As the device specs say 16 MHz, I assumed it was running at 16 MHz. However, it turns out, the device is configured to boot at 2 MHz. This solved a lot of mysteries. This also made me check the LCD code, but the hello world example did configure the clock speed so it wouldn’t have suffered from incorrect timing due this fact.

So, after having established serial communication, the DS18B20 sensor is to be added. Please be carefull when wiring it up. The middle pin is the data pin, for sure, but the outer pins, when looking at the datasheet, it has bottom view, so it’s quite easy to make the mistake to swap them around. The thing gets HOT when you swap them, but it seems, the part survived it. A library to communicate with this sensor can be found here. I changed the connection setup in the header file and compiled the code. At first, I could only get a readout of a constant -0.063. In one of the comments someone mentioned clocking down to 1 MHz solves the problem, and indeed it does. So, this looks like some sort of timing bug. I suppose I don’t need 16 MHz for this project anyways, so, for the time being, let it run at 1 MHz. There are other modifications I would like to make to this library as well, such as support for multiple sensors on the bus.

IMG_20160717_005552Next thing, adding an SD card. Now, one thing to keep in mind. SD cards require 3.3 Volt I/O. The Teensy 2.0 comes with a default configuration of 5 Volt. (The microcontroller can run at 3.3 Volt, but is speed limited to 8 MHz in that case). So, for the purpose of interfacing with an SD card, I use a level shifter. At this moment I don’t have a 3.3 Volt regulator I can solder to my board. Furthermore, I intend to interface with that LCD display I mentioned before, which requires 5 Volt I/O. Either way I would require such a level shifter.

So, looking around for SD support on ATMEL microcontrollers, by first hit was SdFat. However, this required the Arduino libraries and is written in C++. I don’t intent to use C++ on a microcontroller. On a microcontroller I want plain flat C. On a microcontroller speed and size are limited, so I wouldn’t want to write C++ code for a microcontroller. So, the search continues, and gives me sd-reader. This implementation looks better suited for my purposes. However, it has no support for the specific microcontroller I have. First of all, the mentioned UART1 in stead of UART0, and probably some other register changes. There is a patch available against an old version of this code. I suppose I should analyse the changes and apply them to the latest code. However, with the patch, the example code runs and is able to read and write to my SD card.

After getting Kodi running on my BananaPi, some issues remained, For example, there was no visualisation while playing music. It turned out that visualisations are split of from the main kodi package. While in the upstream Arch Linux, the visualisation packages are in the repository, they’re not in the repository for ArchLinuxARM. Compiling the modules myself gave a plugin but no visual effects. The cause turned out to be the visualisations linked against the MESA implementation of OpenGLES, rather then the sunxi implementation.

To make it work with the sunxi header files, edit the /usr/lib/pkgconfig/glesv2.pc file, and make the includedir point to
includedir=${prefix}/include/GLES2
. When compiling visualisations now, they work perfectly.

Another problem, mentioned in previous post, was the crash on using the Media Library. The crash on the Media Library seems like an issue not related to the Mali/Allwinner specific. Attaching a debugger revealed the following:

#0  0xb5b05c2c in std::local_Rb_tree_decrement (__x=0x17584e4) at /build/gcc/src/gcc/libstdc++-v3/src/c++98/tree.cc:98
#1  0x0044d184 in std::_Rb_tree_iterator > std::_Rb_tree, std::_Select1st >, std::less, std::allocator > >::_M_emplace_hint_unique, std::tuple<> >(std::_Rb_tree_const_iterator >, std::piecewise_construct_t const&, std::tuple&&, std::tuple<>&&) ()
#2  0x00b72018 in DatabaseUtils::GetDatabaseResults(std::__cxx11::basic_string, std::allocator > const&, std::vector > const&, std::unique_ptr > const&, std::vector, std::allocator > >, std::allocator, std::allocator > > > >&) ()

At #2, we see a std::__cxx11::basic_string, while in #0, we see some c++98 references. It seems like a C++ 11 String is getting into some C++ 98 code. The gcc documentation states

Not all uses of the new ABI will cause changes in symbol names, for example a class with a std::string member variable will have the same mangled name whether compiled with the old or new ABI. 

A quick google reveals users of other ARM boards are suffering from the same issue, and, as my analysis of mixing up C++ 11 and C++ 98 code, seems confirmed by this forum thread.. So I tried a build from AUR with the suggested CXXFLAGS=--disable-libstdcxx-dual-abi added to the PKGBUILD. This can by done by adding export CXXFLAGS=--disable-libstdcxx-dual-abi just below export PYTHON_VERSION=2 (line 81).

For each package built from AUR, we need to add armv7h to the arch section. The AUR is targetting upstream ArchLinux, and thus only adding i686 and x86-64 to the supported architectures.

Also note: select jre7 when asked what jre version is to be instaled. jre8 will crash during compilation.

However this doesn’t work. It complains about missing libcrossguid, even though it is installed. The real issue here is that the compiler (gcc 6.1.1) doesn’t recognise the flags I gave it.

cc1plus: error: unknown pass libstdcxx-dual-abi specified in -fdisable

Another compiler flag that should disable the new ABI is-D_GLIBCXX_USE_CXX11_ABI=0. This appears to be accepted by the gcc 6.1 compiler. I was unable to finish the build due running out of space on the /tmp file system. As this process has taken up enough time today already, I’ll finish it another time

As discussed in previous articles, I’ve been working on getting Kodi running on a BananaPi using the 3.4 kernel from the AllWinner BSP. An old hacked kernel, to quote the sunxi website

It is only useful when accelerated 3D graphics and multimedia support is strictly necessary.

Nevertheless, let’s see how to get Kodi (somewhat) running on this thing. Basically, download and compile all the things mentioned on the sunxi binary mali driver wiki page. When you use the udev rule to set the rights for the /dev/mali and /dev/ump devices, keep in mind you need to add yourself to the video group as well.

To run the standard kodi build from the repository, we need to run an X server, thus we need to have X installed. To have video acceleration (OpenGL ES) we need the fbturbo driver. Even though there is a version of this driver in the repository, this version is compiled without libump support, something required for acceleration. But when compiling and installing everything from the wiki, that should not pose a problem.

Furthermore, download and compile the experimental vdpau driver for sunxi. As mentioned on the sunxi wiki, this is rather insecure. If you’re don’t need hardware video decoding or video acceleration (OpenGLES), please use the mainline kernel.

When all is well, we can start kodi from X

$ xinit
..........wait for X to start and then in the xterm 
$ VDPAU_DRIVER=sunxi kodi

Now this should start kodi. If the screen remains black, please check the permissions for /dev/mali and /dev/ump, and verify the sunxi-mali libraries have been installed correctly. This might need repetition (run make install again). We’re not packaging things up, and adding files to the file system without the package manager to know. This could cause conflicts with the mesa package, also providing OpenGL stuff, causing kodi to load mesa in stead of mali.

Now, Kodi runs, but might crash when trying to play certain videos. I’m not entirely sure if this is codec or container related. In the crash log appears:

 ERROR: Unable to load libnvomx.so, reason: libnvomx.so: cannot open shared object file: No such file or directory

So, I tried disabling omx support, and that solved this crash issue.
in ~/.kodi/userdata/guisettings.xml is an option “useomx”, set this to false. Note that you must remove the default attribute otherwise it will be reset.

After this modification it seems Kodi is able to play videos without crashing. Full HD 1080p content will not play smooth. I suppose this is because of the down sampling as I am using a “real” SD TV. I have to HD TV be see if it would play fine if it doesn’t have to downsample. Nevertheless, 720p and SD content seem to play smooth most of the time, even though I’ve seen some tearing.

But still… things aren’t running as perfect as they should. I haven’t been able to pinpoint this problem, but when I add a directory to the media library, and configure it as “TV Shows”, then kodi will crash as soon as I attempt to open that directory. If I configure no content type, everything runs fine. For audio applies, using the file browser works, but selecting a media-related view, such as Artists, crashes Kodi.

With all of this, kodi doesn’t run perfectly on a bananapi, however, the menu runs a lot smoother then it ran on the raspberry pi, especially when overlaying the menu when some video is still playing.

As I dicussed in previous article, I would like to run a BSP (Allwinner/sunxi) kernel to enable video acceleration on my BananaPi. Since the code from the LeMaker website is rather old and messy, it won’t compile with a recent compiler. Therefore I will get an image containing this kernel. The ArchLinuxARM image provided by lemaker is rather old (2014) and uses an ancient 3.4 kernel. I hope my system will even boot on such an artefact.

The Mainline U-boot seems to have support for BSP kernels, so just extracting the kernel and its modules should be enough. Therefore I will mount the image through kpartx. This tool allows to mount disk images with partitions. Running the tool creates partitions I can mount for the image.

[root@8570w bananapi]# kpartx ArchLinux_For_BananaPi_v1412.img 
loop0p1 : 0 102400 /dev/loop0 2048
loop0p2 : 0 7063552 /dev/loop0 104448
loop deleted : /dev/loop0
[root@8570w bananapi]# kpartx -a ArchLinux_For_BananaPi_v1412.img
[root@8570w bananapi]# mount /dev/mapper/loop0p1  mnt
[root@8570w bananapi]# ls mnt
script.bin  uEnv.txt  uImage
[root@8570w bananapi]# mkdir BSP_kernel
[root@8570w bananapi]# cp mnt/* BSP_kernel/

Here is another thing where we see the BSP kernel is rather old, as it still uses the uImage format, rather then the zImage kernels use nowadays. Furthermore, we notice a script.bin file. This is a binary created from a FEX file. It’s used to configure the SoC, things like PIN muxing and video resolution, and fixing the MAC address.

[root@8570w bananapi]# umount mnt
[root@8570w bananapi]# mount /dev/mapper/loop0p2  mnt
[root@8570w bananapi]# umount mnt
[root@8570w bananapi]# mount /dev/mapper/loop0p2  mnt
[root@8570w bananapi]# cp -r mnt/lib/modules BSP_kernel/

So, we have got the files we’re looking for, transferring them to the Banana Pi

[andre@8570w bananapi]$ scp -r BSP_kernel/ banana: 

And placing them

[root@banana BSP_kernel]# cp -r modules/* /lib/modules
[root@banana BSP_kernel]# cp * /boot     
cp: omitting directory 'modules'

The U-boot configuration by ArchLinuxARM first tries to load a mainline kernel (zImage) and if not present, it will try to load a BSP kernel (uImage), so by renaming the zImage, we should boot the old kernel.

[root@banana BSP_kernel]# mv /boot/zImage /boot/zImage_bak

However, it seems the bootloader isn;t entirely compatible with the old kernel after all:

Found U-Boot script /boot/boot.scr
833 bytes read in 101 ms (7.8 KiB/s)
## Executing script at 43100000
** File not found /boot/zImage **
4822936 bytes read in 380 ms (12.1 MiB/s)
50972 bytes read in 123 ms (404.3 KiB/s)
## Booting kernel from Legacy Image at 48000000 ...
   Image Name:   Linux-3.4.103
   Image Type:   ARM Linux Kernel Image (uncompressed)
   Data Size:    4822872 Bytes = 4.6 MiB
   Load Address: 40008000
   Entry Point:  40008000
   Verifying Checksum ... OK
   Loading Kernel Image ... OK

Starting kernel ...

<6>Booting Linux on physical CPU 0
<6>Initializing cgroup subsys cpuset
<6>Initializing cgroup subsys cpu
<5>Linux version 3.4.103 (bananapi@lemaker) (gcc version 4.6.3 (Ubuntu/Linaro 4.6.3-1ubuntu5) ) #1 SMP PREEMPT Thu Dec 18 13:07:12 CST 2014
CPU: ARMv7 Processor [410fc074] revision 4 (ARMv7), cr=10c5387d
CPU: PIPT / VIPT nonaliasing data cache, VIPT aliasing instruction cache

Error: unrecognized/unsupported machine ID (r1 = 0x100010bb).


Error: unrecognized/unsupported machine ID (r1 = 0x100010bb).

Available machine support:

ID (hex)        NAME
Available machine support:

ID (hex)        NAME
000010bb        sun7i
0000102a        sun5i
00001008        sun4i

Please check your kernel config and/or bootloader.

It seems the bootloader has set one bit the kernel doesn’t recognise. I could recompile U-boot with the option “Workaround for booting old kernels” under “ARM Architecture”. Now the kernel boots. Oh…. the BSP kernel, which by default flashes a LED when running. Rather annoying. However, the bootprocess gets stuck. I think this is because a 3.4 kernel is too old for systemd to work. Ancient kernels…. le sigh.

I’m going to burn the ancient image. I suppose it won’t be upgradable. But we’ll be sure whether it’s a kernel/systemd mismatch.

Logging in over serial fails, we can log in over ssh
it seems both
serial-getty@ttyS0.service
getty@ttyS0.service

are running, conflicting

[root@lemaker etc]# systemctl stop serial-getty@ttyS0.service 
[root@lemaker etc]# systemctl disable serial-getty@ttyS0.service 
[root@lemaker etc]# systemctl stop getty@ttyS0.service 
[root@lemaker etc]# systemctl start getty@ttyS0.service 

Since we’re running an AllWinner BSP image, we need to fix the fex file to have a static MAC.

[root@lemaker boot]# pacman -S sunxi-tools
[root@lemaker boot]# bin2fex script.bin script.fex

add

[dynamic]
MAC = "8a413f5bf892"

and run

[root@lemaker boot]# fex2bin script.fex script.bin

And while the mainline uboot enables the composite out by default, and even outputs the bootloader. From earlier experience with AllWinner/sunxi BSP kernels I know output is only enabled at some point during boot.

I have been debugging this for hours, turned out, the image from lemaker doesn’t mount the /boot partition, and in the /boot directory, the same files as I would expect on the boot partition where present. So I have been changing files that haven’t been loaded at all. To enable console, after mounting the boot parition!!!!! open uEnv.txt and make the disp. arguments look like disp.screen0_output_mode=pal disp.screen0_output_type=2

After all of this… I think I’ll finish up this article and go to the video acceleration and kodi, which was the original topic when I started writing, to another article. I will discuss one more thing and that will be systemd. The old image could be upgraded without problems

As the Banana Pi has mainline support in both U-boot and the Linux kernel, it should be fairly simple to make it run. ArchLinuxARM does not have u-boot for the Banana Pi compiled, but compiling it myself should be trivial. I am using the gcc cross compiler binaries provided by ArchLinuxARM. ( https://archlinuxarm.org/wiki/Distcc_Cross-Compiling )

The process to compile U-boot is explained at the sunxi website. When using the cross compiler from the ArchLinuxARM website, be sure to add it to the path. Furthermore, CROSS_COMPILE=arm-unknown-linux-gnueabihf- should be used. This is the thing that differs from most guides, which use a different cross compiler. After compiling, use the guide for the CubieBoard 2, and replace the u-boot-sunxi-with-spl.bin file with the file we compiled ourselves.

But it is still not working! The bootloader cannot find the kernel and is attempting netboot. When investivating I’ve found the following:

=> ext4ls mmc 0:1 /boot
<DIR>          0 .
<DIR>       4096 ..
=> ext4ls mmc 0:1 /etc
<DIR>       4096 .
<DIR>       4096 ..
            4096 zImage
<DIR>       4096 dtbs
               0 boot.scr

The bootloader has trouble reading the ext4 file system. When looking at the SD card from my laptop, everything looks fine

[root@8570w bananapi]# ls mnt/boot
boot.scr  dtbs	zImage

So… what is wrong? It seems there are file system features enabled that are not supported by U-boot, and that U-boot is not checking feature flags to detect this. When I realised this was the probable problem, I was able to verify this conclusion by a quick search. Therefore, the guide for the CubieBoard 2 should have one additional thing altered.

mkfs.ext4 -O ^metadata_csum,^64bit /dev/mmcblk0p2

With these alterations, running a mainline u-boot and kernel works fine. Nevertheless, the mainline kernel has no video acceleration support yet. As I was thinking to replace my Raspberry Pi (first generation Mobel B, the 256 MB RAM model) by the BananaPi, I might try running an AllWinner/sunxi kernel. But getting those compiled…. is yet another struggle. That’s why I prefer mainline support. If the code is in the main repository, the code is clean, and it will compile fine, but the code released by AllWinner is basically a mess. I suppose it’s easier to extract a kernel from an image then compiling it myself.

I must say, the quality of the composite output on the Banana Pi looks better then the output generated by the Raspberry Pi. I’ve only been looking at the console and an X session (with only xterm running)