Let’s go straight on to installing ArchLinuxARM on the CubieBoard. Currently I am using my phone’s 8 GB µSD card. I have bought a new 16 GB µSD card for use with the CubieBoard, so I can put the 8GB one back into my phone, and be able to listen some music while being away from home.
Creating a bootable media is straight forwards. There is a script that does all the work. The boot process is similar as I have described for the BeagleBoard, there is a pre-boot loader (sunxi-spl.bin) which loads the boot loader (u-boot.bin).
Let’s begin, shall we?
Download https://raw.github.com/linux-sunxi/sunxi-bsp/master/scripts/sunxi-media-create.sh
Download http://dl.linux-sunxi.org/amery/sunxi-3.0/latest/cubieboard_hwpack.tar.xz
Download http://archlinuxarm.org/os/ArchLinuxARM-sun4i-latest.tar.gz
As with the BeagleBoard guide, I am linking to the latest versions above. Things might change. This guide is based on the versions stated below:
http://os.archlinuxarm.org/os/sun4i/ArchLinuxARM-2012.08-sun4i-roofs.tar.gz
http://dl.linux-sunxi.org/amery/sunxi-3.0/20130114-2310/cubieboard_hwpack.tar.xz
Please note: the script required sudo to be installed. I am not fond of sudo, and usually don’t have it installed. I don’t like the idea my user password grating root rights. I prefer that root rights require a different password, therefore I use su to gain root rights on my systems. So, don’t forget to install sudo if you don’t have it, or modify the script.
Update: On a CubieForums thread, someone had a problem with the script and suggests a patch. For me the script worked fine, but if you’re having problems with the script, take a look at this post
[andre@hplaptop cubieboard]$ ./sunxi-media-create.sh /dev/mmcblk0 cubieboard_hwpack.tar.xz ArchLinuxARM-sun4i-latest.tar.gz

===
=== Partitioning /dev/mmcblk0 ===
===
[sudo] password for andre:
1+0 records gelezen
1+0 records geschreven
1048576 bytes (1,0 MB) gekopieerd, 0,206529 s, 5,1 MB/s
Even controleren of iemand deze schijf nu gebruikt...
OK

Schijf /dev/mmcblk0: 476416 cilinders, 4 koppen, 16 sectoren/spoor
sfdisk: /dev/mmcblk0: onbekend partitietabeltype

Oude situatie:
sfdisk: Geen partities gevonden.

Nieuwe situatie:
Eenheden: sectoren van 512 bytes, tellend vanaf 0

 Apparaat Opst    Begin     Einde  #sectoren  ID  Systeem
/dev/mmcblk0p1          2048    133119     131072   c  W95 FAT32 (LBA)
/dev/mmcblk0p2        133120  30490623   30357504  83  Linux
/dev/mmcblk0p3             0         -          0   0  leeg
/dev/mmcblk0p4             0         -          0   0  leeg
Waarschuwing: er is geen primaire partitie gemarkeerd als opstartbaar.
Voor LILO maakt dit niets uit, maar DOS MBR zal niet van deze schijf opstarten.
De nieuwe partitietabel is met succes weggeschreven.

Herinlezen van partitietabel...

Als u een DOS-partitie gemaakt of gewijzigd hebt, bijvoorbeeld /dev/foo7,
gebruik dan dd(1) om de eerste 512 bytes nul te maken:
  dd if=/dev/zero of=/dev/foo7 bs=512 count=1  (zie man fdisk(8))

===
=== Format Partition 1 to VFAT ===
===
mkfs.vfat 3.0.13 (30 Jun 2012)

===
=== Format Partition 2 to EXT4 ===
===
mke2fs 1.42.6 (21-Sep-2012)
Verwerpen van blokken: voltooid
Bestandssysteemlabel=
Soort besturingssysteem: Linux
Blokgrootte=4096 (log=2)
Fragmentgrootte=4096 (log=2)
'stride'=0 blokken, 'stripe'-breedte=0 blokken
950272 inodes, 3794688 blokken
189734 blokken (5.00%) gereserveerd voor systeembeheer
Eerste gegevensblok=0
Maximum aantal bestandssysteemblokken=3888119808
116 blokgroepen
32768 blokken per groep, 32768 fragmenten per groep
8192 inodes per groep
Superblokreservekopieën opgeslagen in blokken:
	32768, 98304, 163840, 229376, 294912, 819200, 884736, 1605632, 2654208

Reserveren van groepstabellen: voltooid
Schrijven van inodetabellen: voltooid
Aanmaken van journal (32768 blokken): voltooid
Schrijven van superblokken en bestandssysteem-metagegevens: voltooid


===
=== Extracting HW Pack ===
===

===
=== Extracting RootFS ===
===

===
=== Copy U-Boot/SPL to SD Card ===
===
20+0 records gelezen
20+0 records geschreven
20480 bytes (20 kB) gekopieerd, 0,0171501 s, 1,2 MB/s
169+1 records gelezen
169+1 records geschreven
173412 bytes (173 kB) gekopieerd, 0,0428142 s, 4,1 MB/s
Copy VFAT partition files to SD Card

===
=== Copy rootfs partition files to SD Card ===
===
Standard rootfs

===
=== Copy hwpack rootfs files ===
===
Done.
We are using a hwpack from linux-sunxi.org. Linux-sunxi.org works on Linux support for Allwinner SoCs. This is still under active development. Therefore we aren’t using an Arch kernel. The Arch kernel fon sunxi just panics when trying to boot it on the CubieBoard. The script installs the kernel and kernel modules on the µSD card. I don’t really like the idea of having files in my file system the package manager isn’t aware of. I might have a look at creating a package for those files.
Anyhow, there are differences between various Linux distros. The µSD card as produced by the script won’t work completely for ArchLinux. Now, the sudo-using script is done, give me real root, and let’s rock on! In the hwpack, there is a file /etc/modules, in which modules to be loaded at boot time are listed. However, on ArchLinux, modules to be loaded during boot are stored at /etc/modules-load.d/*.conf. Therefore we execure the following commands:
[root@hplaptop cubieboard]# mount /dev/mmcblk0p2 /mnt/b
[root@hplaptop cubieboard]# cd /mnt/b/etc
[root@hplaptop etc]# mv modules modules-load.d/cubieboard.conf
Apart from the way to specify the modules to be loaded during boot, another difference is the location of modules. The hwpack still uses, what ArchLinux used to do, /lib/modules, however, nowadays the location should be /usr/lib/modules
[root@hplaptop etc]# cd /mnt/b/lib/modules/
[root@hplaptop modules]# mv * /mnt/b/usr/lib/modules
[root@hplaptop modules]# cd ..
[root@hplaptop lib]# rmdir modules
Update: Also, the other libraries will have to be moved to /usr/lib, otherwise the system will not be able to upgrade afterwards. This is what happens when you put files in your file system the package manager is not aware of. I need to package those files!
Update: The libraries seem to be available in an AUR package mali400, therefore they may be removed at this stage and installed later. Just to be safe, keep a copy of them. Also note, to compile xf86-video-mali you need the headers for libump, which is not in the mentioned mali400 package. I am still investigating this, but I should write about X configuration soon. However, I got a lot of things I am working on. As always, no promises.
[root@hplaptop b]# mv lib/framebuffer/ usr/lib/
[root@hplaptop b]# mv lib/x11 usr/lib/
[root@hplaptop b]# mv lib/libvecore.so usr/lib/
[root@hplaptop b]# mv lib/libMali.so usr/lib
[root@hplaptop b]# mv lib/libUMP.so usr/lib
In theory, we’re ready to boot now. However, there are a few more adjustment I would like to make before actually booting. One of the things about the CubieBoard is, it doesn’t have a MAC address burned in its EEPROM. Therefore it will have a random MAC address every time it boots. This is undesirable, therefore I will have to fix a MAC address. As explained on http://linux-sunxi.org/EMAC, we can configure the MAC address in the the script.bin file, a configuration file that holds information about the board. In order to manipulate the files, we need the tools bin2fex and fex2bin. We can find those tools in the AUR repository, package sunxi-tools-git.
The fex file is a human-readable version of the configuration file. First we decode the binary configuration file to a fex file, and we create backups of both the binary and text versions.
[root@hplaptop ~]# mount /dev/mmcblk0p1  /mnt/a

[root@hplaptop ~]# cd /mnt/a

[root@hplaptop a]# cp script.bin script.bin.bak

[root@hplaptop a]# bin2fex script.bin script.fex

fexc-bin: script.bin: version: 0.1.2

fexc-bin: script.bin: size: 43216 (76 sections)

[root@hplaptop a]# cp script.fex script.fex.bak
Now, I will edit the script.fex file and add a MAC address. I am using one of the MAC addresses it dynamically configured before I was using my own script.bin file. PLEASE NOTE: DO NOT USE MAC ADDRESS BELOW! MAC ADDRESSES ARE SUPPOSED TO BE UNIQUE
[dynamic]

MAC = "8a413f5bf892"
Convert the fex file back to its binary equivalent:
[root@hplaptop a]# vim script.fex

[root@hplaptop a]# fex2bin script.fex script.bin
So far so good, now we’ve fixed the MAC address, I can configure my “DHCP server” (inside the Fritz!BOX) to give it a static IP address, so I can always SSH into the box from my LAN. It’s really annoying when you never know what IP address the box will have.
But, I would also like to connect a monitor to my CubieBoard. What I wrote about this last December is already outdated. Like I said, the Linux kernel for this board is under active development, and stuff that didn’t work yet in December, may work in January. Back in December I wrote, configuration of the resolution goes through the script.bin file, which I’ve just mentioned. However, according to the fex guide, in hdmi mode, I can only specify “tv” resolutions, but my monitor got 1280×1024. The current kernel however, is able to parse the EDID and select the correct resolution, just like the Raspberry Pi does. However, on the CubieBoard it didn’t work quite well. I will investigate this later, but for now, another new feature is the possibility to specify a resolution as a kernel parameter. This is what I am using now to boot up my CubieBoard. The parameters are explained on a Google Groups post about a Fedora release for Allwinner based devices.
According to the parameters explained in that post, I would need to use disp.screen0_output_type=3 disp.screen0_output_mode=1280x1024p60
Put the following in uEnv.txt on the FAT partition
boot_mmc=fatload mmc 0 0x43000000 ${fexfile}; fatload mmc 0 0x48000000 ${kernel}; bootm 0x48000000

extraargs=rootwait disp.screen0_output_type=3 disp.screen0_output_mode=1280x1024p60

fexfile=script.bin
Well… I suppose this is it for now. I am not discussing configuration of the system for the BeagleBoard and CubieBoard now. That’s not board specific, and I have thoroughly discussed this for my Raspberry Pi. A thing I might be discussing in the future is how to configure hardware video acceleration for both BeagleBoard and CubieBoard. However, I will have to investigate this first, so no promises.
Regarding the hdmi/dvi output: It is not working perfectly, as I have to specify the resolution as a kernel parameter. Moreover, when my monitor is directly connected over a hdmi->dvi cable, the monitor complains I should configure a resolution of 1280×1024@60Hz. It thinks I am giving it 1282×1026@60Hz. So, in both directions two pixels too much, and it displays those as a row/column of purple pixels at the left and bottom of the screen. However, when I use my HDMI->VGA adaptor, the screen happily accept the signal as 1280×1024@60Hz.
I will investigate the display issues later, including what the kernel thinks about my EDID. I will also look at how it behaves with the HDMI->VGA adaptor without extra resolution hints in the uEnv.txt, and also connect a CRT monitor, as those are usually a little more flexible in supported frequencies.
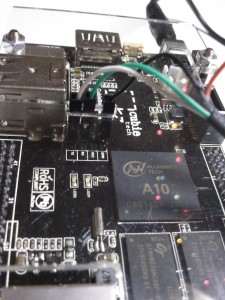
The fact I have a working output at the desired resolution now makes my project to hook up a VGA connector to the CubieBoard get a lower priority. However, I intend to still investigate this, as this information is of interest to the CubieBoard community. Besides, yesterday I found the 2mm dupoint cables in my mailbox, so I am finally able to connect something to the CubieBoard I/O pins. Well… that’s a disadvantage of the CubieBoard. All I/O pins are 2mm, for which the cables are not so common.
Edit: One more after-boot comment
After upgrading packages ( # pacman -Syu ) open the uEnv.txt file on the FAT partition and add init=/usr/lib/systemd/systemd to enable systemd, otherwise you will still be using the old rc.conf initscripts.