Archive for January, 2013


I remember having trouble to get this working. After installing gitosis…. how to get the damn thing working.

Edit the gitosis-admin/gitosis.conf file:

[repo example]
owner = andre@hp

[group mygroup]
members= andre@blaatkonijn andre@hp
writable = example

and commit it

[andre@hplaptop gitosis-admin]$ git commit -a -m "added example repo"
[andre@hplaptop gitosis-admin]$ git push

On the server,

[git@rpi-server repositories]$ mkdir example.git
[git@rpi-server repositories]$ cd example.git
[git@rpi-server example.git]$ git init --bare --shared

On the client:

[andre@hplaptop git-ehv.blaatschaap.be]$ git clone git@ehv.blaatschaap.be:example
Cloning into 'example'...
warning: You appear to have cloned an empty repository.
[andre@hplaptop git-ehv.blaatschaap.be]$ cd example
[andre@hplaptop example]$ cp ~/example/* .
[andre@hplaptop example]$ git commit -a -m "initial commit"
[master (root-commit) fb33879] initial commit
 4 files changed, 326 insertions(+)
 create mode 100644 test.css
 create mode 100644 test.css~
 create mode 100644 test.html
 create mode 100644 test.html~

So far so good, but there are some additional command required before it is actually usable. I have been searching this for hours when I first set up my gitosis. Last may I wrote I still had to blog about setting up gitosis, but it seems, I haven’t done so, until now, now I’ve set up another gitosis installation. I said back then, I am behind with stuff I am supported to blog about, and it seems, that’s still the case. For example, I still haven’t written about certain USB problems I have been experiencing. Anyhow…. let’s look at git again. The missing link is:

[andre@hplaptop example]$ git branch example
[andre@hplaptop example]$ git checkout example
Switched to branch 'example'
[andre@hplaptop example]$ git push origin example

For quite a while, I have been using hexchat in stead of xchat on my laptop. Hexchat is a fork of xchat. Basically, there is nothing wrong with xchat, but its latest release was in May 2010. Hexchat started out as XChat-WDK, which was a windows build of xchat, with some Windows-specific patches. But since the original xchat seems to be no longer under active development, they went multi-platform. Hence the need for a namechange as the W from WDK means Windows. Well…. this is not my story to tell anyway. Just providing a little background information.
Look over here for the announcement. (it’s on facebook, so don’t click when you’re paranoid)

Anyhow, it wasn’t installed yet on my desktop machine (blaatkonijn.) Migration from xchat to hexchat, here we go:

[andre@blaatkonijn ~]$ cd .config
[andre@blaatkonijn .config]$ ls -n ~/.xchat hexchat
[andre@blaatkonijn hexchat]$ ln -s xchat.conf hexchat.conf
[andre@blaatkonijn hexchat]$ ln -s xchatlogs/ logs

In earlier builds, the config file was still called xchat.conf, but it got recently renamed. I was like, wtf?!? after an update as my settings were gone. Anyhow, I discovered the namechange of the config file.

Anyhow, I could just have moved and renamed all the config files, however, when creating just symlinks, I remain compatible with the original xchat, meaning I could start that as well if I wanted to.

Another note: freenode has a slow nickserv. This causes messages like

-NickServ- This nickname is registered. Please choose a different nickname, or identify via /msg NickServ identify .
* #raspberrypi :Cannot join channel (+r) - you need to be identified with services

and seeing in the one-but-last channel to join

-NickServ- You are now identified for AndrevS.

The solution for this problem, to increase the delay between connect and joining the channels

/set irc_join_delay 10
irc_join_delay set to: 10 (was: 3)

My server Pi, well… it still needs some server stuff to be installed. Installing git has been forever on my TODO list. One of the things that are supposed to be handles by this git server is nightly backups of my dedicated server, which hosts this blog among a number of other sites. Originally, my BeagleBoard was supposed to have this role, but due its instabilities, I have never set it us as a git server. At some point in time, Eileen wanted to set up a server at her place, and asked me to help her with configuring it. So I asked if I could have some space on that server for backup purposes. Unfortunately, that machine was unstable as well, so it shut down as well.

To manage git, we’re going to use gitosis. The very same way as is done on my dedicated server (at ovh). But we’re going to use a different configuration. The ovh server exports all repositories, while here we’re going to set up private repositories. But we also want to have the possibility to have public repositories. We will also configure gitweb to have a nice interface to those public repositories.

This configuration is performed on a Raspberry Pi running ArchLinuxARM. However, this guide could be applied to regular ArchLinux on i386 or x86_64 as well.

Let’s get started, shall we?

[andre@rpi-server ~]$ yaourt -S gitosis-git

We have to create set the home directory for the git user manually:

[root@rpi-server home]# mkdir /srv/gitosis
[root@rpi-server home]# usermod -d /srv/gitosis/ git

Since we’re hosting this on a raspberry pi, and don’t want to store the repository on the SD Card, we’re going to apply the same method as we’re dong during the setup of the NFS shares: We add the following line to our fstab

/home/gitosis   /srv/gitosis    none    bind    0   0

Which basically means we mount the /home/gitosis directory to /srv/gitosis. Of course we could simple have made a symlink as well. Anyhow, let’s continue.
***** TODO **** use a symlink after all???

[root@rpi-server home]# mkdir /srv/gitosis
[root@rpi-server home]# mkdir /user/gitosis
[root@rpi-server home]# mkdir /srv/gitosis
[root@rpi-server home]# chown git:git /srv/gitosis
[root@rpi-server home]# chown git:git /home/gitosis/
[root@rpi-server home]# mount /srv/gitosis

Now, I am going to initialise gitosis. I will do this as the git user. So, I su to root and then to git, like this:

[andre@hplaptop ~]$ su
Wachtwoord: 
[root@hplaptop andre]# su git
[git@hplaptop andre]$ cd
[git@hplaptop /]$ 

I have placed a file in the home folder containing my public key. I will try to initialise gitosis using this key:

[git@rpi-server gitosis]$ gitosis-init < andre\@hp.pub 
fatal: unable to access '/home/andre/.config/git/config': Permission denied
Traceback (most recent call last):
  File "/usr/bin/gitosis-init", line 9, in 
    load_entry_point('gitosis==0.2', 'console_scripts', 'gitosis-init')()
  File "/usr/lib/python2.7/site-packages/gitosis/app.py", line 24, in run
    return app.main()
  File "/usr/lib/python2.7/site-packages/gitosis/app.py", line 38, in main
    self.handle_args(parser, cfg, options, args)
  File "/usr/lib/python2.7/site-packages/gitosis/init.py", line 136, in handle_args
    user=user,
  File "/usr/lib/python2.7/site-packages/gitosis/init.py", line 75, in init_admin_repository
    template=resource_filename('gitosis.templates', 'admin')
  File "/usr/lib/python2.7/site-packages/gitosis/repository.py", line 54, in init
    raise GitInitError('exit status %d' % returncode)
gitosis.repository.GitInitError: exit status 128

Apparently, it tries to access file in my (andre) home directory, while its running as git. It shouldn’t know about me, right? Well….

[git@rpi-server gitosis]$ set | grep andre
MAIL=/var/mail/andre
XDG_CACHE_HOME=/home/andre/.cache
XDG_CONFIG_HOME=/home/andre/.config
XDG_DATA_HOME=/home/andre/.local/share

So, there is still a reference to my config directory in the enviorement, lets unset this shit and continue:

[git@rpi-server gitosis]$ unset XDG_CACHE_HOME
[git@rpi-server gitosis]$ unset XDG_CONFIG_HOME
[git@rpi-server gitosis]$ unset XDG_DATA_HOME

Now, we can initialise gitosis:

[git@rpi-server gitosis]$ gitosis-init < andre\@hp.pub 
Initialized empty Git repository in /srv/gitosis/repositories/gitosis-admin.git/
Reinitialized existing Git repository in /srv/gitosis/repositories/gitosis-admin.git/

Now, we're going to install and configure the web server:

[andre@rpi-server ~]$ yaourt -S apache

We're going to do the mount bind again

/home/http   /srv/http    none    bind    0   0
[root@rpi-server ~]# mkdir /home/http
[root@rpi-server ~]# mount /srv/http/
[root@rpi-server ~]# chown http:http /srv/http/
[root@rpi-server ~]# chmod g+w /srv/http/

I'm going to add myself to the http group.

[root@rpi-server http]# groupmems -a andre -g http

As I've mentioned before, I wish to host gitweb as well. Gitweb is in the git package, so it's already installed, just making a symlink is enough, which I can do as myself, as I am in the group http. I've also downloaded the "unknown" folder from my ovh server, which is the page that displays the "domain not served as this server" page in case an unknown vhost is requested. I will move this as well:

[andre@rpi-server ~]$ ln -s /usr/share/gitweb /srv/http/gitweb
[andre@rpi-server ~]$ mv unknown /srv/http

As the fact I am putting my "unknown vhost" page on this server, it will be supporting vhosts. If a requested domain doesn't match any VirtualHost in the apache config file, it will serve the first entry in the config file, therefore we will edit the config file /etc/httpd/conf/extra/httpd-vhosts.conf and put the following in

NameVirtualHost *:80

<VirtualHost *:80>
    DocumentRoot "/srv/http/unknown"
    ErrorLog "/var/log/httpd/unknown-error_log"
    CustomLog "/var/log/httpd/unknown-access_log" combined
</VirtualHost>

However, Virtual Hosts aren't enabled yet. We need to edit the main config file in order to include the vhosts config file. We need to open /etc/httpd/conf/httpd.conf and uncomment the virtual hosts line:

# Virtual hosts
Include conf/extra/httpd-vhosts.conf

The "unkown vhost" page is written in php, so we're also going to install php:

[andre@rpi-server ~]$ yaourt -S php-apache 

And add it to the apache main configuration file again: we need to load the library, and include the configuration file:

LoadModule php5_module modules/libphp5.so
Include conf/extra/php5_module.conf

We also have to add something for the gitweb configuration to the config file

<Directory "/srv/http/gitweb">
   DirectoryIndex gitweb.cgi
   Allow from all
   AllowOverride all
   Order allow,deny
   Options ExecCGI
   <Files gitweb.cgi>
   SetHandler cgi-script
   </Files>
   SetEnv  GITWEB_CONFIG  /etc/conf.d/gitweb.conf
</Directory>

To finish the configuration, we're going to add an actual virtual host to the config, which also serves the gitweb. So we're going to edit the vhosts config again:

<VirtualHost *:80>
    ServerName ehv.blaatschaap.be
    Alias /gitweb "/srv/http/gitweb" 
    DocumentRoot /srv/http/blaatschaap.be/ehv
    ErrorLog "/var/log/httpd/blaatschaap.be-ehv-error_log"
    CustomLog "/var/log/httpd/blaatschaap.be-ehv-access_log" combined
    <Directory /var/www/gitweb>
       Options ExecCGI +FollowSymLinks +SymLinksIfOwnerMatch
       AllowOverride All
       order allow,deny
       Allow from all
       AddHandler cgi-script cgi
       DirectoryIndex gitweb.cgi
   </Directory>
</VirtualHost>

Now, this part of the server is configured. What still has to be done is putting the backup repository so far on the Pi server, and adjusting the script on the ovh server to make backups to this server.

Also, pretty soon I will be getting a new OVH server, as they're offering much better specs for the same price, and I am going to convert to Debian for a server. ArchLinux is great for desktops, but the changed in a rolling distribution such as ArchLinux are not convinient for a machine that's supposed to be always up. Especially the transition from sysvinit to systemd is giving me a headache, as sysvinitscripts are no longer supported... and I am a bit uncomfortable about chaging stuff in the boot loader as I don't have any serial console or anything. If it reboots, I just have to wait till it comes up, if it doesn't.... bad luck.

Besides, I am hosting a few sites for third parties. In order to keep overview, and offer my users a convenient interface I am considering usingISPconfig on my new server. As I have paid for the current server till 15 April, I should have finished the transition by then. I have paid till April since I have renewed my contract just one day before the VAT was increased from 19% to 21%. Anyhow. I plan to order the new server in February, so I have plenty of time for testing.

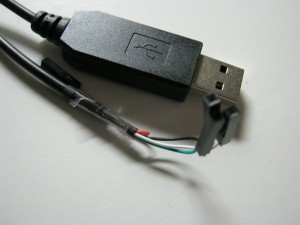
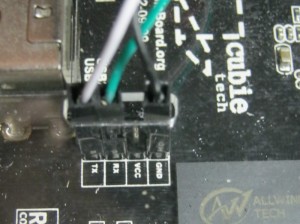
Just a few words about the serial connection on the CubieBoard. I have bought my CubieBoard during the indiegogo campaign, and I have bought the Rich Package. This Rich Package also includes a serial cable. This serial cable is an USB to 3.3 Volt UART, which is based upon the pl2303 chip. It has four connectors, Rx, Tx, Ground and 5 Volt.

pl2303 from cubieboard rich package

The red cable is a 5 Volt power supply. Since the I/O lines on the CubieBoard are 3.3 Volt, this should not be connected. Besides, the Vcc pin on the serial connected is a power source, not a power input. So, when using a pl2303, the Vcc should not be connected.

CubieBoard Serial TTL

If you’ve read my previous post, you see the problem I’ve encountered: when there was already a USB serial device inserted, the device got a different device name. /dev/ttyUSB0 /dev/ttyUSB1 etc, depending on the sequence they were plugged in, or, at boot time, the port in which they are plugged. So, for this reason, I would like to use real RS-232 ports in stead of those USB UART devices.

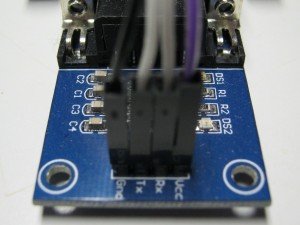
My BeagleBoard got an R-S232 port, so I just plug in a nullmodem cable and that’s it. On the CubieBoard, as mentioned before, the signal levels are 3.3 Volt. A MAX3232 based board can be used to convert the signal levels. I’ve bought such a board at dealextreme. When we use this, we will need to connect the Vcc line.

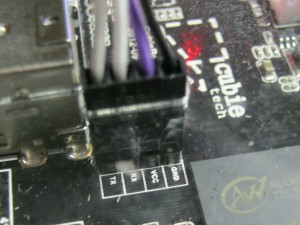
We connect the Vcc on the CubieBoard to the Vcc on the MAX3232 board, the Ground to the Ground, but the Tx and Rx we have to swap. Tx is transmit and Rx is receive. But what the Cubieboard sends is what the RS232 port on my computer will receive, vice versa.

MAX3232 Board

CubieBoard to MAX3232

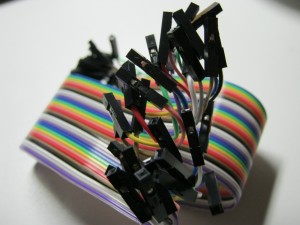
The colours you see in these pictures are no standard colours whatsoever. I just have these wires for general purpose. From what I have read on various places on the internet, the connectors are called dupont connectors. I never knew they were called like that. (Actually, I have no clue how an native English speaking person would pronounce that… it *looks* French to me)

Rainbow dupont flatcable

Anyhow, mentioning I/O Voltages, I would like to add, the CubieBoard and Raspberry Pi use 3,3 Volt I/O, but the BeagleBoard uses 1.8 Volt I/O. Keep this in mind when interfacing hardware. Different voltage on the BeagleBoard!

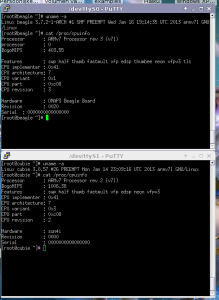
serial-consoles-putty

Yesterday, my new Fritz!BOX 7360 arrived. This afternoon I hooked it up. All Fritz!BOXes use the same power adaptor, so just swapping the cables is enough. At first, it didn’t synchronise, but when I tried to configure it again, it worked fine. However, it didn’t obtain an IPv6 address.


26.01.13 12:42:10 Could not obtain IPv6 prefix. Reason for error: 0 ()
26.01.13 12:38:48 Internet connection established successfully. IP address: 83.160.145.152, DNS server: 194.109.6.66 and 194.109.9.99, Gateway: 194.109.5.203
26.01.13 12:38:45 DSL is available (DSL synchronization exists with 16392/924 kbit/s).
26.01.13 12:38:30 DSL synchronization starting (training).

Actually, this is expected behaviour. I have learned this from the discussions on the IPv6 Pilot mailing list, of which I was part. When one connects a different device to the IPv6 line, it can take over an hour to obtain an IPv6 address. The ISP has still cached the old modem, and will only give out an IPv6 address when the cache expires. I am aware of this behaviour, however, it was nowhere mentioned in any documentation provided with the new modem.


26.01.13 13:45:51 IPv6 prefix obtained successfully. New prefix: 2001:980:55e0::/48
26.01.13 13:45:51 IPv6 Internet connection established successfully. IP address: 2001:980:55e0::1

In the end, everything works as expected. Even though it only has one analogue phone port. But that phone port works perfectly fine with pulse dialing, so there ain’t any problem there. I am supposed to have a double plug somewhere to connect both phones. However, as these are phones with physical bells, I wonder if the Fritz!BOX provides enough power to ring them both. (In the old configuration, they used to ring one at a time)

Anyhow, next Tuesday my connection is supposed to be converted to VDSL.

Let’s go straight on to installing ArchLinuxARM on the CubieBoard. Currently I am using my phone’s 8 GB µSD card. I have bought a new 16 GB µSD card for use with the CubieBoard, so I can put the 8GB one back into my phone, and be able to listen some music while being away from home.

Creating a bootable media is straight forwards. There is a script that does all the work. The boot process is similar as I have described for the BeagleBoard, there is a pre-boot loader (sunxi-spl.bin) which loads the boot loader (u-boot.bin).

Let’s begin, shall we?
Download https://raw.github.com/linux-sunxi/sunxi-bsp/master/scripts/sunxi-media-create.sh
Download http://dl.linux-sunxi.org/amery/sunxi-3.0/latest/cubieboard_hwpack.tar.xz
Download http://archlinuxarm.org/os/ArchLinuxARM-sun4i-latest.tar.gz

As with the BeagleBoard guide, I am linking to the latest versions above. Things might change. This guide is based on the versions stated below:
http://os.archlinuxarm.org/os/sun4i/ArchLinuxARM-2012.08-sun4i-roofs.tar.gz
http://dl.linux-sunxi.org/amery/sunxi-3.0/20130114-2310/cubieboard_hwpack.tar.xz

Please note: the script required sudo to be installed. I am not fond of sudo, and usually don’t have it installed. I don’t like the idea my user password grating root rights. I prefer that root rights require a different password, therefore I use su to gain root rights on my systems. So, don’t forget to install sudo if you don’t have it, or modify the script.

Update: On a CubieForums thread, someone had a problem with the script and suggests a patch. For me the script worked fine, but if you’re having problems with the script, take a look at this post

[andre@hplaptop cubieboard]$ ./sunxi-media-create.sh /dev/mmcblk0 cubieboard_hwpack.tar.xz ArchLinuxARM-sun4i-latest.tar.gz 

===
=== Partitioning /dev/mmcblk0 ===
===
[sudo] password for andre: 
1+0 records gelezen
1+0 records geschreven
1048576 bytes (1,0 MB) gekopieerd, 0,206529 s, 5,1 MB/s
Even controleren of iemand deze schijf nu gebruikt...
OK

Schijf /dev/mmcblk0: 476416 cilinders, 4 koppen, 16 sectoren/spoor
sfdisk: /dev/mmcblk0: onbekend partitietabeltype

Oude situatie:
sfdisk: Geen partities gevonden.

Nieuwe situatie:
Eenheden: sectoren van 512 bytes, tellend vanaf 0

 Apparaat Opst    Begin     Einde  #sectoren  ID  Systeem
/dev/mmcblk0p1          2048    133119     131072   c  W95 FAT32 (LBA)
/dev/mmcblk0p2        133120  30490623   30357504  83  Linux
/dev/mmcblk0p3             0         -          0   0  leeg
/dev/mmcblk0p4             0         -          0   0  leeg
Waarschuwing: er is geen primaire partitie gemarkeerd als opstartbaar.
Voor LILO maakt dit niets uit, maar DOS MBR zal niet van deze schijf opstarten.
De nieuwe partitietabel is met succes weggeschreven.

Herinlezen van partitietabel...

Als u een DOS-partitie gemaakt of gewijzigd hebt, bijvoorbeeld /dev/foo7,
gebruik dan dd(1) om de eerste 512 bytes nul te maken:
  dd if=/dev/zero of=/dev/foo7 bs=512 count=1  (zie man fdisk(8))

===
=== Format Partition 1 to VFAT ===
===
mkfs.vfat 3.0.13 (30 Jun 2012)

===
=== Format Partition 2 to EXT4 ===
===
mke2fs 1.42.6 (21-Sep-2012)
Verwerpen van blokken: voltooid                        
Bestandssysteemlabel=
Soort besturingssysteem: Linux
Blokgrootte=4096 (log=2)
Fragmentgrootte=4096 (log=2)
'stride'=0 blokken, 'stripe'-breedte=0 blokken
950272 inodes, 3794688 blokken
189734 blokken (5.00%) gereserveerd voor systeembeheer
Eerste gegevensblok=0
Maximum aantal bestandssysteemblokken=3888119808
116 blokgroepen
32768 blokken per groep, 32768 fragmenten per groep
8192 inodes per groep
Superblokreservekopieën opgeslagen in blokken: 
	32768, 98304, 163840, 229376, 294912, 819200, 884736, 1605632, 2654208

Reserveren van groepstabellen: voltooid                        
Schrijven van inodetabellen: voltooid                        
Aanmaken van journal (32768 blokken): voltooid
Schrijven van superblokken en bestandssysteem-metagegevens: voltooid


===
=== Extracting HW Pack ===
===

===
=== Extracting RootFS ===
===

===
=== Copy U-Boot/SPL to SD Card ===
===
20+0 records gelezen
20+0 records geschreven
20480 bytes (20 kB) gekopieerd, 0,0171501 s, 1,2 MB/s
169+1 records gelezen
169+1 records geschreven
173412 bytes (173 kB) gekopieerd, 0,0428142 s, 4,1 MB/s
Copy VFAT partition files to SD Card

===
=== Copy rootfs partition files to SD Card ===
===
Standard rootfs

===
=== Copy hwpack rootfs files ===
===
Done.

We are using a hwpack from linux-sunxi.org. Linux-sunxi.org works on Linux support for Allwinner SoCs. This is still under active development. Therefore we aren’t using an Arch kernel. The Arch kernel fon sunxi just panics when trying to boot it on the CubieBoard. The script installs the kernel and kernel modules on the µSD card. I don’t really like the idea of having files in my file system the package manager isn’t aware of. I might have a look at creating a package for those files.

Anyhow, there are differences between various Linux distros. The µSD card as produced by the script won’t work completely for ArchLinux. Now, the sudo-using script is done, give me real root, and let’s rock on! In the hwpack, there is a file /etc/modules, in which modules to be loaded at boot time are listed. However, on ArchLinux, modules to be loaded during boot are stored at /etc/modules-load.d/*.conf. Therefore we execure the following commands:

[root@hplaptop cubieboard]# mount /dev/mmcblk0p2 /mnt/b
[root@hplaptop cubieboard]# cd /mnt/b/etc
[root@hplaptop etc]# mv modules modules-load.d/cubieboard.conf

Apart from the way to specify the modules to be loaded during boot, another difference is the location of modules. The hwpack still uses, what ArchLinux used to do, /lib/modules, however, nowadays the location should be /usr/lib/modules

[root@hplaptop etc]# cd /mnt/b/lib/modules/
[root@hplaptop modules]# mv * /mnt/b/usr/lib/modules
[root@hplaptop modules]# cd ..
[root@hplaptop lib]# rmdir modules

Update: Also, the other libraries will have to be moved to /usr/lib, otherwise the system will not be able to upgrade afterwards. This is what happens when you put files in your file system the package manager is not aware of. I need to package those files!

Update: The libraries seem to be available in an AUR package mali400, therefore they may be removed at this stage and installed later. Just to be safe, keep a copy of them. Also note, to compile xf86-video-mali you need the headers for libump, which is not in the mentioned mali400 package. I am still investigating this, but I should write about X configuration soon. However, I got a lot of things I am working on. As always, no promises.

[root@hplaptop b]# mv lib/framebuffer/ usr/lib/
[root@hplaptop b]# mv lib/x11 usr/lib/
[root@hplaptop b]# mv lib/libvecore.so usr/lib/
[root@hplaptop b]# mv lib/libMali.so usr/lib
[root@hplaptop b]# mv lib/libUMP.so usr/lib

In theory, we’re ready to boot now. However, there are a few more adjustment I would like to make before actually booting. One of the things about the CubieBoard is, it doesn’t have a MAC address burned in its EEPROM. Therefore it will have a random MAC address every time it boots. This is undesirable, therefore I will have to fix a MAC address. As explained on http://linux-sunxi.org/EMAC, we can configure the MAC address in the the script.bin file, a configuration file that holds information about the board. In order to manipulate the files, we need the tools bin2fex and fex2bin. We can find those tools in the AUR repository, package sunxi-tools-git.

The fex file is a human-readable version of the configuration file. First we decode the binary configuration file to a fex file, and we create backups of both the binary and text versions.


[root@hplaptop ~]# mount /dev/mmcblk0p1 /mnt/a
[root@hplaptop ~]# cd /mnt/a
[root@hplaptop a]# cp script.bin script.bin.bak
[root@hplaptop a]# bin2fex script.bin script.fex
fexc-bin: script.bin: version: 0.1.2
fexc-bin: script.bin: size: 43216 (76 sections)
[root@hplaptop a]# cp script.fex script.fex.bak

Now, I will edit the script.fex file and add a MAC address. I am using one of the MAC addresses it dynamically configured before I was using my own script.bin file. PLEASE NOTE: DO NOT USE MAC ADDRESS BELOW! MAC ADDRESSES ARE SUPPOSED TO BE UNIQUE


[dynamic]
MAC = "8a413f5bf892"

Convert the fex file back to its binary equivalent:


[root@hplaptop a]# vim script.fex
[root@hplaptop a]# fex2bin script.fex script.bin

So far so good, now we’ve fixed the MAC address, I can configure my “DHCP server” (inside the Fritz!BOX) to give it a static IP address, so I can always SSH into the box from my LAN. It’s really annoying when you never know what IP address the box will have.

But, I would also like to connect a monitor to my CubieBoard. What I wrote about this last December is already outdated. Like I said, the Linux kernel for this board is under active development, and stuff that didn’t work yet in December, may work in January. Back in December I wrote, configuration of the resolution goes through the script.bin file, which I’ve just mentioned. However, according to the fex guide, in hdmi mode, I can only specify “tv” resolutions, but my monitor got 1280×1024. The current kernel however, is able to parse the EDID and select the correct resolution, just like the Raspberry Pi does. However, on the CubieBoard it didn’t work quite well. I will investigate this later, but for now, another new feature is the possibility to specify a resolution as a kernel parameter. This is what I am using now to boot up my CubieBoard. The parameters are explained on a Google Groups post about a Fedora release for Allwinner based devices.

According to the parameters explained in that post, I would need to use disp.screen0_output_type=3 disp.screen0_output_mode=1280x1024p60
Put the following in uEnv.txt on the FAT partition


boot_mmc=fatload mmc 0 0x43000000 ${fexfile}; fatload mmc 0 0x48000000 ${kernel}; bootm 0x48000000
extraargs=rootwait disp.screen0_output_type=3 disp.screen0_output_mode=1280x1024p60
fexfile=script.bin

Well… I suppose this is it for now. I am not discussing configuration of the system for the BeagleBoard and CubieBoard now. That’s not board specific, and I have thoroughly discussed this for my Raspberry Pi. A thing I might be discussing in the future is how to configure hardware video acceleration for both BeagleBoard and CubieBoard. However, I will have to investigate this first, so no promises.

Regarding the hdmi/dvi output: It is not working perfectly, as I have to specify the resolution as a kernel parameter. Moreover, when my monitor is directly connected over a hdmi->dvi cable, the monitor complains I should configure a resolution of 1280×1024@60Hz. It thinks I am giving it 1282×1026@60Hz. So, in both directions two pixels too much, and it displays those as a row/column of purple pixels at the left and bottom of the screen. However, when I use my HDMI->VGA adaptor, the screen happily accept the signal as 1280×1024@60Hz.

I will investigate the display issues later, including what the kernel thinks about my EDID. I will also look at how it behaves with the HDMI->VGA adaptor without extra resolution hints in the uEnv.txt, and also connect a CRT monitor, as those are usually a little more flexible in supported frequencies.

The fact I have a working output at the desired resolution now makes my project to hook up a VGA connector to the CubieBoard get a lower priority. However, I intend to still investigate this, as this information is of interest to the CubieBoard community. Besides, yesterday I found the 2mm dupoint cables in my mailbox, so I am finally able to connect something to the CubieBoard I/O pins. Well… that’s a disadvantage of the CubieBoard. All I/O pins are 2mm, for which the cables are not so common.

Edit: One more after-boot comment
After upgrading packages ( # pacman -Syu ) open the uEnv.txt file on the FAT partition and add init=/usr/lib/systemd/systemd to enable systemd, otherwise you will still be using the old rc.conf initscripts.

I know, I have written about this before, but, here it is again. Installing ArchLinuxARM on the BeagleBoard, this time, taking a fresh SD card, and now it works like a sunshine. Yesterday, on the 8 GB card, I’d done exactly the same, without any result.

So, let’s see how to install the January 2013 ArchLinux OMAP3 rootfs to an SD card for use with a BeagleBoard.

Download the bootloader http://archlinuxarm.org/os/omap/BeagleBoard-bootloader.tar.gz
Download the rootfs http://archlinuxarm.org/os/ArchLinuxARM-omap-smp-latest.tar.gz

This says the latest rootfs, which would usually be the right thing to do. But to ensure you’re using the same rootfs as I do, you can use http://os.archlinuxarm.org/os/omap/ArchLinuxARM-2013.01-omap-smp-rootfs.tar.gz in stead.

extract the bootloader tarball. This tarball contains a mkcard.sh script which will partition the card for you. As I’ve had problems with the instructions on the ArchLinuxARM site last time, I will use this script instead, as it worked perfectly.


[root@hplaptop bootloader]# ./mkcard.sh /dev/mmcblk0
1024+0 records in
1024+0 records out
1048576 bytes (1.0 MB) copied, 1.13529 s, 924 kB/s
DISK SIZE - 16130244608 bytes
CYLINDERS - 1961
Checking that no-one is using this disk right now ...
OK

Disk /dev/mmcblk0: 1961 cylinders, 255 heads, 63 sectors/track
sfdisk: /dev/mmcblk0: unrecognized partition table type

Please note it also says

./mkcard.sh: line 37: kpartx: command not found

But this ain’t a fatal error. It seems this is a tool to re-read the partition table and create device maps. However, it seems it works without on my system. Anyhow, let’s continue. The said script only partitions the SD card and creates file systems, but nothing else. (unlike the script for the CubieBoard, which I will discuss later)


[root@hplaptop bootloader]# mount /dev/mmcblk0p1 /mnt/a
[root@hplaptop bootloader]# cp MLO /mnt/a
[root@hplaptop bootloader]# cp u-boot.bin /mnt/a
[root@hplaptop bootloader]# cp uEnv.txt /mnt/a
[root@hplaptop bootloader]# mount /dev/mmcblk0p2 /mnt/b
[root@hplaptop bootloader]# cd /mnt/b
[root@hplaptop b]# tar -xvf /run/media/andre/DataBlaat/arm/beagleboard/archlinux/ArchLinuxARM-omap-smp-20130118.tar.gz

It is important for the BeagleBoard that you copy the MLO file first to the FAT parition. This is a pre-boot-loader, “X-loader”, which will load the bootloader “U-Boot”. Then copy the other files to the FAT partition, “u-boot.bin”, the bootloader, and “uEnv.txt”, a configuration file.

Next extract the root file system to the ext3 parition. I usually include the v to the tar arguments to see what’s going on. When this is done, copy the kernel over to the FAT partition

[root@hplaptop b]# cp boot/uImage /mnt/a

This can take longer then expected. When this is done, create a boot script. This boot script will be like the one on the ArchLinuxARM site, but the mmc init line needs to be ommited. It was needed for ancient versions of U-Boot, but has been obsolete for quite a while. So, the boot script will look like


setenv bootargs 'console=ttyO2,115200n8 root=/dev/mmcblk0p2 rw rootfstype=ext3 rootwait'
fatload mmc 0 0x80300000 uImage
bootm 0x80300000
boot

write this bootscript to bootscr, and run mkimage to convert it to an U-boot script. Even though the current version supports the uEnv.txt file, I didn’t manage to get it to boot using the uEnv.txt only. I kept attemption to boot from NAND, but I want to boot from the SD card. I probably only have to set a certain variable to tell it to boot from SD in stead. However, with the boot.scr file present, it boots fine from the SD card.


[root@hplaptop b]# cd /mnt/a
[root@hplaptop a]# vim bootcmd
[root@hplaptop a]# mkimage -A arm -O linux -T script -C none -a 0 -e 0 -n "Beagleboard boot script" -d bootcmd boot.scr
Image Name: Beagleboard boot script
Created: Fri Jan 25 11:05:47 2013
Image Type: ARM Linux Script (uncompressed)
Data Size: 151 Bytes = 0.15 kB = 0.00 MB
Load Address: 00000000
Entry Point: 00000000
Contents:
Image 0: 143 Bytes = 0.14 kB = 0.00 MB
[root@hplaptop mnt]# cd ..
[root@hplaptop mnt]# umount a
[root@hplaptop mnt]# umount b
[root@hplaptop mnt]# sync

Please note: If you’re missing mkimage is available in the AUR repository as package “uboot-mkimage”. Last time when I made an BeagleBoard SD card, I compiled it from source. After this is all done, unmount the file systems, flush the caches, and just put the card into the BeagleBoard, connect to the serial console, and plug in the power. It boots up fine.

P.S. In the rootfs there are some boot.scr files, but they won’t work. First of all, they appear to be for the TrimSlice. But that’s not the problem. They appear to be configured to load the kernel from the rootfs. In the directory /boot there is uImage, so, perfectly fine. However, U-Boot only supports ext2 and not ext3, therefore these files won’t work.

We might need to adjust the kernel parameters later if we want to set something like hdmi or svideo to work. As stated before, when specifying 1280×1024@60Hz, the BeagleBoard is only capable to deliver 57Hz, which my Compaq 1720 monitor refuses to accept. As I have found out with some CubieBoard tests, which I will write about later, the monitor might be a little more tolerant when the input is analogue. Therefore I tried the mentioned HDMI->VGA adaptor also on the BeagleBoard.

When I had my old BeagleBoard installation running, I experienced lots of USB problems, mostly related to the USB Ethernet adaptor. Lots of errors in the pegasus driver. So, I wonder, are the problems really hardware or are they caused by a crappy driver. Anyhow, I’ve bought an SPI Ethernet adaptor for testing purposes.

The BeagleBoard, the Raspberry Pi. They both use an SD card. The CubieBoard uses a µSD card. Basically the same card in a different form factor. Flash memory to store your operating system. As these ARM Boards commonly run a regular Linux distro compiled for ARM, usually logs are written to the file system, updates are installed frequently, and often you see an ext3 file system, which is a journalling file system. This all means there will be frequently written to an SD card in an ARM board, and knowing the write cycles of such a card are limited, makes you wonder, how long will it last. I believe I have hit the end of such an SD card yesterday night.

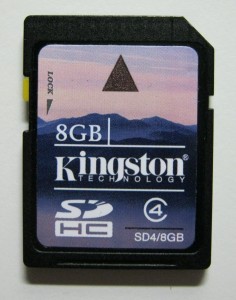
Kingston SD4/8GB

I bought this card, back in 2009 when I bought my BeagleBoard. When I first tried to use my BeagleBoard, I was stopped by the unstable USB bus, therefore it hasn’t been used much. The SD card has probably been used in cameras in the mean time. When I read the USB problems where probably hardware related and a capacitor might fix them, I’ve started using the BeagleBoard again, yet, experiencing various instability issues.

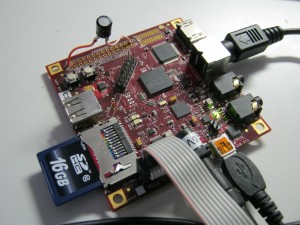
BeagleBoard Rev. C3

Regular crashes and rebooting, not good for the condition of a file system, and such fsck running on the file system, what are the results for write cycles? Anyhow, when I got my Raspberry Pi, I bought some 16 GB SD cards it. However, wanting to test RISCOS, I didn’t want to use such a 16 GB card for it. So I took this 8 GB card and wrote that image to it. RISCOS booted fine on the Raspberry Pi. However, now I think about it. I once had some boot problems, which disappeared as spontaneous as they came.

Now, I wanted to play around with my BeagleBoard again. I took the 8 GB SD card, I made an image of its contents (the RISCOS image), ran the BeagleBoard SD card script, to correctly partition it for use with a BeagleBoard, which also makes a FAT and ext3 file system. I wanted to try geexbox, an XBMC distro, which also has a version for OMAP3, which includes the BeagleBoard, IGEPv2, and others.

So, I copied the bootloader files to the FAT partition, the rootfs to the ext3 parition, put the card in the BeagleBoard and booted it up. This distro uses systemd, which is also in use by ArchLinux. Anyhow, I was conducting some experiments with the hdmi and svideo outputs of the BeagleBoard.

The HDMI to VGA converter worked fine with my Raspberry Pi and CubieBoard, so I was like, let’s give it a try on the BeagleBoard. Even though it would probably not work without modification to the BeagleBoard, as it shows here, it has overcurrent protection on the HDMI output. Such an HDMI to VGA adaptor without own power supply violates the HDMI/DVI specs and draws much more current from the HDMI port that officially allowed. Actually, the BeagleBoard is the only board (known to me) that restricts HDMI devices to the standards.

In general, specifications about maximal current drawn are violated everywhere, especially on USB busses. And then those cables with an extra USB plug to allow more current in case one port is restricted. Or USB fans, lights and even warming plates for a cup of coffee….. all just drawing current without any USB logic, no identification to the host. Well… enough ranting about that. What was I talking about?

Anyhow, after a few seconds the screen would go off, due the HDMI to VGA adaptor drawing too much current. I went to try the svideo output. Where the video output goes is a kernel parameter, so chaging the files in the boot partition and rebooting. Also note, the manual of the BeagleBoard states I should only (un)plug the cable from the HDMI port when the device is unpowered. Anyhow. When I plugged in the power supply again, nothing happened. Of course I was like, “WTF?!?!?!”. After measuring the power adaptor, it turned out this one just decided to die.

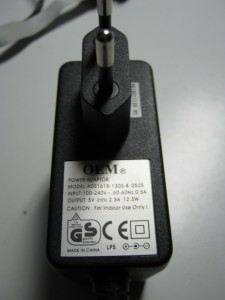
Dead power adaptor

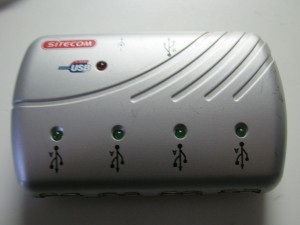
This power adaptor belonged to an USB HUB I’ve decided to retire, as it was causing trouble on the USB bus. Please note this was a 4 port USB hub, and the adaptor is rated 2.5 Amps, as it should. Nowadays you see only 1 Amp for a 4 port USB hub. So, in these days, USB devices draw more power then they should, and USB hubs provide less power then they should. Can someone please explain how on earth this is supposed to work???

Anyhow, the fact the power adaptor just died may make me re-evaluate that USB hub, as its misbehaviour might be related to unstable power. Nevertheless, it’s an old hub, perhaps it even belongs to the first generation of USB 2.0 hubs?

IMG_0985

Anyhow, recently I had some more USB hub issues. I have announced a couple of time again I should write about them. And I should just do it otherwise it will never happen, as I have said I am supposed to write about a certain subject before, but never done in the end. But there are more things to write about so.

I almost forgot, I should still get to the point of this story. So, I had a booting geexbox distro, but I wasn’t able to get anything xbmc on the tv out for some reason. I decided to install ArchLinuxARM in stead. So, I formatted the ext3 partition again and copied the ArchLinuxARM OMAP3 root fs over, I copies the uImage over to the FAT partition, and….. it doesn’t boot. Kernel Panic! Cannot find init! and such. I’ve been testing all night, re-creating the file system, boot loader and everything. I couldn’t find anything wrong. But missing init? it’s right there! I’ve copied a statically linked “hello world” binary (compiled on the Raspberry Pi. ARMv6 Hard Float binaries run fine on ARMv7 Hard Float) over there to test, which ran perfectly fine.

In the end, I noticed the umount command was hanging, when unmounting the card on my laptop. Now, I believe this is related to the SD card malfunctioning. I’ve noticed this before, but I assumed this was some kind of bug instead.

While the umount command was hanging, in another terminal, we see data is being written to the card at a very slow rate:

[andre@hplaptop ~]$ iostat
Linux 3.6.11-1-ARCH (hplaptop) 25-01-13 _x86_64_ (2 CPU)

avg-cpu: %user %nice %system %iowait %steal %idle
9,95 0,00 4,02 21,73 0,00 64,30

Device: tps kB_read/s kB_wrtn/s kB_read kB_wrtn
sda 4,41 51,38 57,41 547377 611549
mmcblk0 0,61 0,35 28,54 3745 30402

When we look at dmesg, it doesn’t complain about anything to do with the sd card, but it noticed the umount being blocked for over two minutes.


[10680.535700] INFO: task umount:3089 blocked for more than 120 seconds.
[10680.535709] "echo 0 > /proc/sys/kernel/hung_task_timeout_secs" disables this message.
[10680.535714] umount D ffff880127dd58b0 0 3089 2881 0x00000000
[10680.535724] ffff88011e23dc08 0000000000000086 ffff880127dd58b0 ffff88011e23dfd8
[10680.535733] ffff88011e23dfd8 ffff88011e23dfd8 ffffffff81814420 ffff880127dd58b0
[10680.535741] ffff880127f330a8 ffff88013fc13e70 ffff88011e23db98 ffffffff810145b3
[10680.535749] Call Trace:
[10680.535765] [] ? __switch_to+0x163/0x410
[10680.535776] [] ? finish_task_switch+0x49/0xe0
[10680.535787] [] schedule+0x29/0x70
[10680.535794] [] schedule_timeout+0x204/0x260
[10680.535802] [] ? check_preempt_curr+0x75/0xa0
[10680.535809] [] ? ttwu_stat+0xaa/0x120
[10680.535816] [] wait_for_common+0xcd/0x160
[10680.535824] [] ? try_to_wake_up+0x2f0/0x2f0
[10680.535831] [] wait_for_completion+0x1d/0x20
[10680.535841] [] writeback_inodes_sb_nr+0x85/0xb0
[10680.535849] [] ? sys_mknod+0x1/0x20
[10680.535886] [] writeback_inodes_sb+0x2e/0x40
[10680.535893] [] sync_filesystem+0x3d/0xb0
[10680.535902] [] generic_shutdown_super+0x3b/0xf0
[10680.535910] [] kill_block_super+0x30/0x80
[10680.535920] [] deactivate_locked_super+0x3c/0xa0
[10680.535927] [] deactivate_super+0x4e/0x70
[10680.535936] [] mntput_no_expire+0x101/0x160
[10680.535944] [] sys_umount+0x76/0x3a0
[10680.535953] [] system_call_fastpath+0x1a/0x1f

Anyhow, I declare this 8GB SD card deceased. Just another thought. As this “dying sd card” causes weird symptoms.

Edit: I believe the cause of the problems were rather different. During an update, the governor was set to ondemand again, in stead of powersave which I had configured. The issues were probably caused by overheating. I have experienced SD problems before related due overheating. I wonder why my laptop has to run at 800 MHz nowadays, while when it was new it ran at 2800 MHz without problems, but suddenly, overheating issues arrised.

A few days ago, I was logged in to my dedicated server, my connection died. At first I was worried something happened to my server, but it turned out to be my own internet connection that dropped. Looking at the logs, I notice


15.01.13 14:07:04 Internet connection established successfully. IP address: 83.160.145.152, DNS server: 194.109.6.66 and 194.109.9.99, Gateway: 194.109.5.203
15.01.13 14:07:02 Login to the FRITZ!Box user interface from the IP address 192.168.178.30.
15.01.13 14:07:00 DSL is available (DSL synchronization exists with 15005/1011 Kbit/s).
15.01.13 14:06:48 DSL synchronization starting (training).
15.01.13 14:06:25 DSL synchronization starting (training).
15.01.13 14:06:06 DSL synchronization starting (training).
15.01.13 14:04:40 Internet connection cleared.
15.01.13 14:04:40 DSL not responding (no DSL synchronization).

I’m like what’s going on? Why? Usually my internet connection is like


21.12.12 16:22:10 Internet connection established successfully. IP address: 83.160.145.152, DNS server: 194.109.6.66
and 194.109.9.99, Gateway: 194.109.5.203
21.12.12 16:21:41 DSL is available (DSL synchronization exists with 4097/1031 Kbit/s).
21.12.12 16:21:38 DSL synchronization starting (training).

I have complained about this, as I am supposed to have 8 Mbit, but the line was too bad to support 8 Mbit. So, it seems they’ve set up a new DSL Exchange. I’ve noticed some more messages about resynchronisation of the like. I believe they’re fine tuning their new DSL exchange.


18.01.13 01:45:08 Internet connection established successfully. IP address: 83.160.145.152, DNS server: 194.109.6.66
and 194.109.9.99, Gateway: 194.109.5.203
18.01.13 01:45:04 DSL is available (DSL synchronization exists with 17505/967 Kbit/s).
18.01.13 01:44:53 DSL synchronization starting (training).
18.01.13 01:44:30 DSL synchronization starting (training).
18.01.13 01:44:11 DSL synchronization starting (training).
18.01.13 01:44:01 Internet connection cleared.
18.01.13 01:44:01 DSL not responding (no DSL synchronization).
17.01.13 10:50:41 Login to the FRITZ!Box user interface from the IP address 192.168.178.30.
17.01.13 01:45:35 Internet connection established successfully. IP address: 83.160.145.152, DNS server: 194.109.6.66
and 194.109.9.99, Gateway: 194.109.5.203
17.01.13 01:45:31 DSL is available (DSL synchronization exists with 17021/995 Kbit/s).
17.01.13 01:45:20 DSL synchronization starting (training).
17.01.13 01:44:56 DSL synchronization starting (training).
17.01.13 01:44:37 DSL synchronization starting (training).
17.01.13 01:44:28 Internet connection cleared.
17.01.13 01:44:28 DSL not responding (no DSL synchronization).

A few days later, 18 January, I got a letter from XS4ALL, saying they now have VDSL available on my location. Well, that explains the new DSL Exchange. I have accepted the upgrade, which will give me a new modem. In the end, I believe I didn’t have to, as I still did have a Fritz!Box 7270, which on the old connection only gave me 1,6 Mbit. Back then I bought that modem because of the Native IPv6 trials. Now, Native IPv6 is standard at XS4ALL. That modem gets good speeds now as well, but gives me Native IPv6 access. I no longer have to my IPv6 tunnel. (Which had a little problem I haven’t written about yet…)


21.01.13 01:31:33 The system time was updated successfully by time server 89.104.194.134.
21.01.13 01:31:22 IPv6 prefix obtained successfully. New prefix: 2001:980:55e0::/48
21.01.13 01:31:22 IPv6 Internet connection established successfully. IP address: 2001:980:55e0::224:feff:fed7:e4d2
21.01.13 01:31:18 Internet connection established successfully. IP address: 83.160.145.152, DNS server: 194.109.6.66 and 194.109.9.99, Gateway: 194.109.5.203
21.01.13 01:31:16 Login to the FRITZ!Box user interface from the IP address 192.168.178.20.
21.01.13 01:31:14 DSL is available (DSL synchronization exists with 18934/1028 kbit/s).
21.01.13 01:30:59 DSL synchronization starting (training).
21.01.13 01:30:34 DSL synchronization starting (training).

Anyhow, looking back, perhaps it was a bad deal to get the VDSL with the new modem. The new modem only has one analogue phone line, while I have 2 phones. Both Fritz!Box 7170 and 7270 support Pulse dialing just fine. My new box will be a Fritz!Box 7360, where looking at this picture, it turns out to have only one phone connector. Besides I’ve heard rumours newer models of the Fritz!Box might not support Pulse dialing…. but I like my retro phones! And to be honest, such a pulse to tone converter, I don’t like the idea…

Well… I still have a Fritz!Box FON ata somewhere. (But is it reliable? This device was the culprit when my internet in Sweden broke down…. but that was when it was acting as a NAT router as well, which it won’t be doing here)

Besides, there is a chance my district might get glass fiber soon. If 30% of my district signs up, we will get it, and the deadline for signing up is this weekend I believe. I signed up ages ago. Yet…. how long will that take? Will I even be still living here? Anyhow, I have decided to keep my 8 Mbit for now, I could have chosen the 40 Mbit now. Still, that’s the downstream. The upstream will be 4 Mbit in stead of the 1 Mbit I have now. That’s why I am looking forwards to glass, a symmetric connection. Then it becomes interesting to have a “real” server at home.

The past week, I’ve been struggling with tvheadend and oscam. The solution of a working configuration I will present in part 3, but first, I will provide some background information, in part 2 I will discuss the problems I’ve encountered, and finally in part 3 I will provide how to get it working

In my previous post, I have mentioned configuring my USB Satellite receiver, so you guess I have satellite TV. In my country, the Netherlands, the provider is CanalDigitaal. Their channels are encrypted and they use the SECA MediaGuard encryption system. It’s CAID is 0100. CanalDigitaal has Provider ID 0006A.

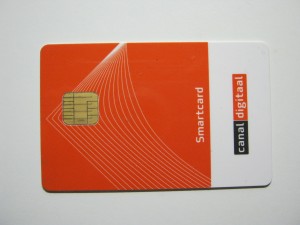
Canal Digitaal Smart Card  (Mediaguard v10.0)

In order to watch TV on a computer (or raspberry pi), I need to decrypt the TV signals. A regular DVB-S receiver uses a CAM (Common Access Module) which reads the smart card. An example of such a CAM is the MatrixCAM. In the picture two revisions of the MatrixCAM: Reloaded and Revolutions.

MatrixCAM

When Canal Digitaal introduced their SECA Mediaguard v7.3 cards, I bought such a MatrixCAM. Even though my DreamBox had a built-in card reader, back then the store where I bought my DreamBox said it couldn’t read the card. Nowadays I use the card reader to read the card, but back then I wasn’t that much this kind of stuff. It could be true that the softcams back then didn’t support Meduaguard v7.3 cards yet, or simple, the salesman wasn’t aware of it. I mean, he sold me a DreamBox with an emu-enables distro and a couple of funcards, so I suppose if he knew he would have told me, right?

Old Canal Digitaal Smart Card (Mediaguard v7.3)

Before I didn’t need a card or a cam to decrypt their signals. The encryption system they used before was broken and I could watch using a so-called emu, which emulates the whole cam and card by software. Back in the days there were distros for my DreamBox DM-7000S available which had this built-in. I believe the hacked system was Irdeto, but I am not sure about this. In those days there were also programmable cards, like the funcard5, which enabled owners of certain receivers to decrypt the dutch channels, but could also be used as data storage to upgrade firmware I believe.

FUN5 Programmable Card

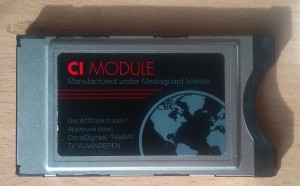
Anyways, when Canal Digitaal yet again replaced their smart cards with MediaGuard v10.0 cards, like the orange one shown above, the MatrixCAMs didn’t work as they should anymore. With the MediaGuard v10.0 cards, the MatrixCAM started to crash frequently and needed to be powercycled. Even though the software in those CAMs is supposed to be upgradable, I haven’t been able to locate a newer firmware to resolve those problems. One solution to this problem is to buy a CAM from Canal Digitaal themselves, which is an official MediaGuard CAM.

MediaGuard CI CAM

Or, since my DreamBox has an integrated smart card reader, soft an softcam, a CAM in software. For this purpose I have been using CCcam. For my media center project, I have bought an USB smart card reader, A smargo smartreader+, which can be used in combination with such a softcam. CCcam is however closed source software, which I would like to avoid. There is also an open source softcam, oscam, which I will be using, and I will discuss the problems I have encountered with it in part 2.

Smargo SmartReader+

As I mentioned, there have been problems with certain hardware after Canal Digitaal gave out new smart cards. The salesman recommended the MatrixCAM since it supports multiple card systems, as opposed to the official CAM, which only supports one system. Also, the MatrixCAM is software upgradable, so, in theory, new software could be flashed to resolve the incompatibilities with the MediaGuard v10.0 cards… however I once searched but haven’t found.