Tag Archive: raspberry pi


Raspberry Pi and SD card file system corruption. I have been experiencing these issues and I can’t really pinpoint the source of the trouble. I decided to take one of my Raspberry Pi’s, install Raspbian on it, and then ISPConfig, to have a test server, with a similar configuration then the server hosting this blog, –production server– as you may. — anyhow — during the installation of some packages, the file system already got corrupted — therefore this was a never finished project.

At this point, I started to suspect the specific Pi. (I have two Model B revision 1 Pi’s) But, I cannot be sure. I have run the “Overclock stability test” script on both my Pi’s, on two different SD cards. Note: I am not overclocking, but it is a stability test, that reads and writes from the SD card. Everything seemed stable. (Also when I *did* overclock a bit)

One thing to notice about this test, it performs a series of sequential reads and writes. Perhaps that’s the difference. File system corruption occurs when writing to files. Keep in mind that SD cards are actually microcontrollers, and their programming might contain some FAT specific optimisations which cause corruption when running another file system. Keeping this in mind — the random writes method I have been suggesting earlier might not trigger the error. However… I am just speculating. In the end — it could be the power supply problem some people have been suggesting.

Anyway, enough about Pi’s, now it’s time for my ODROID U3 to do something: replacing my Raspberry Pi as NFS server. The Raspberry Pi has bad performance as an NFS server anyways. Therefore, in the past, I was about to replace it with my CubieBoard. Initial tests were promising, throughput was, –as far as I can recall– double the Pi’s. I went to sleep, to discover the next day, the CubieBoard was down. I assumed it crashed for some reason, and powercycled it. It didn’t come back up. No…. since that moment, I haven’t been able to get it to do anything. No boot from NAND or µSD card, nothing on the serial interface: it’s dead.

So… now it’s about time to replace my 8530w laptop — temporary playing server — with a more permanent solution: my UDROID-U3. I am not going to discuss the entire configuration. I have discussed configuring NFS servers before. However, there are a few things I would like to discuss. I problem I have encountered before: using new nfs-utils versions with older linux kernels. The kernel for the UDROID is 3.8.13.23-3-ARCH, which is rather old.

The problem is, when starting the nfs daemon, it requests the versions on NFS to use from the kernel. Starting at nfs-utils 1.2.9, it will include 4.1 in this request. Older kernels will not recognise this and generate an error. On my Pi, I reverted to nfs-utils 1.2.8, but now, I have a more permanent solution.

The problem:

[root@odroid andre]# systemctl status nfsd
● nfsd.service - NFS Server Daemon
   Loaded: loaded (/usr/lib/systemd/system/nfsd.service; enabled)
   Active: failed (Result: exit-code) since Fri 1999-12-31 18:00:31 MST; 14 years 5 months ago
     Docs: man:rpc.nfsd(8)
  Process: 294 ExecStopPost=/usr/bin/exportfs -a -u (code=exited, status=0/SUCCESS)
  Process: 291 ExecStop=/usr/bin/rpc.nfsd 0 (code=exited, status=0/SUCCESS)
  Process: 260 ExecStartPost=/usr/bin/exportfs -a (code=exited, status=1/FAILURE)
  Process: 233 ExecStart=/usr/bin/rpc.nfsd $NFSD_OPTS $NFSD_COUNT (code=exited, status=0/SUCCESS)
 Main PID: 233 (code=exited, status=0/SUCCESS)

Dec 31 18:00:31 odroid rpc.nfsd[233]: rpc.nfsd: Setting version failed: errno 22 (Invalid argument)
Dec 31 18:00:31 odroid exportfs[260]: exportfs: Failed to stat /srv/nfs4/grassroot: No such file or directory
Dec 31 18:00:31 odroid systemd[1]: nfsd.service: control process exited, code=exited status=1
Dec 31 18:00:31 odroid systemd[1]: Failed to start NFS Server Daemon.
Dec 31 18:00:31 odroid systemd[1]: Unit nfsd.service entered failed state.


Note to audience: I have no battery connected to the RTC, so “Dec 31 18:00:31” is a faulty date before it contacted an NTP server.
Note to self: image has an American default timezone: fix it! timedatectl set-timezone CET

The solution:
The configuration file for the nfs server is /etc/conf.d/nfs-server.conf. When you open time file, you see nothing that would suggest setting a version. No, the file only specifies command line options to nfs daemon. Putting NFSD_OPTS="-V 4" does the trick. You can specify multiple versions by comma separating them, for example NFSD_OPTS="-V 2,3,4", which would enable NFS version 2, 3 and 4.

Oh my…. I haven’t written at all in this blog this year…
Anyhow…. I will report about a number of technical problems…
They always seem to come at the same time, don’t they?

Let’s see, my raspberry pi server, down again. So… what I did in the past, I moved the root file system to an external hard disk, since I was suffering from file system corruption on the SD card. This week, file system corruption also occured on that external hard disk. Last week, the raspberry pi crashed, and when I rebooted it didn’t come up. It couldn’t find the root file system. Powercycling the hard disk containing the root file system fixed the problem. Seeing the problem I had last week, I blaim faulty hardware for the problems I’ve been experiencing. Now, I come to a point where I suspect the SD card I used before to be faulty as well. I am thinking ways to test that SD card. Perhaps I could create a script that writes random data to random positions, both on the SD card and in an image file, and comparing both in the end.

My dedicated server, which hosts this blog, also encountered a problem. A problem simular to a problem I’ve been experiencing with my previous server. It ran out of memory and killed amavis, virtually disabling the email subsystem. Now, I have configured the OOM to be less likely to kill amavisd-new or clamd, to be less likely to be killed in the event the system runs out of memory. For now, only a single instance. Let’s have a look at the /proc filesystem. In there we see a directory per running process.

Say, the pid of clamd is 12345, then we can set the killing likelyness from -16 (unlikely) to 15 (very likely) like this:

# pidof clamd
12345
# echo -15 > /proc/12345/oom_adj
#

Well… having that said, the issue still is, the system ran out of memory. Now, I have to say, this machine was pre-installed by OVH using their default ISPConfig configuration. The machine has 3 GB of RAM installed, and was configured with 1 GB swap. Now, the rule of thumb is to have twice as much swap then ram. So, I guess that’s the cause of the problem. Now, I would like to increase the swap, but I cannot repartition a running system. And even if that wasn’t an issue, the system is running a software raid.

# blkid
/dev/sda3: UUID="8199facf-617b-475a-9874-79f017193cce" TYPE="swap" 
/dev/sdb3: UUID="366beea7-8e2f-457b-b184-78c811df7d07" TYPE="swap" 
/dev/sda1: UUID="9cf67138-a39d-3a3f-a4d2-adc226fd5302" TYPE="linux_raid_member" 
/dev/sda2: UUID="f8058e35-2dec-e859-a4d2-adc226fd5302" TYPE="linux_raid_member" 
/dev/sdb1: UUID="9cf67138-a39d-3a3f-a4d2-adc226fd5302" TYPE="linux_raid_member" 
/dev/sdb2: UUID="f8058e35-2dec-e859-a4d2-adc226fd5302" TYPE="linux_raid_member" 
/dev/md2: LABEL="/var" UUID="f8893706-4d3c-45aa-af84-b302221f3bd7" TYPE="ext4" 
/dev/md1: LABEL="/" UUID="4903b0b6-3e50-4fc9-bb0b-1ab3e6c505b7" TYPE="ext4" 

So, I guess I’ll solve it by creating a swap file instead. The system is paritioned to have a small root file system, and a huge /var file system. Therefore I’ll create the swap file in /var

# fallocate -l 6G /var/swapfile
# chmod 600 /var/swapfile 
# mkswap /var/swapfile 
mkswap: /var/swapfile: warning: don't erase bootbits sectors
        on whole disk. Use -f to force.
Setting up swapspace version 1, size = 6291452 KiB
no label, UUID=74989c54-dc14-4b65-8577-13b356ca79c8
# swapon /var/swapfile 

And add the swap file to the fstab.

Checking the swap status:

# swapon -s
Filename				Type		Size	Used	Priority
/dev/sda3                               partition	525308	254816	-1
/dev/sdb3                               partition	525308	16488	-2
/var/swapfile                           file		6291452	0	-3

Well… I guess this solves the memory problem. I might have a closer look at some logs, but so far I haven’t seen any task using suspecious amount of resources. I guess 3 GB of RAM + 1 GB of swap just wasn’t enough.

I have been complaining about file system corruption on the SD card of my Raspberry Pi’s before. A suggested cause for this problem was a faultly power supply, delivering a too low voltage. Thinking about it, a faulty power supply might also be at the root of the stability issues I’ve always experienced with my BeagleBoard.


Jul 20 00:20:42 rpi kernel: [45414.541554] EXT4-fs error (device mmcblk0p5): ext4_ext_check_inode:462: inode #36100: comm pacman: bad header/extent: invalid eh_entries - magic f30a, entries 513, max 4(4), depth 0(0)

IMG_1287Anyways, I’ve decided to try to power the Raspberry Pi with a fat power supply. A 5 Volt 6 Ampère power supply should not suffer from any voltage drops by the load of a Raspberry Pi, BeagleBoard or CubieBoard for that matter.

IMG_1289Apart from hooking up just an ARM board, there are more reasons for purchasing this power supply. Having a full extension socket with just power adapters that all output 5 Volts is just insane. It would be far more efficient to just have one supply to power all my devices, such as a network switch and USB hub. It could also be used to charge a phone. Think about it, a Raspberry Pi power supply is just a phone charger with Micro USB connector anyways.

Since this power supply just outputs it’s 5 Volts on a terminal block I will of course have to fix some connectivity:

IMG_1256IMG_1261IMG_1270IMG_1254IMG_1271IMG_1262

Since I am using regular female USB connectors, the part where I solder the connector itself to the PCB does not fit in my holes PCB, and I have to fold it away. The actual USB pins are soldered to the PCB. The middle pins are the data pins. I’ve short circuited the data pins to indicate being a charging port. (This is according to the USB specs.) I’ve connected some wires to the outer pins, being the plus and minus of the 5 Volt power pins. The idea was to solder some PCB terminal blocks, one to be connected to the power supply, and the others to provide power to devices, such as a network switch or my BeagleBoard, that require 5 Volt but come with some other power connected.

But then I discovered a problem. The distance between the pins of the connector blocks I’ve ordered is not an e-multiple. 1 e is 2,54 mm, a unit commonly used in electronics. It’s derived from American units (as 1 American inch is 2,54 cm) It is the distance between the holes on an PCB holes board. Components usually have a multiple of this. But not my connectors. So… a problem. Causing my little project to catch dust for several weeks.

IMG_1288But thanks to Dean I’ve got some connectors that do fit by holes PCB, and I’ve continued my project. I’ve only wired two positions from my connector block, just hooking up the power supply. I’ve connected my Raspberry Pi, and a voltage meter to it now. This is just a prototype, far from the ideal situation I am aiming for. I want to built in some protection. Thinking about some over-voltage protection. I am using some cheap-ass Chinese power supply after all. Better safe then sorry, right? Same goes for over-current protection. When hooking all kinds of devices up, it might be wise. (P.S. I also have a 5 Volts 20 Ampère version…. a current like that could easily start a fire)

Anyhow, I got some 1 Ampère polyfuses. I suppose I could just put two of them in parallel to obtain a 2A polyfuse, right?

Just a few things left do configure on my server Pi. One of them is setting up the scanner server. This is quite straight forwards, and it just takes a couple of minutes to set it up. (See ArchLinux wiki) The first step is to install sane and xinetd on the server:

[andre@rpi-server ~]$ yaourt -S sane xinetd

The next step is setting the allowed clients in /etc/sane.d/saned.conf


# required
localhost
# allow local subnet
192.168.178.0/24

And configuring xinetd. The file /etc/xinetd.d/sane already exists, and all that needs to be changed is setting disable to no. On the clients, add the ip address of the server to /etc/sane.d/net.conf and it just works! Awesome!

Another thing still on the TODO list is the IPv6 tunnel. Unfortunately, the ArchLinux wiki still only lists a configuration for the classical initscripts, and not for systemd. Twice, even: IPv6 – Tunnel Broker Setup and IPv6 – 6in4 Tunnel are describing the same thing.

So.. I guess let’s have a closer look at systemd, how to add custom services to it, right? So… there is a link to Systemd/Services which actually provides what I am looking for. No need to write a custom script. Just adjust it to the settings for the XS4ALL tunnel.

/etc/systemd/system/xs4all-ipv6.service


[Unit]
Description=XS4ALL IPv6 tunnel
After=network.target

[Service]
Type=oneshot
RemainAfterExit=yes
ExecStart=/sbin/ip tunnel add xs4all-ipv6 mode sit remote 194.109.5.241 local 83.160.145.152 ttl 255
ExecStart=/sbin/ip link set xs4all-ipv6 up mtu 1472
ExecStart=/sbin/ip addr add 2001:888:10:590::2/64 dev xs4all-ipv6
ExecStart=/sbin/ip -6 route add ::/0 dev xs4all-ipv6
ExecStop=/sbin/ip -6 route del ::/0 dev xs4all-ipv6
ExecStop=/sbin/ip link set xs4all-ipv6 down
ExecStop=/sbin/ip tunnel del xs4all-ipv6

[Install]
WantedBy=multi-user.target

So… let’s try it:


[root@rpi-server system]# systemctl start xs4all-ipv6
Job for xs4all-ipv6.service failed. See 'systemctl status xs4all-ipv6.service' and 'journalctl -xn' for details.
[root@rpi-server system]# systemctl status xs4all-ipv6.service
xs4all-ipv6.service - XS4ALL IPv6 tunnel
Loaded: loaded (/usr/lib/systemd/system/xs4all-ipv6.service; disabled)
Active: failed (Result: exit-code) since Thu, 2013-01-03 14:50:02 GMT; 8s ago
Process: 15926 ExecStart=/sbin/ip tunnel add xs4all-ipv6 mode sit remote 194.109.5.241 local 83.160.145.152 ttl 255 (code=exited, status=1/FAILURE)
CGroup: name=systemd:/system/xs4all-ipv6.service

[root@rpi-server system]# /sbin/ip tunnel add xs4all-ipv6 mode sit remote 194.109.5.241 local 83.160.145.152 ttl 255
add tunnel sit0 failed: No such device

No worky yet… there is no sit0 device. Sounds like a missing kernel module to me, which makes sense, as I did a full system upgrade ( pacman -Syu) yesterday, which included a new firmware and kernel, but I didn’t reboot yet. So… I think that’s the problem. And indeed it was, after reboot it doesn’t display the error message anymore. However, it doesn’t work yet.

[root@rpi-server andre]# systemctl start xs4all-ipv6
[root@rpi-server andre]# ifconfig
eth0: flags=4163 mtu 1500
inet 192.168.178.49 netmask 255.255.255.0 broadcast 192.168.178.255
inet6 fe80::ba27:ebff:fe89:f248 prefixlen 64 scopeid 0x20 ether b8:27:eb:89:f2:48 txqueuelen 1000 (Ethernet)
RX packets 1614 bytes 167190 (163.2 KiB)
RX errors 0 dropped 0 overruns 0 frame 0
TX packets 1464 bytes 217606 (212.5 KiB)
TX errors 0 dropped 0 overruns 0 carrier 0 collisions 0

lo: flags=73 mtu 16436
inet 127.0.0.1 netmask 255.0.0.0
inet6 ::1 prefixlen 128 scopeid 0x10
loop txqueuelen 0 (Local Loopback)
RX packets 8 bytes 560 (560.0 B)
RX errors 0 dropped 0 overruns 0 frame 0
TX packets 8 bytes 560 (560.0 B)
TX errors 0 dropped 0 overruns 0 carrier 0 collisions 0

xs4all-ipv6: flags=209 mtu 1472
inet6 fe80::53a0:9198 prefixlen 128 scopeid 0x20 inet6 2001:888:10:590::2 prefixlen 64 scopeid 0x0
sit txqueuelen 0 (IPv6-in-IPv4)
RX packets 0 bytes 0 (0.0 B)
RX errors 0 dropped 0 overruns 0 frame 0
TX packets 0 bytes 0 (0.0 B)
TX errors 0 dropped 0 overruns 0 carrier 0 collisions 0

[root@rpi-server andre]# ping6 google.com
PING google.com(wi-in-x64.1e100.net) 56 data bytes
From tunnel1424.ipv6.xs4all.nl icmp_seq=1 Destination unreachable: Address unreachable
From tunnel1424.ipv6.xs4all.nl icmp_seq=2 Destination unreachable: Address unreachable
From tunnel1424.ipv6.xs4all.nl icmp_seq=3 Destination unreachable: Address unreachable
From tunnel1424.ipv6.xs4all.nl icmp_seq=4 Destination unreachable: Address unreachable
From tunnel1424.ipv6.xs4all.nl icmp_seq=5 Destination unreachable: Address unreachable
^C
--- google.com ping statistics ---
5 packets transmitted, 0 received, +5 errors, 100% packet loss, time 4005ms

So.. what’s wrong here? The Sever is set as the exposed host, therefore it should receive the tunnel packets. So that can’t be the problem. Also, using the old initscripts script it works. So… I guess I’ll have to look at the the differences. At first glance they look the same, so the difference got to be in the details. (note: the error messages are due the fact my system is no longer having support scripts for the old style initscripts)

[root@rpi-server andre]# /etc/rc.d/6in4-tunnel start
/etc/rc.d/6in4-tunnel: line 13: /etc/rc.conf: No such file or directory
/etc/rc.d/6in4-tunnel: line 14: /etc/rc.d/functions: No such file or directory
/etc/rc.d/6in4-tunnel: line 18: stat_busy: command not found
/etc/rc.d/6in4-tunnel: line 36: add_daemon: command not found
/etc/rc.d/6in4-tunnel: line 37: stat_done: command not found
[root@rpi-server andre]# ping6 google.com
PING google.com(wi-in-x65.1e100.net) 56 data bytes
64 bytes from wi-in-x65.1e100.net: icmp_seq=1 ttl=56 time=23.8 ms
64 bytes from wi-in-x65.1e100.net: icmp_seq=2 ttl=56 time=23.0 ms
64 bytes from wi-in-x65.1e100.net: icmp_seq=3 ttl=56 time=23.4 ms
64 bytes from wi-in-x65.1e100.net: icmp_seq=4 ttl=56 time=26.4 ms
^C
--- google.com ping statistics ---
4 packets transmitted, 4 received, 0% packet loss, time 3004ms
rtt min/avg/max/mdev = 23.044/24.208/26.488/1.355 ms

The problem was rather stupid. A mistake I was struggling with last time I had to set this up. The “local” IP is supposed to LAN (internal) ip not my WAN (external) ip.

[root@rpi-server andre]# systemctl start xs4all-ipv6
[root@rpi-server andre]# ifconfig
eth0: flags=4163 mtu 1500
inet 192.168.178.49 netmask 255.255.255.0 broadcast 192.168.178.255
inet6 fe80::ba27:ebff:fe89:f248 prefixlen 64 scopeid 0x20 ether b8:27:eb:89:f2:48 txqueuelen 1000 (Ethernet)
RX packets 834 bytes 81976 (80.0 KiB)
RX errors 0 dropped 0 overruns 0 frame 0
TX packets 790 bytes 118486 (115.7 KiB)
TX errors 0 dropped 0 overruns 0 carrier 0 collisions 0

lo: flags=73 mtu 16436
inet 127.0.0.1 netmask 255.0.0.0
inet6 ::1 prefixlen 128 scopeid 0x10
loop txqueuelen 0 (Local Loopback)
RX packets 8 bytes 560 (560.0 B)
RX errors 0 dropped 0 overruns 0 frame 0
TX packets 8 bytes 560 (560.0 B)
TX errors 0 dropped 0 overruns 0 carrier 0 collisions 0

xs4all-ipv6: flags=209 mtu 1472
inet6 fe80::c0a8:b231 prefixlen 128 scopeid 0x20 inet6 2001:888:10:590::2 prefixlen 64 scopeid 0x0
sit txqueuelen 0 (IPv6-in-IPv4)
RX packets 0 bytes 0 (0.0 B)
RX errors 0 dropped 0 overruns 0 frame 0
TX packets 0 bytes 0 (0.0 B)
TX errors 0 dropped 0 overruns 0 carrier 0 collisions 0

[root@rpi-server andre]# ping6 google.com
PING google.com(wi-in-x71.1e100.net) 56 data bytes
64 bytes from wi-in-x71.1e100.net: icmp_seq=1 ttl=56 time=23.4 ms
64 bytes from wi-in-x71.1e100.net: icmp_seq=2 ttl=56 time=22.8 ms
^C
--- google.com ping statistics ---
2 packets transmitted, 2 received, 0% packet loss, time 1001ms
rtt min/avg/max/mdev = 22.897/23.150/23.403/0.253 ms

Now we got that working, the routing part. To configure the system as a IPv6 router, we add net.ipv6.conf.all.forwarding = 1 to /etc/sysctl.conf. Next we enable radvd. It appears I’ve already installed radvd, otherwise install it with pacman -S radvd.

The /etc/radvd.conf file contains tons of examples. So, we’ll have to a new file for this. We can use the XS4ALL auto create config file for this, as this is not distro specific. (ArchLinux isn’t on their list, they offer Debian, Redhat, FreeBSD, and some commercial Operating Systems like Mac OSX, Windows XP and Windows Vista)


interface eth0 {
AdvSendAdvert on;
AdvHomeAgentFlag off;

prefix 2001:888:1590::/64 {
AdvOnLink on;
AdvAutonomous on;
AdvRouterAddr off;
};
};

Looking at their config file, they’ve disabled Mobile IPv6 support (AdvHomeAgentFlag off;), which is an interesting feature of IPv6. I attended a presentation about this when I was in Sweden, back in 2008. I wish features like this would be widely implemented by now. I mean… if the mobile phone networks supported this…. Think about it. Just keeping your TCP connections open while switching networks. The technology is out there… and has been for years, but no dog uses it.

Anyhow…. back to the configuration. On the other machines, IPv6 connectivity is not yet working. It seems, the system is not acting as a router yet. It appears the /etc/sysctl.conf is not parsed, as when I run sysctl -p it starts working. Some more things that have changed since the old initscripts days. Looking at the ArchLinux Wiki, we’re supposed to create a config file in /etc/sysctl.d/, and if we click the link on there, we see the file needs extension .conf, so, let’s create this file, reboot, and see if it just works.

[root@rpi-server sysctl.d]# echo net.ipv6.conf.all.forwarding = 1 > ipv6_router.conf

Unfortunately, after reboot, it’s still not working…

[andre@rpi-server sysctl.d]$ sysctl net.ipv6.conf.all.forwarding
net.ipv6.conf.all.forwarding = 0

Getting this to work is always a pain in the ass. And why isn’t it parsing the damn config files…. grrr, they are where they should be. Sysctl seem to be started, so it should parse the damn config file.

andre@rpi-server ~]$ systemctl status systemd-sysctl
systemd-sysctl.service - Apply Kernel Variables
Loaded: loaded (/usr/lib/systemd/system/systemd-sysctl.service; static)
Active: active (exited) since Thu, 1970-01-01 01:00:02 BST; 43 years and 0 months ago
Docs: man:systemd-sysctl.service(8)
man:sysctl.d(5)
Process: 49 ExecStart=/usr/lib/systemd/systemd-sysctl (code=exited, status=0/SUCCESS)
CGroup: name=systemd:/system/systemd-sysctl.service

Please note it says 1970 as the Raspberry Pi doesn’t have a RTC, and this is executing early in the boot process (btw. I’ve ordered a I²C RTC to solve this problem)

Some more searching on the internet gave me some french blog. My french is very rusty, and when I had french class in high school, I totally sucked at is, so I won’t even try to read it, and just to the command to restart. After this the config file seems to be parsed. (Does it cache it or what?)

[root@rpi-server sysctl.d]# systemctl restart systemd-sysctl.service
[root@rpi-server sysctl.d]# sysctl net.ipv6.conf.all.forwarding
net.ipv6.conf.all.forwarding = 1

Let’s reboot. After reboot it is not set. So, even though systemctl says it got an active status, somehow, it is not. I’m tired of this, I will just hack it in. Adding systemctl restart systemd-sysctl.service to my tunnel script…. no change. trying sysctl net.ipv6.conf.all.forwarding=1 No change either. Ok. it seems systemctl config files require full paths. Now the hack works. So, the /usr/lib/systemd/system/xs4all-ipv6.service ended up looking like:


[Unit]
Description=XS4ALL IPv6 tunnel
After=network.target

[Service]
Type=oneshot
RemainAfterExit=yes
ExecStart=/sbin/ip tunnel add xs4all-ipv6 mode sit remote 194.109.5.241 local 192.168.178.49 ttl 255
ExecStart=/sbin/ip link set xs4all-ipv6 up mtu 1472
ExecStart=/sbin/ip addr add 2001:888:10:590::2/64 dev xs4all-ipv6
ExecStart=/sbin/ip -6 route add ::/0 dev xs4all-ipv6
ExecStart=/sbin/sysctl net.ipv6.conf.all.forwarding=1
ExecStop=/sbin/ip -6 route del ::/0 dev xs4all-ipv6
ExecStop=/sbin/ip link set xs4all-ipv6 down
ExecStop=/sbin/ip tunnel del xs4all-ipv6

[Install]
WantedBy=multi-user.target

Still, I would prefer to see the sysctl files parsed as it should. This is just a hack. So, I am not happy about this yet… however, the basic configuration is done now. I will have an image of the current content of the SD card (first 2 GB only) and then grow the file system to occupy the complete SD card.

Making the image of the card:

[root@hplaptop raspberrypi]# dd if=/dev/mmcblk0 of=rpi-server.img bs=1M count=1886
1886+0 records gelezen
1886+0 records geschreven
1977614336 bytes (2,0 GB) gekopieerd, 207,126 s, 9,5 MB/s

The original image was 1977614336 bytes, which is 1886 MiB. So, that’s the size of used part, before resizing. Please note, even though dd says MB and GB, it actually means MiB and GiB. I am creating this image in its original size, so I can write it to a different (size) SD card later if necessary.

Growing the file system I’ve already explained when I was discussing my other Pi.

At this stage, other stuff can be added to the installation. (And I should also take another look at qmeu userspace emulation) But also some server software meant for exposure to the internet, such as http, irc, and more. Thinking about my Media Center Project, perhaps the server Pi should run the tvheadend, and connect to the XBMC Pi over the network. It’s just… I am not that comfortable with running soft real time applications on a machine which can receive unknown load from the internet (and also my local network, but I have control over that)

OpenELEC XMBC

Today, I’ve returned to Eindhoven, where my Pi was waiting for me. Some more testing to do with my Raspberry. In the meantime, I’ve ordered licenses for hardware decoding of MPEG2 and VC-1. I need at least MPEG2 for DVD decoding and for my planned DVB experiments. VC-1 might be used on some BluRay discs… I don’t even have a drive or anything, but whatever, when I am ordering, let’s just order both, why not?

Well… let’s see… MPEG2 license installed. Let’s play a dvd!… or not… The DVD shows up just fine in XBMC, but when I want to play it, it prompts to insert a disc. What? I mean…. you see the damn disc, so why are you asking to insert a disc?!? Also, when I right click it and select play, it just freezes and I have to kill the task over ssh. No luck there…

XBMC has been indexing my movies and series just before I left to my family. So… let’s see how it performs on those. The results are mixed. Some files play perfectly, others have synchronisation issues, and others won’t play at all. Remember we’re hardware decoding. A wrong codec and it won’t play. Keep in mind, my collection of videos has been around on my hard disks for years, and may already have been old when I downloaded them. The problem is, some files are encoded using the DivX ;) 3.11 codec, which was a popular codec about a decade ago. It was a hacked version of the Microsoft MPEG-4 codec. The original Microsoft codec had a limitation so that it only could be used within an asf container. The hacked version removed this limitation. So far so good, but the problem is, Microsoft MPEG-4 is not compatible with ISO MPEG-4. Microsoft tends to invent their own standards, but, in my best “denglish”, that’s an old cow.

Well… the codec is not supported by the hardware. But… back in the days I bought this KISS DP-508 DVD/DivX player. It has hardware MPEG2/MPEG4 decoding, just like my Raspberry Pi does now, yet it supported playback of DivX 3, so Microsoft MPEG-4 content, which suggests it’s possible to patch Microsoft MPEG4 bitstream to ISO MPEG4 on the fly. I have been searching the internet for clues how to do this, but I haven’t been successful yet. So, I was like, it’s a linux based player, so some sources should be available, right? It appears Cisco owns KISS now, and the sources for the DP-508 don’t appear on their GPL page. Bummer! I haven’t been able to locate the source codes elsewhere yet. It might contain the code that performs this streampatching on the fly. Just a wild guess, it doesn’t have to be in there… And even if I find it, I must find a way to integrate it into XBMC.

Speaking about XBMC. I’m going to give OpenELEC a try. At first I was considering Raspbmc, but I’ve decided for OpenELEC, since it should support DVD playback and have the PVR stuff, so it should be more suitable for my needs. My ArchLinuxARM installation will be be used for the original purpose as a thin desktop. So, I needed another SDCARD. The 8 GB card which I had lying around already contained a RISCOS installation. I really should get some more cards, and perhaps another pi? Oh well… I should have another look at RISCOS. Anyhow… going to use that SDCARD. One thing I’ve noticed. RISCOS hangs on boot when the USB hard disk is connected. Apparently it doesn’t like Linux ext4 and swap partitions… or is it the PC-style partition table that’s causing the confusion. But the SD card also has a PC-style partition table, so I doubt that’s the problem. Anyhow, unplugging the disk and the system continues to boot. Backupping that sdcard and writing the OpenELEC image to it. Let’s see how it performs.

OpenELEC takes quite some time to boot, but well, it’s the first boot. Having to set the language to Dutch, and have a sensible 24 hours clock. AM/PM is just ugly as hell IMHO. Another thing, it actually shows the temperature. I suppose, on ArchLinuxARM I am supposed to install some kernel module to support it. But that’s just a minor detail I haven’t bothered to look after yet. Something more interesting, this build supports changing resolution on the fly, which XBMC on ArchLinuxARM did not.

Now, before I can test if it actually plays DVDs I still have to install the licenses to this image. I will also have to get it mount my NFS shares.

There is also an OpenELEC part in the XMBC configuration now. Nicely integrated. Per default, it appears to offer a SAMBA share. As none of my computers speaks SMB, I will disable it, and enable the SSH deamon. (Using different installations, thus different host keys, on the same machine… hmm… ) More interesting is the keyboard options. Does it mean on this XBMC I can actually type on the keyboard in stead of the on screen keyboard with alphabetic order layout. This appears indeed to be the case. The On Screen Keyboard is still in a silly alphabetical order layout.

But… once can notice this is a one-purpose distro. Just a media center. I mean… I don’t see an easy way to get a shell, except for over the ssh, for which it’s not even clear what login to use. I suppose it’s easier to use an my laptop to enter the license codes into the config.txt file. Looking at that config file, there are also licenses for DTS and DDP. (I’ve never heard of DDP anyways)

Anyways. Booting the Pi again, it seems to be able to play DVDs, even though it first appears to just mount the disc. I have to right click and select play dvd to make it work. Anyways it works… and I’ve already seen some DVB stuff in the interface…. so as soon as my DVB-T receiver arrives I can do some initial testing. If I am pleased with the DVB-T receiver, I will order a the real stuff, a DVB-S receiver and a cardreader. Anyhow…. mounting my other Pi over NFS, and scanning media again.

I have noticed I might need to make little changes to my files as some series/movies aren’t recognised correctly, at least so I’ve noticed on the Arch XBMC installation. Now I am scanning without the directory is movie name option, perhaps this gives better results.

Let’s continue where I’ve stopped yesterday, with writing at least, as there is still some stuff I’ve done which I haven’t written down yet.
Well… let’s see, where was I… so I wrote about installing xfce4 and qmmp and so. Well, we’ve got qmmp, we’ve got the nfs on the server Pi mounted. So let’s play some music, shall we? Well…. no…. no audio device found. The reason for this is that the audio driver was not loaded. So adding snd-bcm2835 to the modules to be loaded solved that problem.

The audio driver is loaded, but still no sound. I am using the HDMI->VGA adaptor. The only HDMI->DVI cable I’ve got is 5 meters long and rather this, so this is a clumsy cable. Therefore I am using a short thing VGA cable with that adaptor. It’s rather inefficient to connect a digital (flat) monitor over an analogue interface, but whatever. The problem is, this HMDI to VGA adaptor does pass through the EDID information from the monitor, however, it falsely claims to support audio, therefore the Raspberry Pi attempts to send the audio over the HDMI interface. So we have to force the analogue output.

This can be done using the following command

amixer cset numid=3 1

Well.. I have sound, but, it’s only mono.

Simple mixer control 'PCM',0
Capabilities: pvolume pvolume-joined pswitch pswitch-joined
Playback channels: Mono
Limits: Playback -10239 - 400
Mono: Playback -1500 [82%] [-15.00dB] [on]

Speaker test gives

[andre@rpi ~]$ speaker-test

speaker-test 1.0.26

Playback device is default
Stream parameters are 48000Hz, S16_LE, 1 channels
Using 16 octaves of pink noise
Rate set to 48000Hz (requested 48000Hz)
Buffer size range from 512 to 16384
Period size range from 512 to 16384
Using max buffer size 16384
Periods = 4
was set period_size = 4096
was set buffer_size = 16384
0 - Front Left
Time per period = 2,326930
0 - Front Left

On some forum. I’ve read a comment this may be caused by a bad cable, causing the Pi to detect only one of the speakers. I have tried headphones and my stereo tower, but still it says Mono. I cannot find where I’ve read this right now, but when searching I’ve found different answers to this problem. It seems this only means the mixer doesn’t support per channel volume control. Running speaker test telling it to use two speakers shows everything works as it should.


[andre@rpi ~]$ speaker-test -c 2

speaker-test 1.0.26

Playback device is default
Stream parameters are 48000Hz, S16_LE, 2 channels
Using 16 octaves of pink noise
Rate set to 48000Hz (requested 48000Hz)
Buffer size range from 256 to 8192
Period size range from 256 to 8192
Using max buffer size 8192
Periods = 4
was set period_size = 2048
was set buffer_size = 8192
0 - Front Left
1 - Front Right
Time per period = 5,663562
0 - Front Left
1 - Front Right

Another thing I’ve tried is to connect a CRT monitor to my HDMI->VGA adaptor. After all, VGA is an analogue interface, and makes much more sense for a real analogue monitor. The system boots up correctly immediately. It doesn’t have the first boot out of sync problem with my flat monitor. The CRT monitor is a 17″ Philips 107G5. One thing to notice is it comes up at 1280×720 with a refresh rate of 60 Hz. This is the “HD 720p60” resolution, right? The reason for this is that the resolution/refresh rate is within the supported range, and as it is an analogue monitor, it doesn’t have a “preferred” resolution.

Using the method for resolution setting as discussed before, the correct resolution can be set

tvservice -e="DMT 19"
fbset -xres 1024 -yres 768 -a

or through the /boot/config.txt file

# Philips 107G5
disable_overscan=1
hdmi_group=2
hdmi_mode=19
hdmi_drive=1

But, this brings me to my CubieBoard. As I mentioned, my Compaq 1720 flat monitor doesn’t accept the output from my CubieBoard. As I’ve understood from forums, it outputs 720p60. So I’ve connected the HDMI->VGA adaptor to the CubieBoard again, and booted it without µSD card. Android boots, and indeed shows output on the screen. So, I’ve verified it’s graphical output is working. However booting on the µSD card gave no graphical output yet. As mentioned before, it’s a possibility the kernel I’m using doesn’t have the framebuffer enabled. Anyhow, the hardware is fine, it’s a software problem.

Another problem that arised is the CubieBoard to fall out halfway during boot. I am using my Phone’s charger (850 mA) to power the Raspberry Pi, but it seems it’s not strong enough to power the CubieBoard with the HDMI output enabled. The CubieBoard ran fine without graphical output enabled. As I am using a powered USB hub. (Even though its power supply is 1 A for 4 USB ports, which should be 500 mA per port, so at least 2 A + power needs for the hub itself). So, I wonder if this is even allowed according to the USB specs. However, I plugged in the CubieBoard’s power cable into that hub, which is also against the USB specifications, to draw power from the bus without any USB logic reporting the amount of energy being drained, and getting approved by the USB host. Besides missing the USB logic it is also drawing over 500 mA, another violation of the USB specifications. So… this is blatantly violating the USB specifications, it seems to work.

Another thing that’s blatantly violating specifications is the OpenMAX implementation on the Raspberry Pi. This is the cause an OpenMAX enabled VLC build doesn’t work on the Raspberry Pi. But it’s not only the Raspberry Pi’s library fault. Even though the problem on the VLC part is rather small, being the filename of the library, being hard-coded for various implementations of OpenMAX, not including the Raspberry Pi’s filename.

Well… as I’ve builded VLC anyways, from the source tarball, I’ll write about doing that as well. Usually software is built through a PKGBUILD patching all problems away. So we call the configure script with the “–enable-omxil” parameter. As it complains about missing gl package, I’m also adding “–disable-glx”, as I’m interested in the OpenMAX plugin.

[andre@rpi vlc-2.0.5]$ ./configure --enable-omxil --disable-glx

VLC depends on LUA version 5.1, and won’t compile with 5.2. Since the filenames for LUA 5.1 are postfixes with their filenames, making a synlink to the un-postfixed is required to make the ./configure script find lua.

Anyhow… this explains why the Raspberry Pi version of XBMC doesn’t use OpenMAX but some custom integrated component on the Raspberry Pi. Anyhow I’ve installed omxplayer, but as it just writes the movie to the framebuffer, but doesn’t erase the borders, it’s not really an option for watching movies on the Pi, at least, not without some additional tools. So, I’m currently building the mentioned XBMC.

Trying to build XBMC (from AUR) showed some other problems. Namely, the /tmp is by default a tmpfs. This is like a RAMdisk in the old DOS days, a part of memory used as a file system. But it’s way too small to build XBMC. Therefore I’m using the hard disk as /tmp.

/home/tmp /tmp none bind 0 0

And now…. I am just waiting for it to finish compiling….. which can take ages… so perhaps one of my next projects is setting up distcc to perform the compiling on a faster machine. NOTE TO SELF: Finish configuring the Raspberry Pi Server first!!! It still needs a sane server, IPv6 configuration, git server, web server!!!

Anyhow speaking about this Media Center software, I also have this DreamBox DM-7000S. It was still running PLi 2009-06-27. Even though nothing new shows up in the opdates, it seems they’ve changed to OpenPLI. So I’ve flashed a new image into my DreamBox. So…. my software is again up to date. Apart from that I’ve swapped the SCART cable with the DVD player, now the snow I was getting is gone. But on the DVD player there is no slow either. I suppose it was just a bad contact.

I have been looking around for a new DreamBox, even though I don’t have a HD-TV, and I am not planning to get one either. But the regional channels are MPEG-4 encoded and so won’t work with the DM-7000S. Well… my dish isn’t aligned correctly for 23.5E anyways so I won’t receive the regional channels anyways. So, a DM-8000 is interesting, I’ve been looking at this for years, but the price is keeping me back. € 875 is a little too much for just a satellite receiver. Ok, there are cheaper stores, but € 819 is still rather high. Ok, there are cheaper DreamBoxes, but I want one that can decode MPEG-4 and offers recording to hard disk. The DM 8000 offers the possibility to install tuner modules so we can receive, apart from DVB-S/DVB-S2 also DVB-T or DVB-C.

Well… since I was looking at this XBMC stuff…. what about turning a Raspberry Pi into a complete Media Center including DVB. Cheap DVB-T receivers are available at DX.com. They seem to offer only one USB DVB-S receiver, but at it mentions only DVB-S and not DVB-S2, it’s not capable to receive HD channels as they use a different modulation. Looking around on the internet found me this receiver.

When thinking about tuning a Raspberry Pi into a satellite receiver, we need to think about the fact all Dutch TV Channels are encrypted. *sigh* Why do they have to do this? Most German channels are FTA for example. Anyhow, on my DreamBox I am using the integrated card reader, as the MatrixCAM Reloaded and MatrixCAM Revolutions, which I used to use in the past, on this and other receivers, show incompatibility issues with the new Smart Cards supplied by CanalDigitaal and freezes regulary, requiring the CA to be powercycled. Using the integrated Smart Card reader and a softcam CCcam the Smart Card works without problems.

Well… CCcam… it’s a proprietary piece of software… so it’s not ideal. There is OScam, which is open source, but it appears not to be available in the OpenPLi DM7000 repository, and since CCcam works, I keep using it. Well… the point is. CCcam can be used as a Softcam for my Smart Card. So adding USB Smart Card Readerto the list of required components for turning the Pi into a satellite receiver. It seems there also exist a multi card version.

If it would be required in the future to use an official CanalDigitaal CAM, USB CASes (1) (2) are also available. Also note it’s possible to program the MatrixCAMs with this devices, however I haven’t been able to locate an update for this. (I’ve looked for this back then when CanalDigitaal shipped those new Smart Cards having the compatibility issues, looking for a bugfix for the freezing problem)

So… it seems all pieces required to do this are available. Will they work together on a Raspberry Pi. And if I obtain a MPEG2 license for the Pi. MPEG is a rather nasty codec due all this license shit, but that’s what all this DVB stuff uses, unfortunately. And Broadcom also has to pay license fees for offering hardware decoding. I don’t agree with all this having to buy a license to unlock a hardware feature, I can understand the reason behind it.

Anyhow, it should be possible, from hardware point of view. From software point of view, the DVB-S2 receiver mentions Linux support. I have no clue about the DVB-T receiver. Also, I don’t know how CCcam or OScam would integrate with XBMC. Well I don’t know anything about XBMC. Hmmm…. I am forgetting something about XBMC. It would also need a remote control, right? DX.com offers remote controls for PCs but are they compatible with XBMC? Well… do I have everything now I need? (Speaking about remote control…. I still can’t find my DVD players remote.)

I’m just wondering, what’s the status of BlueRay on Linux? Is plugging in a BlueRay drive to a Pi an option with XBMC. Well… my USB DVD drive will work given I have the MPEG2 license.

Some more Pi

My second Raspberry Pi still powered on and connected to my LAN. That’s how I left to stack last Thursday. So, I SSH’ed into my first Pi, and from there, being inside my lan, I SSH’ed to my second Pi. Let’s do something with it, shall we? As this is a fresh installation, we have some configuration to be done. Let’s start with installing yaourt. On ArchLinuxARM we don’t need to add a repository like we should on regular ArchLinux.

[root@alarmpi ~]# pacman -S yaourt

As this Pi is connected to a screen, let’s get some graphical enviorement

[root@alarmpi ~]# pacman -S xorg xorg-apps xfce4 xfce4-goodies gdm

Note gdm seems to have some weird dependencies such as pulseaudio and flac. I assume because it makes some sound during login. I’ve tried lightdm instead but it doesn’t work on my Raspberry Pi.
Also base-devel is not installed, so we cannot compile anything, and the locale needs to be fixed, as I described in the other Pi installation, which I should also continue to write about. I have an unfinished post on concept for like…. ages. And I have a lot more to do on that other Pi… Anyhow, that’s all what I did last thursday, at least, to the Pi, as I went to the pub that night. It was 20 December after all, so, as the world was supposed to end the day after, it was my last chance to have some beers with friends.

So, 20 December 2012, I was at a pub until late at night. The result was I overslept the next day and missed the end of the world. And since I missed it, and was apparently still alive, I decided to continue playing around with that second Pi.

Since all the graphical stuff takes a lot of space, we should resize the file system to occupy the whole SD card. How to resize it is described on the ArchLinuxARM forum. It just tells you what to enter, but let’s take a look at what we’re actually doing


[root@alarmpi andre]# fdisk /dev/mmcblk0
Welcome to fdisk (util-linux 2.22.1).

Changes will remain in memory only, until you decide to write them.
Be careful before using the write command.

Command (m for help): d
Partition number (1-4): 2
Partition 2 is deleted

Command (m for help): n
Partition type:
p primary (1 primary, 0 extended, 3 free)
e extended
Select (default p): p
Partition number (1-4, default 2): 2
First sector (194560-31512575, default 194560):
Using default value 194560
Last sector, +sectors or +size{K,M,G} (194560-31512575, default 31512575):
Using default value 31512575
Partition 2 of type Linux and of size 15 GiB is set

Command (m for help): w
The partition table has been altered!

Calling ioctl() to re-read partition table.

WARNING: Re-reading the partition table failed with error 16: Device or resource busy.
The kernel still uses the old table. The new table will be used at
the next reboot or after you run partprobe(8) or kpartx(8)
Syncing disks.

We’re deleting the rootfs partition, and creating a new one. Since there is no space between the boot and the root partition in the first place, the new partition will start at the exact same position as the just deleted partition. This means, we’ve got a bigger partition, with a smaller filesystem in there.

We also observe the re-reading of the partition failed, since the partition is currently in use. Therefore we have to reboot in order for the new partition table to be known to the kernel. After reboot we can perform the resizing of the file system itself


[root@alarmpi andre]# resize2fs /dev/mmcblk0p2
resize2fs 1.42.6 (21-Sep-2012)
Filesystem at /dev/mmcblk0p2 is mounted on /; on-line resizing required
old_desc_blocks = 1, new_desc_blocks = 1
Performing an on-line resize of /dev/mmcblk0p2 to 3914752 (4k) blocks.
The filesystem on /dev/mmcblk0p2 is now 3914752 blocks long.

Now, we’re occupyting the whole SD card. So… setting up graphical enviorement. We’ve got some more disk space now, let’s install a browser.

[root@alarmpi andre]# pacman -S midori firefox
error: target not found: firefox

Hmmm…. firefox not found… apparently not in the repository. (Neither is thunderbird) More stuff I have to compile myself, just like I had to compile qemu. Perhaps I should really look into how to set up my own repository. For now, let’s install some other browsers.

[root@alarmpi andre]# pacman -S links midori netsurf

Links for when I am using a console. Perhaps I should better install elinks. Midori is a webkit browser. Should be fine for normal surfing but has some rough edges. At least last time I used it on my x86_64 machine. Netsurf, it is the default browser on the RISCOS image for the Raspberry Pi. That’s when I first heard of it.

Another this that cannot be missed on a graphical installation is an IRC client. Recently I have migrated from Xchat to Hexchat, since the latest Xchat release is over two years old. As Hexchat is in AUR, we need to compile it ourselves. While installing, I ran into the following error.

==> ERROR: hexchat is not available for the 'armv6h' architecture.
Note that many packages may need a line added to their PKGBUILD
such as arch=('armv6h').
==> ERROR: Makepkg was unable to build hexchat.
==> Restart building hexchat ? [y/N]
==> --------------------------------
==>

It happens on some packages. Note that AUR is meant for ArchLinux, and that ArchLinuxARM is just using their AUR. They could have set arch=(‘any’) and it would have compiled anyways, but i686 and x86_64 are the official supported architectures, therefore putting those in the arch array makes perfect sense. Just edit the PKGBUILD and add ‘armv6h’ to the arch array, and it will work fine. They should have used any. The specefic i686 and x86_64 should only be used for binary packages (skype, dropbox, opera and other proprietary someware *shiver*) or software written in assembly (not aware of any)

Compiling takes long, especially on an ARM board. Therefore, during compiling I decided to install some more software. Qmmp is the music player I usually use on my Linux boxes. I used to use xmms in the past, but it being a gtk1 application, it’s considered a dinosaur. Some distros ditched it years ago, but Arch still has it in its repository.

But doing this on a Raspberry Pi Model B Revision 1, with only 256 MB of shared RAM, well…. it ran out of RAM, and both terminals were closed. (My XFCE was running already) I need to connect a USB Hard Disk with a swap file and home partition. Compiling stuff on a SD card, it’s not a wise thing to do. Too many writes and a limited number of write cycles. I would like to use the SD for a little longer.

I know it’s not wise, but I’ve tried another attempt building hexchat, this time, not doing other things with the Pi during the build.

==> Tidying install...
-> Purging unwanted files...
-> Compressing man and info pages...
-> Stripping unneeded symbols from binaries and libraries...
-> Removing libtool files...
==> Creating package...
-> Generating .PKGINFO file...
-> Adding install file...
-> Compressing package...
bsdtar: Failed to set default locale
xz: (stdin): Cannot allocate memory
bsdtar: usr/share/locale/lv/: Write error
==> ERROR: Failed to create package file.
==> ERROR: Makepkg was unable to build hexchat.
==> Restart building hexchat ? [y/N]
==> --------------------------------
==>

So, it actually finished, but ran out of memory during the package creation. We really need that hard disk… But…. what hard disk to use? I have three external hard disks connected to my server Pi, but they’re in use. I have one more external HD. I wasn’t sure what was on it, but… there is stuff on it, and it’s full. A 500 GB Hard Disk… Backing the data up to my desktop… well… all it’s hard disks are smaller. One hard disk, containing a Windows 8 Developer Preview and an OpenIndiana installation, but mostly unpartitioned space. OpenIndiana isn’t really usefull on that machine, and I haven’t booted it since… long ago. And well… Windows… I don’t think I need to explain. So… that hard disk had been extracted from my desktop (blaatkonijn) and connected using a USB-IDE adaptor.

I’ve recently ordered an USB->IDE/SATA at dx.com. It looks exactly like my USB->IDE except for the SATA connector at the top. My USB->IDE power supply came with a switch in the cable, which the USB->IDE/SATA one lacked. More overly it came with a type B power plug.


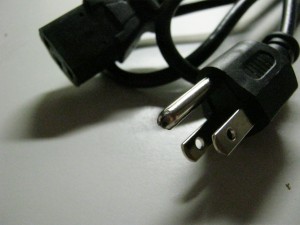
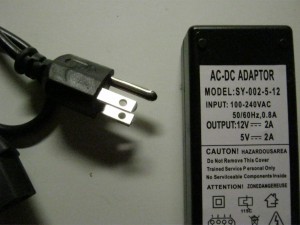
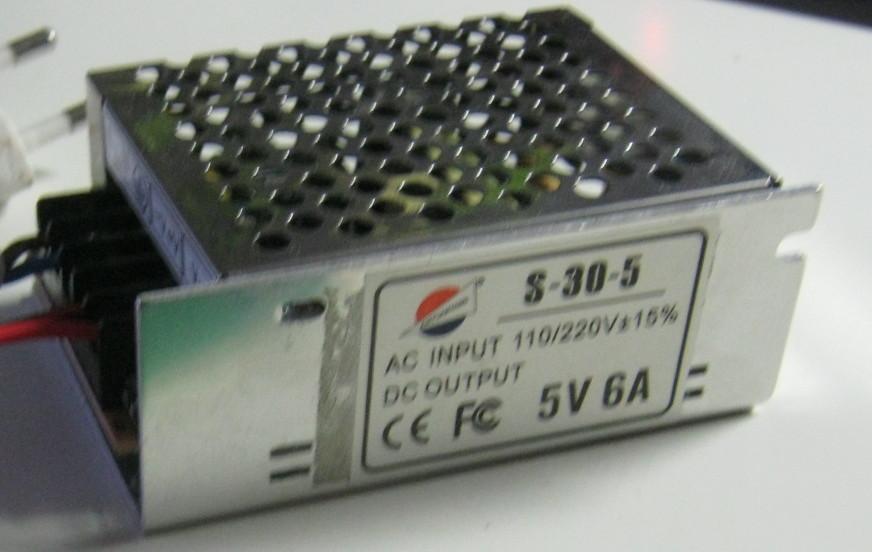
Even though it comes with a type B power plug, mostly used in the United Stated (120 VAC) and Japan (100VAC), the power adaptor says 100-240 VAC, so just connecting a different cable should do the trick. Still I was a little suspicious, as when inserting the power cable, it made this clack noise as if its initial current was rather high. Therefore I have verified the output voltages with a multimeter before connecting any hard disks to it. This is something I’ve done a few weeks ago.

Anyhow, I’ve decided to use that power adaptor, as I don’t need the switch, and I started to parition it. GParted refused to start, due incorrect locale. The locate problem, for now, I just did a export LC_ALL="C", but this was another problem that needed to be fixed. Well… GParted working on C locale. How big should I make the swap partition? I’ve made it 8 GB. It’s insane, but better too much then too little, and the rest of the disk as home partition.

As I am configuring my fstab anyways, let’s take care of my network mounts as well.

[root@alarmpi andre]# pacman -S nfs-utils

This results in the following entries added to my fstab


UUID=5d44c79b-7fc0-4711-a9f5-73dcaea98275 swap swap defaults 0 0
UUID=839de469-ef9d-48a7-aedd-d2a6b05f1a5f /home ext4 defaults 0 2

rpi-server:/srv/nfs4/1000 /mnt/1000 nfs defaults 0 0
rpi-server:/srv/nfs4/1500 /mnt/1500 nfs defaults 0 0

At first I put nfs4, but it didn’t work yet, so I am using nfs3 instead. Looking at my other machines, they’re also using nfs3, so that’s consitent with the rest of my installation. I should look at how to migrate to nfs4, but nfs3 is good enough for now.

Why did I mention that power adaptor? Well… it went poof and blew my fuse after operating for a while. At least, I blaim that thing for my blews fuse, as it was rather hot and smelled burnt, and I had a feeling about it since I got it. Hooray, I had a little mini tiny apocalypse, a blown fuse.

Connecting my other power supply, the one with the switch, which came with this USB->IDE adaptor, everything works fine. This power supply remains at a normal temperature, and has been running for quite a while without problems. However, now I don’t have any power supply for the other USB->IDE/SATA adaptor.

As this post is getting lengthy, this is where I stop. More will follow in a next post, as there are some more things I’ve encountered. I mean, a lot has happened while waiting for the world to end. Also, a package with a 5¼” floppy drive I’d bought on ebay arrived

Last friday, my CubieBoard arrived. I only had time today to play around with it. First of all, it turned out to be a 512 MB version. I was under the impression the CubieBoards from the Indiegogo campaign were the 1 GB version.

Anyhow, let’s get started. Since it is an Allwinner A10 based device, it *should* work as follows:
Prepare the SD card as for a Mele A100 and replace the script.bin file with the adequate version.
The script.bin file is a compiled fex file, using the fex2bin tool. It should be somewhere in that git repository as well, but there is an AUR package so just install sunxi-tools-git and there we go.

The package included an USB to 3.3 Volt serial cable. How to connect it however? A little looking around finds me the answer.

DSC_0002

Connected to the serial console… nothing!!! Nothing at all.

Now…. I have been stupid. I had another USB-to-Serial adaptor inserted to my compyter, connected to an (unpowered) BeagleBoard. No wonder I saw nothing
on the serial connection!

So… connected to the correct serial port, I see an u-boot prompt, the usual countdown till boot. And booting the kernel. However…. the kernel isn’t very happy about the board

The ArchLinux kernel is OOPSing… also, it detects 512 MB of RAM. This was supposed to be the 1 GB version of the CubieBoard, wasn’t it?
I have installed the script.bin for the 1 GB version. Perhaps that’s why it is having trouble? Replacing the script.bin file didn’t solve the issue.

I’ve downloaded a cubieboard specific boorloader/kernel from linux-sinxi which boots the board correctly. So, the board boots… however, using a kernel out of repository. I’m not that happy about having files in my filesystem pacman isn’t aware of.
Another issue with using this kernel is there are no kernel headers, so compiling kernel modules will be a problem as well.

So far so good, I’ve got a login prompt at the serial console. The system boots. Connecting the HDMI output to my DVI-D monitor doesn’t give me an output however. I will probably have to configure it somewhere. In the meantime, let’s look at some other stuff.

I’ve bought an HDMI -> VGA adaptor. Since my (second) Raspberry Pi is known to be working with my display, on it’s DVI-D input, I’ve decided to hook it up over VGA with the adaptor. This second Pi is not configured yet, just having (almost) unused image on it.

On boot, the monitor reports Out Of Range. This probably means the EDID information from the screen isn’t correctly passed through the HDMI interface, causing the Pi to select an unsupported resolution/refresh rate.

Of course it is possible to force a specific resolution in the config tile in the boot partition, but I consider this an ugly practice. So, software controlled resolution changing it is. It was a little work to figure this out, as it requires two separate tools to perform this action.

First there is fbset, a tool to configure the framebuffer. (Install package fbset)

Just setting

fbset -xres 1280 -yres 1024

doesn’t work. Therefore I have connected the monitor over DVI-D input again, and tried changing the resolution on a working screen. Even through the tool reports a different resolution, the content of the screen tells otherwise.

A little searching on the internet points me to a tool called tvservice. I have no idea to which package it belongs, it appears to be located in /opt/vc/bin. This directory is not in the path. It’s linked against libraries in /opt/vc/lib, which is also not in the library path. So, to tell ld to also look for libs there. (Note: temporary solution, also LD_LIBRARY_PATH was empty, otherwise I would have been replacing it with the command below)

export LD_LIBRARY_PATH=/opt/vc/lib

To list supported display modes

[root@alarmpi bin]# ./tvservice -m DMT
Group DMT has 8 modes:
mode 4: 640×480 @ 60Hz, progressive
mode 6: 640×480 @ 75Hz, progressive
mode 9: 800×600 @ 60Hz, progressive
mode 11: 800×600 @ 75Hz, progressive
mode 16: 1024×768 @ 60Hz, progressive
mode 18: 1024×768 @ 75Hz, progressive
mode 35: 1280×1024 @ 60Hz, progressive
mode 36: 1280×1024 @ 75Hz, progressive

To change resolution:

[root@alarmpi bin]# ./tvservice -e=”DMT 35″

This, indeed, does chnage the output resolution/refresh rate, however, it just outputs a blank screen. In order for it to work, afther changing the resolution with tvservice, the fbset command is required. Then it appears to work.

In the meantime, I have been thinking about other caused for this behaviour. I have heard about issues with similar adaptors in combination with the BeagleBoard. As the device is powered from the HDMI interface, it draws current from it. The current requirements were too high for the BeagleBoard, requiring a polyfuse to be replaced by a bigger one on the Beagle.

So, in order to test the device, I’ve hooked it up to the HDMI output of my laptop. The laptop (HP EliteBook 8530w) does not see the monitor connected. Not at all. At the moment when I unplugged the device, something funny happened.

Anyhow, seeing the results on the changing resolution on the Pi made me decide to give it another try. Surprisingly, this time it just worked out-of-the-box. I didn’t have to change any settings, the correct resolution was used right away.

I suspect the case was causing trouble again. There is this plastic case around my Pi, and the hole is just big enough for the metal part of the HDMI connector to pass through, however, the part where you hold the plug is against the cover, therefore, not allowing the plug go in as far as it normally would. This can cause some bad connection. Perhaps that’s what went wrong the first time. My usual HDMI->DVI-D cable has also bad contact issues, but it causes no signal.

This no-signal situation is what caused me to look into the online changing the output settings of the screen in the first place, as I don’t feel like rebooting until the damn plug makes contact.

However, I still have not verified the passing through of the EDID code. It could be that this tvservice is playing with me, and storing the resolution in the config file in the boot partition. It would not be neat if it did that, and I could just verify if the config file is untouched. Let’s assume for now, it just passed through the EDID as it should have.

Anyhow…. that was my Pi for today. I will have to look at the CubieBoard again, see how to make it generate some output on that screen. At least it boots, so it’s probably just a matter of configuration. And that’s going to be a little harder on the CubieBoard. The community is a lot smaller then the Raspberry Pi community, and AllWinner isn’t giving away much documentation about its SoC.

If it’s about documentation, a TI SoC is to be recommended I believe. I haven’t been reading much documentation myself, but that’s what I’ve been hearing. I still have that BeagleBoard C3 lying around. It’s that damn USB problem that’s keeping me from using it…. I should have returned it right away… I should… but back in the days I assumed it was a software issue and waited for a new kernel.

Well… the BeagleBoard, BeagleBoard-xM and BeagleBone are a little more expensive then Raspberry Pi and CubieBoard. I guess they’re also targeted at a different audience. Let’s just say, I’ve ordered a Raspberry Pi in the UK, I’ve ordered a CubieBoard in China, and a BeagleBoard in the USA. For the BeagleBoard I had to send a verification about the intended use to the American customs. Seriously!

P.S. Another funny observation: When unplugging the CubieBoard from its power source while connected to the supplied USB to serial cable, the power led remains lit (dimmed, but still emitting light)

So, now I have ran fsck -f on all usb hard disks, just to be sure the file systems are not corrupted. I am aware there is probably some corrupt data on those disks, due the unstable USB bus on the BeagleBoard.

Well… plug everything in and boot up the system. The Raspberry Pi has two USB ports. I am currently using only one of them. I have connected a 4 port powered USB hub, to which I have connected the three hard disks, and another, bus powered, 4 port hub. To this hub I have connected my printer (HP Deskjet 895Cxi). This printer used to cause the BeagleBoard to crash all the time. It’s from the early USB-era, and therefore it might be not fully USB-complaint. However, I hope it won’t cause any problems on the Raspberry Pi. (I will have to repair my HP Deskjet 3320, but that’s another topic)

So… we got to configure the mount points. As I said, this will be done using their UUIDs. To see them, use the command blkid

# blkid
/dev/mmcblk0: PTTYPE=”dos”
/dev/mmcblk0p1: SEC_TYPE=”msdos” UUID=”A697-C157″ TYPE=”vfat”
/dev/mmcblk0p2: UUID=”f9e11351-e87a-4df2-a9be-27f03d215329″ TYPE=”ext4″
/dev/sda1: LABEL=”Extern1000″ UUID=”74afebc6-5b3f-4306-82dc-b164f4185aa3″ TYPE=”ext4″
/dev/sdb1: UUID=”577e2053-b83e-45d3-bad6-355475d07c36″ TYPE=”ext4″
/dev/sdb2: UUID=”effa82e7-ccc6-4d27-98d1-1aa255a702f3″ TYPE=”swap”
/dev/sdc1: LABEL=”Extern1500″ UUID=”30a34cab-aaf9-4c75-b63b-4e196cf8ef66″ TYPE=”ext4″

This translates to the following lines in /etc/fstab

UUID=74afebc6-5b3f-4306-82dc-b164f4185aa3 /mnt/1000 ext4 defaults 0 2
UUID=30a34cab-aaf9-4c75-b63b-4e196cf8ef66 /mnt/1500 ext4 defaults 0 2
UUID=577e2053-b83e-45d3-bad6-355475d07c36 /home ext4 defaults 0 2
UUID=effa82e7-ccc6-4d27-98d1-1aa255a702f3 swap swap defaults 0 0

However, looking at the already present lines, I am not sure if I am completely happy with them.

devpts /dev/pts devpts defaults 0 0
shm /dev/shm tmpfs nodev,nosuid 0 0
/dev/mmcblk0p1 /boot vfat defaults 0 0

Seeing the root file system is not present, and the boot file system has last parameter 0, meaning, the content of the SD card will never be checked for errors. I don’t know if this is the desired behaviour. So, I will change it to:

UUID=f9e11351-e87a-4df2-a9be-27f03d215329 / ext4 defaults 0 1
/dev/mmcblk0p1 /boot vfat defaults 0 1

and reboot… after a while, the system comes up, looking at the output of the mount command, everything seems to be mounted as it should. However… looking at

/dev/root on / type ext4 (rw,relatime,user_xattr,barrier=1,data=ordered)

I wonder weather it is fsck’ed during boot…

Sooo, let’s see what still has to be done: make user accounts, install cups, perhaps sane, perhaps an http and sql server (as they ran on the BeagleBoard as well), transmission-deamon, and more.

Originally I intended to also run an IRC server on my BeagleBoard, but due instabilities I have stopped doing so. If this board is stable, I guess I will try again. Another project I started, which I now may continue a lot easier due the changed in ArchLinux is getting Dropbox to run. Now, it’s quite easy to generate a base system using pacstrap. As I believed not having a complete base system was the reason my previous attempt on the BeagleBoard failed.

However, I am forgetting one of the tasks the Raspberry Pi should take care about, my IPv6 tunnel. Since back when I configured my BeagleBoard, systemd has been introduced, but it appears the wiki hasn’t been updates, and still tells me to make the script and put it in the /etc/rc.conf file.

Now, let’s get started with NFS, right? Well… first things first… this configuration is supposed to replace the BeagleBoard. As mentioned, I have occidentally overwritten its SD card. This also means I cannot access its current configuration.

I cannot login to the device anymore over ssh or serial connection due incorrect content of the root filesystem. However the NFS server is still serving perfectly fine. Since I cannot login, I cannot gracefully unmount the filesystems. The point is, I am listening to music. The music is on the USB hard disks connected to the BeagleBoard, which I will have to shut down in order to connect them to the Raspberry Pi to configure the mount points. If I could access the old configureation, I could just copy over the entries in /etc/fstab.

I will be using UUIDs to identify the partition to mount, as, when using USB, I cannot predict which device name it will have. I mean, if I disconnect, and reconnect the hard disks on a different USB port, I wish not to have to change the configuration. Therefore I will use UUIDs so no matter what device name it gets, it will work. So, let’s delay configuring the mount points to a later point. We will configure the mount points (same as currently on the BeagleBoard):

/mnt/1000 : 1000 GB USB HARD DISK, DATA
/mnt/1500 : 1500 GB USB HARD DISK, DATA
/home : 250 GB USB HARD DISK, HOME PARTITION

If I just create the directories, the rest of the procedure should work, and the actual hard disks can be added later. Let’s install the NFS software. Also… let’s install vim, the editor I am used to, as it isn’t installed by default in an ArchLinux installation (vi and nano are)

# pacman -S nfs-utils vim

For security reasons, we will set up an nfs root

# mkdir /srv/nfs4
# mkdir /srv/nfs4/1000
# mkdir /srv/nfs4/1500
# mkdir /srv/nfs4/andre

and add the following to /etc/fstab

/mnt/1000 /srv/nfs4/1000 none bind 0 0
/mnt/1500 /srv/nfs4/1500 none bind 0 0
/home/andre /srv/nfs4/andre none bind 0 0

and set up the exports in /etc/exports

/srv/nfs4/ 192.168.178.1/24(rw,fsid=0,no_subtree_check)
/srv/nfs4/1000 192.168.178.1/24(rw,no_subtree_check,nohide)
/srv/nfs4/1500 192.168.178.1/24(rw,no_subtree_check,nohide)
/srv/nfs4/andre 192.168.178.1/24(rw,no_subtree_check,nohide)

To start the nfs server, just now

# systemctl start nfsd.service rpc-idmapd.service rpc-mountd.service rpcbind.service

Verifying the exports from my desktop machine:

$ showmount -e 192.168.178.49
Export list for 192.168.178.49:
/srv/nfs4/andre 192.168.178.1/24
/srv/nfs4/1500 192.168.178.1/24
/srv/nfs4/1000 192.168.178.1/24
/srv/nfs4 192.168.178.1/24

Since this looks fine, I can enable startup during boot using

# systemctl enable nfsd.service rpc-idmapd.service rpc-mountd.service rpcbind.service

This is the new way of configuring services at boot, as compared to the old /etc/rc.conf method.

So, I guess it’s about time to shut down the BeagleBoard and replace it by the Raspberry Pi. Even though there are some more services to be configured, such as my IPv6 tunnel, printer server, scanner server, and so on. As I am unable to gracefully shut the BeagleBoard down, and due its instability, I guess I’d better fsck all the external hard disks before putting them online in the new configuration.

One thing to verify before proceeding is to verify the Raspberry Pi boots up headless, and I’ve heard this might be an issue. However, the system comes up perfectly fine.

In order to listen some music while these operations are in progress, I will revert to vinyl. The real way to listen to music ;)
PS. I bought this record last wednesday. It’s awesome to see new music appear on vinyl only ;)