Tag Archive: archlinux


There are no compilers installed on the system yet, so let’s do something about it, right? I mean, what is a Linux machine without compilers?

[andre@rpi-server ~]$ yaourt -S base-devel

I once wrote about dropbox, and tried to get it working on my BeagleBoard. Now, dropbox is proprietary software. I hate proprietary software you know. Actually, why would I trust some binary blob running on my system. It might be doing god knows what. Not showing your source? What are you trying to hide? Anyhow, the problem is the fact dropbox is only available as binaries, compiled for either x86 or x86_64, and we are on a armv6h system. So, we got to emulate x86 (or x86_64). For this purpose I suggest qemu, which is able to run linux elf binaries compiled for other systems, provided the required libraries are available.

My last attempt on my BeagleBoard wasn’t really successful, but that might be due the fact I didn’t have a full base system for the emulated architecture. With the new ArchLinux installation method, basically creating a base system using the pacstrap program, I should be able to setup a working system.

Now, the next problem is, qemu is not in the ArchLinuxARM repository

[andre@rpi-server ~]$ yaourt -Ss qemu
extra/vde2 2.3.2-2
Virtual Distributed Ethernet for emulators like qemu
community/libvirt 1.0.0-3
API for controlling virtualization engines
(openvz,kvm,qemu,virtualbox,xen,etc)
The URL http://aur.archlinux.org/rpc.php?type=search&arg=qemu returned error : 301

Looking at the last line, it appears the request to search the AUR is failing. However, 301 is not an http error code, but a redirect. The aur repository should be accessed through https and not http. We can fix this by setting AURURL="https://aur.archlinux.org" in /etc/yaourtrc

[andre@rpi-server ~]$ yaourt -Ss qemu
extra/vde2 2.3.2-2
Virtual Distributed Ethernet for emulators like qemu
community/libvirt 1.0.0-3
API for controlling virtualization engines
(openvz,kvm,qemu,virtualbox,xen,etc)
aur/aqemu 0.8.2-2 (0)
QEMU GUI written in Qt4

Now, we got results from AUR as well… but still no qemu. Last time I just grabbed the source from the qemu site and compiled that, but this time, I am going to build a package and install it through pacman.

Well, if there is no binary package, perhaps we can go through ABS (Arch Build System) and build the package ourself. So let’s look up how it works, shall we?

[andre@rpi-server ~]$ man yaourt
man: can’t set the locale; make sure $LC_* and $LANG are correct

Hmmm? what’s that? can’t set the locale?

[andre@rpi-server ~]$ locale
locale: Cannot set LC_CTYPE to default locale: No such file or directory
locale: Cannot set LC_MESSAGES to default locale: No such file or directory
locale: Cannot set LC_ALL to default locale: No such file or directory
LANG=en_US.UTF-8
LC_CTYPE=”en_US.UTF-8″
LC_NUMERIC=”en_US.UTF-8″
LC_TIME=”en_US.UTF-8″
LC_COLLATE=C
LC_MONETARY=”en_US.UTF-8″
LC_MESSAGES=”en_US.UTF-8″
LC_PAPER=”en_US.UTF-8″
LC_NAME=”en_US.UTF-8″
LC_ADDRESS=”en_US.UTF-8″
LC_TELEPHONE=”en_US.UTF-8″
LC_MEASUREMENT=”en_US.UTF-8″
LC_IDENTIFICATION=”en_US.UTF-8″
LC_ALL=

No such file or directory? We’re missing something here! It seems, in the rootfs image for Raspberry Pi, the locate isn’t set up
correctly. In /etc/locate.conf the language was set to LANG=en_US.UTF-8, however, it was never generated, since /etc/locale.gen isn’t configured, all
possible langauges were still commened out. Removing the comments for en_US.UTF-8 UTF-8 and nl_NL.UTF-8 UTF-8 and running locale-gen

[root@rpi-server andre]# locale-gen
Generating locales…
en_US.UTF-8… done
nl_NL.UTF-8… done
Generation complete.

Problem solved! Right, were where we, yes, compiling from ABS. Seems adding a

[andre@rpi-server ~]$ yaourt -Sb qemu

Gives me a not found too, so using ABS directly isn’t going to work either. So, what we’re going to do is get the PKGBUILD from the regular ArchLinux repository and build that.

[andre@rpi-server ~]$ wget http://mirrors3.kernel.org/archlinux/sources/packages/qemu-1.2.0-1.src.tar.gz

[andre@rpi-server ~]$ tar -xvf ./qemu-1.2.0-1.src.tar.gz

Edit the BUILDPKG file and add armv6h to the arch= array, (alternatively call makepkg with the -A option to ignore the architecture) and start buildpkg

[andre@rpi-server qemu]$ makepkg
==> Making package: qemu 1.2.0-1 (Tue Nov 20 21:01:34 GMT 2012)
==> Checking runtime dependencies…
==> Missing Dependencies:
-> sdl
-> alsa-lib
-> nss
-> bluez
-> vde2
-> libpulse
-> seabios
-> libcap-ng
==> Checking buildtime dependencies…
==> Missing Dependencies:
-> texi2html
==> ERROR: Could not resolve all dependencies.

Okay, missing some dependencies. If we were running through yaourt, it would install the missing dependencies for me. But let’s just install what it tells me to install.

[andre@rpi-server qemu]$ yaourt -S texi2html sdl alsa-lib nss bluez vde2 libpulse seabios libcap-ng

error: target not found: seabios

We discover seabios is not in the ArchLinuxARM repository either. However this is a noarch package, so we can just take it from the regular ArchLinux repository.

[andre@rpi-server qemu]$ yaourt -U http://mirrors3.kernel.org/archlinux/extra/os/x86_64/seabios-1.7.0-1-any.pkg.tar.xz

Now, we’re ready to build. Since this may take a while… let’s run it in a screen. Since this was a new installation, screen was not yet installed

[andre@rpi-server qemu]$ yaourt -S screen

and here we go!

[andre@rpi-server qemu]$ makepkg
==> Making package: qemu 1.2.0-1 (Tue Nov 20 21:35:20 GMT 2012)
==> Checking runtime dependencies…
==> Checking buildtime dependencies…
==> Retrieving Sources…
-> Found qemu-1.2.0.tar.bz2
-> Found 65-kvm.rules
==> Validating source files with md5sums…
qemu-1.2.0.tar.bz2 … Passed
65-kvm.rules … Passed
==> Extracting Sources…
-> Extracting qemu-1.2.0.tar.bz2 with bsdtar
==> Removing existing pkg/ directory…
==> Starting build()…

Since this is going to take for a while, just detach the screen, and tomorrow we’ll see if it worked

Something I might want to look into is cross-compiling, and not just compiling, but also to build the package. makepkg doesn’t appear to have an option for target architecture. Well, only in it’s configuration file, but as it doesn’t appear to have support for cross compiling by itself, I doubt if it will work if I just change the main config file.

I have been searching the ArchLinux wiki for cross compiling packages, without any luck yet. Perhaps I will find something on the ArchLinuxARM wiki, but not today. PS. I might consider setting up a repo for hosting qemu packages, but I need to collect more info what’s involved in doing so.

I mentioned using the gutenprint driver for my HP Deskjet 895Cxi printer. This driver is causing issues, I’ve been experiencing for quite a while. The first page it prints is often corrupted, and looks like this

The tail of /var/log/cups/error_log looks like

W [19/Nov/2012:15:48:24 +0100] [CGI] Missing NickName and ModelName in /usr/share/cups/model/foomatic-db-ppds/KONICA_MINOLTA/KOC451JX.ppd.gz!
W [19/Nov/2012:15:48:24 +0100] [CGI] Missing NickName and ModelName in /usr/share/cups/model/foomatic-db-ppds/Epson/eplp850c.ppd.gz!
W [19/Nov/2012:15:48:24 +0100] [CGI] Missing NickName and ModelName in /usr/share/cups/model/foomatic-db-ppds/Epson/eplp950c.ppd.gz!
W [19/Nov/2012:15:48:24 +0100] [CGI] Missing NickName and ModelName in /usr/share/cups/model/foomatic-db-ppds/Epson/eplp980c.ppd.gz!
W [19/Nov/2012:15:48:24 +0100] [CGI] Missing NickName and ModelName in /usr/share/cups/model/foomatic-db-ppds/Epson/eplp920c.ppd.gz!
W [19/Nov/2012:15:48:24 +0100] [CGI] Missing NickName and ModelName in /usr/share/cups/model/foomatic-db-ppds/Epson/eplp9100.ppd.gz!
W [19/Nov/2012:15:48:24 +0100] [CGI] Missing NickName and ModelName in /usr/share/cups/model/foomatic-db-ppds/Epson/eplp960s.ppd.gz!
W [19/Nov/2012:15:48:24 +0100] [CGI] Missing NickName and ModelName in /usr/share/cups/model/foomatic-db-ppds/Epson/eplp830c.ppd.gz!
W [19/Nov/2012:15:48:24 +0100] [CGI] Missing NickName and ModelName in /usr/share/cups/model/foomatic-db-ppds/Epson/eplp880c.ppd.gz!
W [19/Nov/2012:15:48:24 +0100] [CGI] Missing NickName and ModelName in /usr/share/cups/model/foomatic-db-ppds/Brother/BR5070DN_GPL.ppd.gz!
E [19/Nov/2012:15:48:25 +0100] [cups-driverd] Bad driver information file “/usr/share/cups/model/foomatic-db-ppds/Kyocera/ReadMe.htm”!
E [19/Nov/2012:15:48:26 +0100] [cups-driverd] Bad driver information file “/usr/share/cups/drv/cupsfilters.drv”!
~

As these files do not involve the printer I am interested in, I can remove these files, and I am able to use the hpijs or hpcups driver, which don’t have the issue I am experiencing with the gutenprint driver.

Please note: This is happening on the cups on my desktop computer, as it locally renders and sends the rendered data to the cups server running on the Raspberry Pi. However, it should apply to any CUPS installation.

After migrating my ArchLinux from sysvinit to systemd, I’ve noticed my X screen to be at tty1 in stead of the usual tty7. At that point, I didn’t realise the consequences of this, until this morning. Yesterday I’ve run updates in my system, and this morning, the GUI wouldn’t come up. It turned out to be an Xorg problem. However, in the old situation, I would simply see a login prompt on tty1. But since tty1 would now turn into the X screen, all there is to see are some messages that appeared during boot, and then nothing, the system appears to hang, until I switch to another tty, where I see my usual login prompt.

The problem, the nvidia driver updated to nvidia 310.19-2. In the log messages appears

[ 10.500692] nvidia: module license ‘NVIDIA’ taints kernel.
[ 10.500701] Disabling lock debugging due to kernel taint
[ 10.536285] NVRM: The NVIDIA GeForce 6200 GPU installed in this system is
NVRM: supported through the NVIDIA 304.xx Legacy drivers. Please
NVRM: visit http://www.nvidia.com/object/unix.html for more
NVRM: information. The 310.19 NVIDIA driver will ignore
NVRM: this GPU. Continuing probe…
[ 10.536462] NVRM: No NVIDIA graphics adapter found!

Therefore I am not so pleased with this Xorg on tty1 thing. I believe that in the old sysvinit situation I would even get a message about there being an X problem, but now, the system appears to hang.

Also… how to fix the problem? I could install nvidia-304xx, but why am I using the tainted nvidia driver anyways in stead of the open source nouveau? I believe this had something to do with the nivdia control panel, as back when I installed the machine, I wasn’t familiar with the xrandr tool to configure my TV-out correctly.

Removing the old driver doesn’t work due dependencies:

[root@blaatkonijn andre]# pacman -R nvidia nvidia-utils
checking dependencies…
error: failed to prepare transaction (could not satisfy dependencies)
:: freeglut: requires libgl
:: glu: requires libgl
:: gnome-session: requires libgl
:: lib32-libgl: requires libgl
:: libva: requires libgl
:: mesa: requires libgl
:: mplayer: requires libgl
:: qemu: requires libgl
:: qt: requires libgl
:: webkitgtk2: requires libgl
:: webkitgtk3: requires libgl
:: wxgtk: requires libgl
:: xorg-xdriinfo: requires libgl

Another approach, to tell pacman to install the nouveau driver won’t work either. Pacman detects a conflict, two packages providing the libgl, which caused the problem mentioned above.

[root@blaatkonijn andre]# pacman -S nouveau-dri xf86-video-nouveau
resolving dependencies…
looking for inter-conflicts…
:: libgl and nvidia-utils are in conflict. Remove nvidia-utils? [y/N] y
error: failed to prepare transaction (could not satisfy dependencies)
:: nvidia: requires nvidia-utils=310.19

So, the correct way to switch from nvidia to nouveau is to remove nvidia, but leave nvidia-utils, and then install the nouveau driver.

[root@blaatkonijn andre]# pacman -R nvidia
checking dependencies…

Targets (1): nvidia-310.19-2

Total Removed Size: 3,88 MiB

Do you want to remove these packages? [Y/n]
(1/1) removing nvidia [######################] 100%
[root@blaatkonijn andre]# pacman -S nouveau-dri xf86-video-nouveau
resolving dependencies…
looking for inter-conflicts…
:: libgl and nvidia-utils are in conflict. Remove nvidia-utils? [y/N] y

Targets (4): libgl-9.0.1-1 nvidia-utils-310.19-1 [removal]
nouveau-dri-9.0.1-1 xf86-video-nouveau-1.0.4-1

Total Download Size: 13,05 MiB
Total Installed Size: 49,96 MiB
Net Upgrade Size: -18,14 MiB

Proceed with installation? [Y/n] y
:: Retrieving packages from extra…
libgl-9.0.1-1-x86_64 4,8 MiB 423K/s 00:12 [######################] 100%
nouveau-dri-9.0.1-1… 8,1 MiB 423K/s 00:20 [######################] 100%
xf86-video-nouveau-… 69,8 KiB 426K/s 00:00 [######################] 100%
(3/3) checking package integrity [######################] 100%
(3/3) loading package files [######################] 100%
(3/3) checking for file conflicts [######################] 100%
(4/4) checking available disk space [######################] 100%
(1/1) removing nvidia-utils [######################] 100%
(1/3) installing libgl [######################] 100%
(2/3) installing nouveau-dri [######################] 100%
(3/3) installing xf86-video-nouveau [######################] 100%
==> make sure you use KernelModeSetting (KMS)
==> see http://wiki.archlinux.org/index.php/Nouveau#KMS for more

I think it feels kinda weird for the nvidia package to depend on nvidia-utils in stead of the other way around.

But… X still doesn’t start. This is because the nvidia driver was still listed in /etc/X11/xorg.conf. Removing the file, leaving X in auto configuration mode, solves the problem. However, it takes quite a while to lead, while there are no messages to my console during that time. I suppose this is some kind of configuration issue. Shutdown also appears to hang, but it could also be I just have to waaaaaait a little longer.

Just after getting my desktop running again for a few days, it seems it’s causing me troubles again. But I guess I’ll have to look at them another time. I’ve got to spend some time on my study, I’ve got a few papers to read.

edit: Even though the login screen comes up, after entering password, it doesn’t start my desktop environment. This seems to be related to an issue with dbus. Starting my X session manually using xinit works fine. Buuuut… I am procrastinating again, I should be reading papers.

Now, updating my desktop and laptop’s configuration to mount the Raspberry Pi. On my desktop this didn’t cause any problems, however on my laptop it caused the following proglem:

$ mount /mnt/rpisrv
mount.nfs: rpc.statd is not running but is required for remote locking.
mount.nfs: Either use ‘-o nolock’ to keep locks local, or start statd.
mount.nfs: an incorrect mount option was specified

The troubleshooting on the Arch Wiki says to change the NFS configuration not to need statd. But what about doing exactly what the message tells me to do?

root@hp # systemctl start rpc-statd.service

So, now it works, so enable it on boot:

root@hp # systemctl enable rpc-statd.service

So far my other machines, back to the Pi. CUPS, yes, let’s get that printer working. Apart from the problems with the actual printer, the drivers can cause problems as well. I have written about this before, reported a bug, it was once solved, but later was re-introduced I believe.

# pacman -S hplip cups

to install CUPS and the hplip driver (and its dependencies, which used to cause the mentioned problems before)

# systemctl start cups

is not enough, I cannot connect to the CUPS on my Raspberry. Looking the the config file, it appears to be configured to listen on localhost only, which is off course rather useless for a headless server. In /etc/cups/cupsd.conf, replacing Listen localhost:631 by Listen 631 should fix this problem, but it does not. Looking at the log files

E [17/Nov/2012:19:59:20 +0000] Unable to communicate with avahi-daemon: Daemon not running

it turns out there is a dependency on another daemon which should be started first. Now, the server is listening, but it gives me a 403.
I still need to set from which IP addresses the connections are allowed (in the same file as mentioned above). Adding Allow from 192.168.178.*
to all access levels will do. IPv6 configuration will be done later.

The Unable to get list of printer drivers: Success error appears again. meaning I cannot use the hplip driver due the foomatic problem.
Removing that shit again

# pacman -R foomatic-db foomatic-db-engine foomatic-filters hplip

and installing gutenprint instead

# pacman -S gutenprint

This is a problem which has been around for months if not longer. It had been fixed at some point I believe, but it re-appeared at some point.

Using the gutenprint drivers, I can add the printer, but there is still a problem. The printer doesn’t appear automatically in the list at the other computers. I can add the printer manually, and then it works, so I suppose this is a problem with avahi.

And it was indeed an avahi problem. But it was on the client side, where the

# systemctl start avahi-daemon
# systemctl enable avahi-daemon

The printer still doesn’t magically appear in the list, however, when I access cups, it will report the printer found, and can be added manually. But when I try to print to it, I get the error "Unable to locate printer "rpi-server.local". According to this page, it means incorrect hostname or ip address. Which can be correct, as .local isn’t valid in my configuration. My modem is a Fritz!Box, and appends local hostnames by fritz.box. I suppose this should to into the avahi config file. Changing that doesn’t help. Now the printer isn’t appearing anywhere. I suppose I should change this part in the avahi configuration on all machines. If that’s the case then it totally breaks the point of avahi, automatic configuration.

Anyhow, I have been trying various things, but it appears I cannot get auto, or semi-automatic configuration working. I assume this is related to the switch to systemd, as from memory, it used to work automatically, as soon as the “share this printer” checkbox was marked, the printer used to automatically appear on all computers in the network. Well… I can add it manually. I guess that’s what I will do for now…. but I am not pleased with the fact it ain’t working as it should.

So, now I have ran fsck -f on all usb hard disks, just to be sure the file systems are not corrupted. I am aware there is probably some corrupt data on those disks, due the unstable USB bus on the BeagleBoard.

Well… plug everything in and boot up the system. The Raspberry Pi has two USB ports. I am currently using only one of them. I have connected a 4 port powered USB hub, to which I have connected the three hard disks, and another, bus powered, 4 port hub. To this hub I have connected my printer (HP Deskjet 895Cxi). This printer used to cause the BeagleBoard to crash all the time. It’s from the early USB-era, and therefore it might be not fully USB-complaint. However, I hope it won’t cause any problems on the Raspberry Pi. (I will have to repair my HP Deskjet 3320, but that’s another topic)

So… we got to configure the mount points. As I said, this will be done using their UUIDs. To see them, use the command blkid

# blkid
/dev/mmcblk0: PTTYPE=”dos”
/dev/mmcblk0p1: SEC_TYPE=”msdos” UUID=”A697-C157″ TYPE=”vfat”
/dev/mmcblk0p2: UUID=”f9e11351-e87a-4df2-a9be-27f03d215329″ TYPE=”ext4″
/dev/sda1: LABEL=”Extern1000″ UUID=”74afebc6-5b3f-4306-82dc-b164f4185aa3″ TYPE=”ext4″
/dev/sdb1: UUID=”577e2053-b83e-45d3-bad6-355475d07c36″ TYPE=”ext4″
/dev/sdb2: UUID=”effa82e7-ccc6-4d27-98d1-1aa255a702f3″ TYPE=”swap”
/dev/sdc1: LABEL=”Extern1500″ UUID=”30a34cab-aaf9-4c75-b63b-4e196cf8ef66″ TYPE=”ext4″

This translates to the following lines in /etc/fstab

UUID=74afebc6-5b3f-4306-82dc-b164f4185aa3 /mnt/1000 ext4 defaults 0 2
UUID=30a34cab-aaf9-4c75-b63b-4e196cf8ef66 /mnt/1500 ext4 defaults 0 2
UUID=577e2053-b83e-45d3-bad6-355475d07c36 /home ext4 defaults 0 2
UUID=effa82e7-ccc6-4d27-98d1-1aa255a702f3 swap swap defaults 0 0

However, looking at the already present lines, I am not sure if I am completely happy with them.

devpts /dev/pts devpts defaults 0 0
shm /dev/shm tmpfs nodev,nosuid 0 0
/dev/mmcblk0p1 /boot vfat defaults 0 0

Seeing the root file system is not present, and the boot file system has last parameter 0, meaning, the content of the SD card will never be checked for errors. I don’t know if this is the desired behaviour. So, I will change it to:

UUID=f9e11351-e87a-4df2-a9be-27f03d215329 / ext4 defaults 0 1
/dev/mmcblk0p1 /boot vfat defaults 0 1

and reboot… after a while, the system comes up, looking at the output of the mount command, everything seems to be mounted as it should. However… looking at

/dev/root on / type ext4 (rw,relatime,user_xattr,barrier=1,data=ordered)

I wonder weather it is fsck’ed during boot…

Sooo, let’s see what still has to be done: make user accounts, install cups, perhaps sane, perhaps an http and sql server (as they ran on the BeagleBoard as well), transmission-deamon, and more.

Originally I intended to also run an IRC server on my BeagleBoard, but due instabilities I have stopped doing so. If this board is stable, I guess I will try again. Another project I started, which I now may continue a lot easier due the changed in ArchLinux is getting Dropbox to run. Now, it’s quite easy to generate a base system using pacstrap. As I believed not having a complete base system was the reason my previous attempt on the BeagleBoard failed.

However, I am forgetting one of the tasks the Raspberry Pi should take care about, my IPv6 tunnel. Since back when I configured my BeagleBoard, systemd has been introduced, but it appears the wiki hasn’t been updates, and still tells me to make the script and put it in the /etc/rc.conf file.

Now, let’s get started with NFS, right? Well… first things first… this configuration is supposed to replace the BeagleBoard. As mentioned, I have occidentally overwritten its SD card. This also means I cannot access its current configuration.

I cannot login to the device anymore over ssh or serial connection due incorrect content of the root filesystem. However the NFS server is still serving perfectly fine. Since I cannot login, I cannot gracefully unmount the filesystems. The point is, I am listening to music. The music is on the USB hard disks connected to the BeagleBoard, which I will have to shut down in order to connect them to the Raspberry Pi to configure the mount points. If I could access the old configureation, I could just copy over the entries in /etc/fstab.

I will be using UUIDs to identify the partition to mount, as, when using USB, I cannot predict which device name it will have. I mean, if I disconnect, and reconnect the hard disks on a different USB port, I wish not to have to change the configuration. Therefore I will use UUIDs so no matter what device name it gets, it will work. So, let’s delay configuring the mount points to a later point. We will configure the mount points (same as currently on the BeagleBoard):

/mnt/1000 : 1000 GB USB HARD DISK, DATA
/mnt/1500 : 1500 GB USB HARD DISK, DATA
/home : 250 GB USB HARD DISK, HOME PARTITION

If I just create the directories, the rest of the procedure should work, and the actual hard disks can be added later. Let’s install the NFS software. Also… let’s install vim, the editor I am used to, as it isn’t installed by default in an ArchLinux installation (vi and nano are)

# pacman -S nfs-utils vim

For security reasons, we will set up an nfs root

# mkdir /srv/nfs4
# mkdir /srv/nfs4/1000
# mkdir /srv/nfs4/1500
# mkdir /srv/nfs4/andre

and add the following to /etc/fstab

/mnt/1000 /srv/nfs4/1000 none bind 0 0
/mnt/1500 /srv/nfs4/1500 none bind 0 0
/home/andre /srv/nfs4/andre none bind 0 0

and set up the exports in /etc/exports

/srv/nfs4/ 192.168.178.1/24(rw,fsid=0,no_subtree_check)
/srv/nfs4/1000 192.168.178.1/24(rw,no_subtree_check,nohide)
/srv/nfs4/1500 192.168.178.1/24(rw,no_subtree_check,nohide)
/srv/nfs4/andre 192.168.178.1/24(rw,no_subtree_check,nohide)

To start the nfs server, just now

# systemctl start nfsd.service rpc-idmapd.service rpc-mountd.service rpcbind.service

Verifying the exports from my desktop machine:

$ showmount -e 192.168.178.49
Export list for 192.168.178.49:
/srv/nfs4/andre 192.168.178.1/24
/srv/nfs4/1500 192.168.178.1/24
/srv/nfs4/1000 192.168.178.1/24
/srv/nfs4 192.168.178.1/24

Since this looks fine, I can enable startup during boot using

# systemctl enable nfsd.service rpc-idmapd.service rpc-mountd.service rpcbind.service

This is the new way of configuring services at boot, as compared to the old /etc/rc.conf method.

So, I guess it’s about time to shut down the BeagleBoard and replace it by the Raspberry Pi. Even though there are some more services to be configured, such as my IPv6 tunnel, printer server, scanner server, and so on. As I am unable to gracefully shut the BeagleBoard down, and due its instability, I guess I’d better fsck all the external hard disks before putting them online in the new configuration.

One thing to verify before proceeding is to verify the Raspberry Pi boots up headless, and I’ve heard this might be an issue. However, the system comes up perfectly fine.

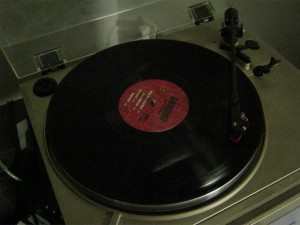
In order to listen some music while these operations are in progress, I will revert to vinyl. The real way to listen to music ;)
PS. I bought this record last wednesday. It’s awesome to see new music appear on vinyl only ;)

So, let’s continue configuring that Raspberry Pi, right? First, I would like to observe some weird behaviour. Please note I have attached a monitor, keyboard and screen to the Raspberry Pi, so I am not using a serial console, as I did when I configured my BeagleBoard.

The Raspberry Pi supports my monitors resolution 1280×1024, while the BeagleBoard does not (at a refresh rate high enough to be accepted by the monitor…. details) Another difference is that it works “out-of-the-box” on the Raspberry Pi. Just plug the monitor in and power it on. It will find out what resolution to use by itself, while the BeagleBoard required it as a kernel parameter.

The BeagleBoard is advertised as a developer board, while the Raspberry Pi aims at being a teaching tool. Another difference between those boards is that the BeagleBoard has a mounted RS-232 connector, while the Raspberry Pi only has the UART to pins on the expansion header, which is 3.3 Volt level. Therefore some level converters are required to be able to use this thing. I have ordererd this one on DX.com. The name says TTL, but in the specs it says “VCC: 3V / 5V”, therefore I think this one will do the trick. But I guess I will have to verify the voltage, as the Raspberry is *not* 5V tolerant.

DX.com, the chinese webshop, selling all kinds of stuff. I have ordered stuff there before. Free shipping, it may take a while to get it, but it’s for free. Not all my orders there have been without problems, but their customer services are good. If there are any problems, they offer replacement of refund. No difficult questions asked.

Anyways, why did I even start talking about the monitor being connected stuff, well, it’s because I am unable to log in (as root, I haven’t created users yet) on tty2, tty5 and tty6. But it works on tty1, tty3 and tty4. Looking at /var/log/auth.log

Nov 17 10:15:54 rpi-server login: pam_unix(login:session): session opened for user root by LOGIN(uid=0)
Nov 17 10:15:54 rpi-server systemd-logind[98]: New session c1 of user root.
Nov 17 10:15:54 rpi-server login: ROOT LOGIN ON tty1
Nov 17 10:16:04 rpi-server login: pam_securetty(login:auth): access denied: tty ‘tty2’ is not secure !
Nov 17 10:16:12 rpi-server login: FAILED LOGIN 1 FROM tty2 FOR root, Authentication failure

So, we see a successful login and an unsuccessful one. They’re similar for the other tty’s mentioned. Asking this question go Google gives me securetty. /etc/securetty is a text file which lists the tty’s where root is allowed to login. The content of this file agrees with the observed behaviour.

Still the question remains, why was it preconfigured with this content in the /etc/securetty file? One can assume it has been made for testing purposed, forgot about it, and ended in the image. Or is there a Raspberry Pi specific reason for doing this? Anyhow. I was planning to use this Raspberry Pi headless, so it doesn’t matter at this moment. However I am thinking about using a second Pi as desktop machine.

Well… the mystery has been solved. Let’s continue configuring this thing. Setting it up as NFS server… I am not sure if I have described this before when I’ve set this up on my BeagleBoard. However, due the conversion of ArchLinux to systemd, it would be outdated anyways.

Anyhow, since I’ve typed quite a lot already, the NFS configuration will go to yet another post. I have written two posts and the only thing I’ve done yet is booted it up, set root password and hostname.

PS: I’ve found an interesting link:Small Linux PCs overview

So… time to install ArchLinuxARM on my Raspberry Pi.

I will be using the ArchLinux image for the Pi released on 18 September 2012. I believe this is the first release using the new ARMv6 repo. This is an full image of a 2 GB SD card, so just a simple # dd bs=1M if=archlinux-hf-2012-09-18.img of=/dev/mmcblk0 will do the trick, given you enter this command as root, on the right machine, as stupid me entered this command on the BeagleBoard in stead of the laptop.

Since I am using a 16 GB SD Card, I will have to resize the partition to use the full card. However, I am planning to do this as final step, so I can create an 2 GB image of the configured system.

Given above steps went correctly, just insert the SD card into the Raspberry Pi and power it on. ArchLinux boots up. At this point, the /boot partition still contains the old-style bootloader. The new bootloader is however in the repository. As a first step I am planning to do an upgrade anyways. The default login is username/password root, which of course has to be changed. Anyhow… about upgrading the system, on ArchLinux:

# pacman -Syu

However, this gives an error less then 1024 bytes per second transferred the last 10 seconds. The default repository is set to a GeoIP/load balancer. It appears this sends me to the Chinese mirror. When pinging it I have a ping of ~450 ms. So, editing the /etc/pacman.d/mirrorlist. commenting the “load balancer” out, and removing the # from the Dutch mirror solves the problem, and the upgrades, including a new bootloader in the /boot partition, have been installed.

So… some basic tasks that need to be executed now, such as setting up root password, hostname etc. On ArchLinux, this used to go to /etc/rc.conf by setting HOSTNAME=, however, this method of setting up the hostname is deprecated. ArchLinux has switched to systemd recently. I have mentioned before, on my other machines, this switch required some changes. Merely the init= boot parameter, as there is some backwards compatibility with old configuration. However, it means I have to look at the new way of configuring stuff. (Yeah… I have been lazy for my old installations, not changing the configuration files to new style.) Please note that I can recommend setting the hostname first, before installing anything else, since some daemons may use it, and otherwise they’ll use the default.

# hostnamectl set-hostname rpi

However this gives an error: Failed to issue method call: org.freedesktop.PolicyKit1 was not provided my any .services files Apparently, for this to work, you need to install polkit and reboot first.

So, as mentioned before, time to fix the ArchLinux installation on my desktop “Blaatkonijn”. The problem is a broken initramfs, so it doesn’t boot up. As the initramfs is system-specific, just copying a working initramfs from a different machine doesn’t work. Therefore, my idea is to install another ArchLinux on the same machine, and use its initramfs to boot my old installation.

I have tried that approach a while ago. Back then I did not succeed. Well… the installation of ArchLinux did not succeed. There were some problems upgrading the installation. ArchLinux has gone through a couple of changes lately. The guide I wrote for installing ArchLinux on my laptop… well… none of it applied anymore, that I can tell you. I guess, I have used that same cd for that attempt, but I am not sure. Anyhow…. it appears the cd was old compared to the repository, requiring some manual action to let it upgrade. For just creating an initramfs… too much touble.

So… today I downloaded and burned the current installation image. It was fresh, released this month. Cool! But everything has changed. No more installer! Just a tool to create a root fs. So, the installation is just, install root fs, install boot loader, done! (ok, over-simplified…. you do have to set passwords etc.)

There is also a command arch-chroot. Which does a chroot, but also automatically mounts the API file systems. This is to be used during the installation. However, it appeared my old installation was too old for this tool to work with. Creating the initramfs is also a part of the installation procedure. So, I just created the initramfs, and copied the content of /boot over to my old installation, and ran grub-install on the partition of the old installation. (The old installation did not have a separate /boot partition) Also, I copied the content of /usr/lib/modules to the old installation, as the new kernel of course needs the corresponding modules.

Please note, grub2 is now the default boot loader, no longer grub1. It even appears grub1 has been removed from the repository. I am used to grub1 installations. Also note the previous attempt used grub1 in a dedicated boot partition. It seems, a dedicated boot partition is no longer an option in the current ArchLinux installation procedure. With the installer, one could define a separate boot partition. Of course this can be done manually, but that’s now out of scope of this post.

So, on the new installation, after installing the root fs, I had to install the boot loader, so, grub2. This installer created an example config file. As I am copying it over to the old installation I have to change the partition to boot. The config file uses the parition UUID to identify the partition. using the command blkid one can determine the UUIDs for the partitions. Changing this made the system boot.

Upgrading the system…. as the system was out of operating for a few months, there are off course many many updates available. Please note, removing the copied modules again, otherwise the kernel upgrade will fail over the file conflict, as it will attempt to install those. Other errors, which I have met the recent months, such as the /etc/font/conf.d/* exists, resolved my renaming that directory, also appeared again.

Another problem appeared when trying to upgrade glibc. As I have been attempting to resolve the problem, I do not have the exact error message anymore. Something like not overwriting dir lib with file. Therefore, I figure this is caused by the changed in the filesystem, changing the directory /lib to a symlink /usr/lib. Doing this on a live system required calling ld-2.16.so manually, as, after renaming the /lib, running dynamically linked binaries, of course, fail.

[root@blaatkonijn /]# mv lib lib_
[root@blaatkonijn /]# /usr/lib/ld-2.16.so /bin/ln -s /usr/lib /lib

After this, the glibc package installs…. and after waiting for over 500 packages to install, we’re done. Rebooting the system… which succeeds… however, I see a text login, my graphical login doesn’t start. But this is another known issue, which I was still to report about.

The problem is rather simple… and if one would read all the messages during the upgrades, one would have noticed. However… when a lot of packages are being installed, such a notice is snowed under quickly. As mentioned, many things have changed in the ArchLinux world. The sysvinit has been replaced by systemd. To boot correctly, one is supposed to add systemd to the init= kernel parameter. From the pacman logs on my laptop:

[2012-09-04 18:09] :: Append 'init=/bin/systemd' to your kernel command line in your
[2012-09-04 18:09] bootloader to replace sysvinit with systemd

So… now, the system is working correctly again. I should add that sound card again and verify it works with ArchLinux, so I can say for sure Windows sucks!.

As I also have to upgrade the packages on my server, and the /lib exist problem, when forcing installation, caused some mess on my desktop machine, I really have to do something different on my server when upgrading the packages there.

http://www.linuxquestions.org/questions/linux-newbie-8/arch-pacman-su-error-glibc-lib-exists-in-filesystem-4175418135/ gave me some solution:

$ grep '^lib/' /var/lib/pacman/local/*/files

To remove all packages except glibc which install in /lib. In the case of the server, these were gcc-multilib libtool-multilib and lib32-glibc. In other words, the 32 bit support parts.

So, in order to revert the system to 64 bit, we use:

# pacman -S -d gcc-libs

To use only the 64 bit versions of the gcc-libs. The option -d is added to not check for dependencies. Please note I have switched to using pacman directly in stead of using yaourt. This feels a little safer when doing operations that could destroy the system.

# pacman -R lib32-gcc-libs lib32-libltdl lib32-glibc

However upgrading the system still fails due the existance of /lib. I have removed all packages that exist in /lib, thus this was not the problem. It seems, the problem was the existance of the directory /lib/yaourt. Moving this directory temporary outside /lib makes the upgrade work. So, when it’s finished, the services that are affected are restarted, the removed packages have been restored, I can move the yaourt directory back where it belongs.

So, now, we know the solution for the /lib exists problem which has been appearing on the internet on many places, just move the yaourt directory (temporary) elsewhere and perform the upgrade through pacman directly.

After the upgrade, it seems the /lib/yaourt directory has been recreated.