Archive for December, 2012


OpenELEC XMBC

Today, I’ve returned to Eindhoven, where my Pi was waiting for me. Some more testing to do with my Raspberry. In the meantime, I’ve ordered licenses for hardware decoding of MPEG2 and VC-1. I need at least MPEG2 for DVD decoding and for my planned DVB experiments. VC-1 might be used on some BluRay discs… I don’t even have a drive or anything, but whatever, when I am ordering, let’s just order both, why not?

Well… let’s see… MPEG2 license installed. Let’s play a dvd!… or not… The DVD shows up just fine in XBMC, but when I want to play it, it prompts to insert a disc. What? I mean…. you see the damn disc, so why are you asking to insert a disc?!? Also, when I right click it and select play, it just freezes and I have to kill the task over ssh. No luck there…

XBMC has been indexing my movies and series just before I left to my family. So… let’s see how it performs on those. The results are mixed. Some files play perfectly, others have synchronisation issues, and others won’t play at all. Remember we’re hardware decoding. A wrong codec and it won’t play. Keep in mind, my collection of videos has been around on my hard disks for years, and may already have been old when I downloaded them. The problem is, some files are encoded using the DivX ;) 3.11 codec, which was a popular codec about a decade ago. It was a hacked version of the Microsoft MPEG-4 codec. The original Microsoft codec had a limitation so that it only could be used within an asf container. The hacked version removed this limitation. So far so good, but the problem is, Microsoft MPEG-4 is not compatible with ISO MPEG-4. Microsoft tends to invent their own standards, but, in my best “denglish”, that’s an old cow.

Well… the codec is not supported by the hardware. But… back in the days I bought this KISS DP-508 DVD/DivX player. It has hardware MPEG2/MPEG4 decoding, just like my Raspberry Pi does now, yet it supported playback of DivX 3, so Microsoft MPEG-4 content, which suggests it’s possible to patch Microsoft MPEG4 bitstream to ISO MPEG4 on the fly. I have been searching the internet for clues how to do this, but I haven’t been successful yet. So, I was like, it’s a linux based player, so some sources should be available, right? It appears Cisco owns KISS now, and the sources for the DP-508 don’t appear on their GPL page. Bummer! I haven’t been able to locate the source codes elsewhere yet. It might contain the code that performs this streampatching on the fly. Just a wild guess, it doesn’t have to be in there… And even if I find it, I must find a way to integrate it into XBMC.

Speaking about XBMC. I’m going to give OpenELEC a try. At first I was considering Raspbmc, but I’ve decided for OpenELEC, since it should support DVD playback and have the PVR stuff, so it should be more suitable for my needs. My ArchLinuxARM installation will be be used for the original purpose as a thin desktop. So, I needed another SDCARD. The 8 GB card which I had lying around already contained a RISCOS installation. I really should get some more cards, and perhaps another pi? Oh well… I should have another look at RISCOS. Anyhow… going to use that SDCARD. One thing I’ve noticed. RISCOS hangs on boot when the USB hard disk is connected. Apparently it doesn’t like Linux ext4 and swap partitions… or is it the PC-style partition table that’s causing the confusion. But the SD card also has a PC-style partition table, so I doubt that’s the problem. Anyhow, unplugging the disk and the system continues to boot. Backupping that sdcard and writing the OpenELEC image to it. Let’s see how it performs.

OpenELEC takes quite some time to boot, but well, it’s the first boot. Having to set the language to Dutch, and have a sensible 24 hours clock. AM/PM is just ugly as hell IMHO. Another thing, it actually shows the temperature. I suppose, on ArchLinuxARM I am supposed to install some kernel module to support it. But that’s just a minor detail I haven’t bothered to look after yet. Something more interesting, this build supports changing resolution on the fly, which XBMC on ArchLinuxARM did not.

Now, before I can test if it actually plays DVDs I still have to install the licenses to this image. I will also have to get it mount my NFS shares.

There is also an OpenELEC part in the XMBC configuration now. Nicely integrated. Per default, it appears to offer a SAMBA share. As none of my computers speaks SMB, I will disable it, and enable the SSH deamon. (Using different installations, thus different host keys, on the same machine… hmm… ) More interesting is the keyboard options. Does it mean on this XBMC I can actually type on the keyboard in stead of the on screen keyboard with alphabetic order layout. This appears indeed to be the case. The On Screen Keyboard is still in a silly alphabetical order layout.

But… once can notice this is a one-purpose distro. Just a media center. I mean… I don’t see an easy way to get a shell, except for over the ssh, for which it’s not even clear what login to use. I suppose it’s easier to use an my laptop to enter the license codes into the config.txt file. Looking at that config file, there are also licenses for DTS and DDP. (I’ve never heard of DDP anyways)

Anyways. Booting the Pi again, it seems to be able to play DVDs, even though it first appears to just mount the disc. I have to right click and select play dvd to make it work. Anyways it works… and I’ve already seen some DVB stuff in the interface…. so as soon as my DVB-T receiver arrives I can do some initial testing. If I am pleased with the DVB-T receiver, I will order a the real stuff, a DVB-S receiver and a cardreader. Anyhow…. mounting my other Pi over NFS, and scanning media again.

I have noticed I might need to make little changes to my files as some series/movies aren’t recognised correctly, at least so I’ve noticed on the Arch XBMC installation. Now I am scanning without the directory is movie name option, perhaps this gives better results.

Het is weer Kerstmis, mijn beste bloglezers, Kerstmis 2012. Ik wens iedereen veel geluk en liefde toe.

Veel geluk en liefde, in het bijzonder aan hun die het (en misschien vooral deze dagen) moeilijk hebben.

Ik heb al eerder mijn zorgen over onze samenleving. Onze individualistische samenleving. Een paar weken geleden, het was een donderdag, even na half twee, fietste ik over de kruisstraat. Ik had net wat boodschappen gedaan bij de EkoPlaza en was op weg naar de universiteit, want ik had die namiddag colleges. Toen zag ik een meisje op de stoep met een bord “Eenzaam, u ook?”. Het winkelend volk liep gewoon langs haar heen. Ik besloot haar aan te spreken, ondanks het feit dat ik weinig tijd had.

Eenzaamheid… hoeveel mensen zijn eenzaam? Misschien toch wel meer dan je zou denken. Eenzaam hoeft lang niet altijd te betekenen alleen te zijn. Wat ook in ons gesprek naar boven kwam, en iets wat ik zelf in het verleden ook ervaren heb, je kan in een zaal vol mensen zijn en toch eenzaam zijn.

Ik wens deze kerst, dat zij die eenzaam zijn een warm thuis mogen vinden, dat ze mensen mogen vinden die hun eenzaamheid wegneemt. Dat zij die in een duistere periode in hun leven verkeren een lichtpuntje mogen zien. Kerst is immers het feest van de terugkeer van het licht.

Let’s continue where I’ve stopped yesterday, with writing at least, as there is still some stuff I’ve done which I haven’t written down yet.
Well… let’s see, where was I… so I wrote about installing xfce4 and qmmp and so. Well, we’ve got qmmp, we’ve got the nfs on the server Pi mounted. So let’s play some music, shall we? Well…. no…. no audio device found. The reason for this is that the audio driver was not loaded. So adding snd-bcm2835 to the modules to be loaded solved that problem.

The audio driver is loaded, but still no sound. I am using the HDMI->VGA adaptor. The only HDMI->DVI cable I’ve got is 5 meters long and rather this, so this is a clumsy cable. Therefore I am using a short thing VGA cable with that adaptor. It’s rather inefficient to connect a digital (flat) monitor over an analogue interface, but whatever. The problem is, this HMDI to VGA adaptor does pass through the EDID information from the monitor, however, it falsely claims to support audio, therefore the Raspberry Pi attempts to send the audio over the HDMI interface. So we have to force the analogue output.

This can be done using the following command

amixer cset numid=3 1

Well.. I have sound, but, it’s only mono.

Simple mixer control 'PCM',0
Capabilities: pvolume pvolume-joined pswitch pswitch-joined
Playback channels: Mono
Limits: Playback -10239 - 400
Mono: Playback -1500 [82%] [-15.00dB] [on]

Speaker test gives

[andre@rpi ~]$ speaker-test

speaker-test 1.0.26

Playback device is default
Stream parameters are 48000Hz, S16_LE, 1 channels
Using 16 octaves of pink noise
Rate set to 48000Hz (requested 48000Hz)
Buffer size range from 512 to 16384
Period size range from 512 to 16384
Using max buffer size 16384
Periods = 4
was set period_size = 4096
was set buffer_size = 16384
0 - Front Left
Time per period = 2,326930
0 - Front Left

On some forum. I’ve read a comment this may be caused by a bad cable, causing the Pi to detect only one of the speakers. I have tried headphones and my stereo tower, but still it says Mono. I cannot find where I’ve read this right now, but when searching I’ve found different answers to this problem. It seems this only means the mixer doesn’t support per channel volume control. Running speaker test telling it to use two speakers shows everything works as it should.


[andre@rpi ~]$ speaker-test -c 2

speaker-test 1.0.26

Playback device is default
Stream parameters are 48000Hz, S16_LE, 2 channels
Using 16 octaves of pink noise
Rate set to 48000Hz (requested 48000Hz)
Buffer size range from 256 to 8192
Period size range from 256 to 8192
Using max buffer size 8192
Periods = 4
was set period_size = 2048
was set buffer_size = 8192
0 - Front Left
1 - Front Right
Time per period = 5,663562
0 - Front Left
1 - Front Right

Another thing I’ve tried is to connect a CRT monitor to my HDMI->VGA adaptor. After all, VGA is an analogue interface, and makes much more sense for a real analogue monitor. The system boots up correctly immediately. It doesn’t have the first boot out of sync problem with my flat monitor. The CRT monitor is a 17″ Philips 107G5. One thing to notice is it comes up at 1280×720 with a refresh rate of 60 Hz. This is the “HD 720p60” resolution, right? The reason for this is that the resolution/refresh rate is within the supported range, and as it is an analogue monitor, it doesn’t have a “preferred” resolution.

Using the method for resolution setting as discussed before, the correct resolution can be set

tvservice -e="DMT 19"
fbset -xres 1024 -yres 768 -a

or through the /boot/config.txt file

# Philips 107G5
disable_overscan=1
hdmi_group=2
hdmi_mode=19
hdmi_drive=1

But, this brings me to my CubieBoard. As I mentioned, my Compaq 1720 flat monitor doesn’t accept the output from my CubieBoard. As I’ve understood from forums, it outputs 720p60. So I’ve connected the HDMI->VGA adaptor to the CubieBoard again, and booted it without µSD card. Android boots, and indeed shows output on the screen. So, I’ve verified it’s graphical output is working. However booting on the µSD card gave no graphical output yet. As mentioned before, it’s a possibility the kernel I’m using doesn’t have the framebuffer enabled. Anyhow, the hardware is fine, it’s a software problem.

Another problem that arised is the CubieBoard to fall out halfway during boot. I am using my Phone’s charger (850 mA) to power the Raspberry Pi, but it seems it’s not strong enough to power the CubieBoard with the HDMI output enabled. The CubieBoard ran fine without graphical output enabled. As I am using a powered USB hub. (Even though its power supply is 1 A for 4 USB ports, which should be 500 mA per port, so at least 2 A + power needs for the hub itself). So, I wonder if this is even allowed according to the USB specs. However, I plugged in the CubieBoard’s power cable into that hub, which is also against the USB specifications, to draw power from the bus without any USB logic reporting the amount of energy being drained, and getting approved by the USB host. Besides missing the USB logic it is also drawing over 500 mA, another violation of the USB specifications. So… this is blatantly violating the USB specifications, it seems to work.

Another thing that’s blatantly violating specifications is the OpenMAX implementation on the Raspberry Pi. This is the cause an OpenMAX enabled VLC build doesn’t work on the Raspberry Pi. But it’s not only the Raspberry Pi’s library fault. Even though the problem on the VLC part is rather small, being the filename of the library, being hard-coded for various implementations of OpenMAX, not including the Raspberry Pi’s filename.

Well… as I’ve builded VLC anyways, from the source tarball, I’ll write about doing that as well. Usually software is built through a PKGBUILD patching all problems away. So we call the configure script with the “–enable-omxil” parameter. As it complains about missing gl package, I’m also adding “–disable-glx”, as I’m interested in the OpenMAX plugin.

[andre@rpi vlc-2.0.5]$ ./configure --enable-omxil --disable-glx

VLC depends on LUA version 5.1, and won’t compile with 5.2. Since the filenames for LUA 5.1 are postfixes with their filenames, making a synlink to the un-postfixed is required to make the ./configure script find lua.

Anyhow… this explains why the Raspberry Pi version of XBMC doesn’t use OpenMAX but some custom integrated component on the Raspberry Pi. Anyhow I’ve installed omxplayer, but as it just writes the movie to the framebuffer, but doesn’t erase the borders, it’s not really an option for watching movies on the Pi, at least, not without some additional tools. So, I’m currently building the mentioned XBMC.

Trying to build XBMC (from AUR) showed some other problems. Namely, the /tmp is by default a tmpfs. This is like a RAMdisk in the old DOS days, a part of memory used as a file system. But it’s way too small to build XBMC. Therefore I’m using the hard disk as /tmp.

/home/tmp /tmp none bind 0 0

And now…. I am just waiting for it to finish compiling….. which can take ages… so perhaps one of my next projects is setting up distcc to perform the compiling on a faster machine. NOTE TO SELF: Finish configuring the Raspberry Pi Server first!!! It still needs a sane server, IPv6 configuration, git server, web server!!!

Anyhow speaking about this Media Center software, I also have this DreamBox DM-7000S. It was still running PLi 2009-06-27. Even though nothing new shows up in the opdates, it seems they’ve changed to OpenPLI. So I’ve flashed a new image into my DreamBox. So…. my software is again up to date. Apart from that I’ve swapped the SCART cable with the DVD player, now the snow I was getting is gone. But on the DVD player there is no slow either. I suppose it was just a bad contact.

I have been looking around for a new DreamBox, even though I don’t have a HD-TV, and I am not planning to get one either. But the regional channels are MPEG-4 encoded and so won’t work with the DM-7000S. Well… my dish isn’t aligned correctly for 23.5E anyways so I won’t receive the regional channels anyways. So, a DM-8000 is interesting, I’ve been looking at this for years, but the price is keeping me back. € 875 is a little too much for just a satellite receiver. Ok, there are cheaper stores, but € 819 is still rather high. Ok, there are cheaper DreamBoxes, but I want one that can decode MPEG-4 and offers recording to hard disk. The DM 8000 offers the possibility to install tuner modules so we can receive, apart from DVB-S/DVB-S2 also DVB-T or DVB-C.

Well… since I was looking at this XBMC stuff…. what about turning a Raspberry Pi into a complete Media Center including DVB. Cheap DVB-T receivers are available at DX.com. They seem to offer only one USB DVB-S receiver, but at it mentions only DVB-S and not DVB-S2, it’s not capable to receive HD channels as they use a different modulation. Looking around on the internet found me this receiver.

When thinking about tuning a Raspberry Pi into a satellite receiver, we need to think about the fact all Dutch TV Channels are encrypted. *sigh* Why do they have to do this? Most German channels are FTA for example. Anyhow, on my DreamBox I am using the integrated card reader, as the MatrixCAM Reloaded and MatrixCAM Revolutions, which I used to use in the past, on this and other receivers, show incompatibility issues with the new Smart Cards supplied by CanalDigitaal and freezes regulary, requiring the CA to be powercycled. Using the integrated Smart Card reader and a softcam CCcam the Smart Card works without problems.

Well… CCcam… it’s a proprietary piece of software… so it’s not ideal. There is OScam, which is open source, but it appears not to be available in the OpenPLi DM7000 repository, and since CCcam works, I keep using it. Well… the point is. CCcam can be used as a Softcam for my Smart Card. So adding USB Smart Card Readerto the list of required components for turning the Pi into a satellite receiver. It seems there also exist a multi card version.

If it would be required in the future to use an official CanalDigitaal CAM, USB CASes (1) (2) are also available. Also note it’s possible to program the MatrixCAMs with this devices, however I haven’t been able to locate an update for this. (I’ve looked for this back then when CanalDigitaal shipped those new Smart Cards having the compatibility issues, looking for a bugfix for the freezing problem)

So… it seems all pieces required to do this are available. Will they work together on a Raspberry Pi. And if I obtain a MPEG2 license for the Pi. MPEG is a rather nasty codec due all this license shit, but that’s what all this DVB stuff uses, unfortunately. And Broadcom also has to pay license fees for offering hardware decoding. I don’t agree with all this having to buy a license to unlock a hardware feature, I can understand the reason behind it.

Anyhow, it should be possible, from hardware point of view. From software point of view, the DVB-S2 receiver mentions Linux support. I have no clue about the DVB-T receiver. Also, I don’t know how CCcam or OScam would integrate with XBMC. Well I don’t know anything about XBMC. Hmmm…. I am forgetting something about XBMC. It would also need a remote control, right? DX.com offers remote controls for PCs but are they compatible with XBMC? Well… do I have everything now I need? (Speaking about remote control…. I still can’t find my DVD players remote.)

I’m just wondering, what’s the status of BlueRay on Linux? Is plugging in a BlueRay drive to a Pi an option with XBMC. Well… my USB DVD drive will work given I have the MPEG2 license.

Some more Pi

My second Raspberry Pi still powered on and connected to my LAN. That’s how I left to stack last Thursday. So, I SSH’ed into my first Pi, and from there, being inside my lan, I SSH’ed to my second Pi. Let’s do something with it, shall we? As this is a fresh installation, we have some configuration to be done. Let’s start with installing yaourt. On ArchLinuxARM we don’t need to add a repository like we should on regular ArchLinux.

[root@alarmpi ~]# pacman -S yaourt

As this Pi is connected to a screen, let’s get some graphical enviorement

[root@alarmpi ~]# pacman -S xorg xorg-apps xfce4 xfce4-goodies gdm

Note gdm seems to have some weird dependencies such as pulseaudio and flac. I assume because it makes some sound during login. I’ve tried lightdm instead but it doesn’t work on my Raspberry Pi.
Also base-devel is not installed, so we cannot compile anything, and the locale needs to be fixed, as I described in the other Pi installation, which I should also continue to write about. I have an unfinished post on concept for like…. ages. And I have a lot more to do on that other Pi… Anyhow, that’s all what I did last thursday, at least, to the Pi, as I went to the pub that night. It was 20 December after all, so, as the world was supposed to end the day after, it was my last chance to have some beers with friends.

So, 20 December 2012, I was at a pub until late at night. The result was I overslept the next day and missed the end of the world. And since I missed it, and was apparently still alive, I decided to continue playing around with that second Pi.

Since all the graphical stuff takes a lot of space, we should resize the file system to occupy the whole SD card. How to resize it is described on the ArchLinuxARM forum. It just tells you what to enter, but let’s take a look at what we’re actually doing


[root@alarmpi andre]# fdisk /dev/mmcblk0
Welcome to fdisk (util-linux 2.22.1).

Changes will remain in memory only, until you decide to write them.
Be careful before using the write command.

Command (m for help): d
Partition number (1-4): 2
Partition 2 is deleted

Command (m for help): n
Partition type:
p primary (1 primary, 0 extended, 3 free)
e extended
Select (default p): p
Partition number (1-4, default 2): 2
First sector (194560-31512575, default 194560):
Using default value 194560
Last sector, +sectors or +size{K,M,G} (194560-31512575, default 31512575):
Using default value 31512575
Partition 2 of type Linux and of size 15 GiB is set

Command (m for help): w
The partition table has been altered!

Calling ioctl() to re-read partition table.

WARNING: Re-reading the partition table failed with error 16: Device or resource busy.
The kernel still uses the old table. The new table will be used at
the next reboot or after you run partprobe(8) or kpartx(8)
Syncing disks.

We’re deleting the rootfs partition, and creating a new one. Since there is no space between the boot and the root partition in the first place, the new partition will start at the exact same position as the just deleted partition. This means, we’ve got a bigger partition, with a smaller filesystem in there.

We also observe the re-reading of the partition failed, since the partition is currently in use. Therefore we have to reboot in order for the new partition table to be known to the kernel. After reboot we can perform the resizing of the file system itself


[root@alarmpi andre]# resize2fs /dev/mmcblk0p2
resize2fs 1.42.6 (21-Sep-2012)
Filesystem at /dev/mmcblk0p2 is mounted on /; on-line resizing required
old_desc_blocks = 1, new_desc_blocks = 1
Performing an on-line resize of /dev/mmcblk0p2 to 3914752 (4k) blocks.
The filesystem on /dev/mmcblk0p2 is now 3914752 blocks long.

Now, we’re occupyting the whole SD card. So… setting up graphical enviorement. We’ve got some more disk space now, let’s install a browser.

[root@alarmpi andre]# pacman -S midori firefox
error: target not found: firefox

Hmmm…. firefox not found… apparently not in the repository. (Neither is thunderbird) More stuff I have to compile myself, just like I had to compile qemu. Perhaps I should really look into how to set up my own repository. For now, let’s install some other browsers.

[root@alarmpi andre]# pacman -S links midori netsurf

Links for when I am using a console. Perhaps I should better install elinks. Midori is a webkit browser. Should be fine for normal surfing but has some rough edges. At least last time I used it on my x86_64 machine. Netsurf, it is the default browser on the RISCOS image for the Raspberry Pi. That’s when I first heard of it.

Another this that cannot be missed on a graphical installation is an IRC client. Recently I have migrated from Xchat to Hexchat, since the latest Xchat release is over two years old. As Hexchat is in AUR, we need to compile it ourselves. While installing, I ran into the following error.

==> ERROR: hexchat is not available for the 'armv6h' architecture.
Note that many packages may need a line added to their PKGBUILD
such as arch=('armv6h').
==> ERROR: Makepkg was unable to build hexchat.
==> Restart building hexchat ? [y/N]
==> --------------------------------
==>

It happens on some packages. Note that AUR is meant for ArchLinux, and that ArchLinuxARM is just using their AUR. They could have set arch=(‘any’) and it would have compiled anyways, but i686 and x86_64 are the official supported architectures, therefore putting those in the arch array makes perfect sense. Just edit the PKGBUILD and add ‘armv6h’ to the arch array, and it will work fine. They should have used any. The specefic i686 and x86_64 should only be used for binary packages (skype, dropbox, opera and other proprietary someware *shiver*) or software written in assembly (not aware of any)

Compiling takes long, especially on an ARM board. Therefore, during compiling I decided to install some more software. Qmmp is the music player I usually use on my Linux boxes. I used to use xmms in the past, but it being a gtk1 application, it’s considered a dinosaur. Some distros ditched it years ago, but Arch still has it in its repository.

But doing this on a Raspberry Pi Model B Revision 1, with only 256 MB of shared RAM, well…. it ran out of RAM, and both terminals were closed. (My XFCE was running already) I need to connect a USB Hard Disk with a swap file and home partition. Compiling stuff on a SD card, it’s not a wise thing to do. Too many writes and a limited number of write cycles. I would like to use the SD for a little longer.

I know it’s not wise, but I’ve tried another attempt building hexchat, this time, not doing other things with the Pi during the build.

==> Tidying install...
-> Purging unwanted files...
-> Compressing man and info pages...
-> Stripping unneeded symbols from binaries and libraries...
-> Removing libtool files...
==> Creating package...
-> Generating .PKGINFO file...
-> Adding install file...
-> Compressing package...
bsdtar: Failed to set default locale
xz: (stdin): Cannot allocate memory
bsdtar: usr/share/locale/lv/: Write error
==> ERROR: Failed to create package file.
==> ERROR: Makepkg was unable to build hexchat.
==> Restart building hexchat ? [y/N]
==> --------------------------------
==>

So, it actually finished, but ran out of memory during the package creation. We really need that hard disk… But…. what hard disk to use? I have three external hard disks connected to my server Pi, but they’re in use. I have one more external HD. I wasn’t sure what was on it, but… there is stuff on it, and it’s full. A 500 GB Hard Disk… Backing the data up to my desktop… well… all it’s hard disks are smaller. One hard disk, containing a Windows 8 Developer Preview and an OpenIndiana installation, but mostly unpartitioned space. OpenIndiana isn’t really usefull on that machine, and I haven’t booted it since… long ago. And well… Windows… I don’t think I need to explain. So… that hard disk had been extracted from my desktop (blaatkonijn) and connected using a USB-IDE adaptor.

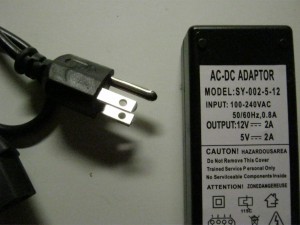
I’ve recently ordered an USB->IDE/SATA at dx.com. It looks exactly like my USB->IDE except for the SATA connector at the top. My USB->IDE power supply came with a switch in the cable, which the USB->IDE/SATA one lacked. More overly it came with a type B power plug.


Even though it comes with a type B power plug, mostly used in the United Stated (120 VAC) and Japan (100VAC), the power adaptor says 100-240 VAC, so just connecting a different cable should do the trick. Still I was a little suspicious, as when inserting the power cable, it made this clack noise as if its initial current was rather high. Therefore I have verified the output voltages with a multimeter before connecting any hard disks to it. This is something I’ve done a few weeks ago.

Anyhow, I’ve decided to use that power adaptor, as I don’t need the switch, and I started to parition it. GParted refused to start, due incorrect locale. The locate problem, for now, I just did a export LC_ALL="C", but this was another problem that needed to be fixed. Well… GParted working on C locale. How big should I make the swap partition? I’ve made it 8 GB. It’s insane, but better too much then too little, and the rest of the disk as home partition.

As I am configuring my fstab anyways, let’s take care of my network mounts as well.

[root@alarmpi andre]# pacman -S nfs-utils

This results in the following entries added to my fstab


UUID=5d44c79b-7fc0-4711-a9f5-73dcaea98275 swap swap defaults 0 0
UUID=839de469-ef9d-48a7-aedd-d2a6b05f1a5f /home ext4 defaults 0 2

rpi-server:/srv/nfs4/1000 /mnt/1000 nfs defaults 0 0
rpi-server:/srv/nfs4/1500 /mnt/1500 nfs defaults 0 0

At first I put nfs4, but it didn’t work yet, so I am using nfs3 instead. Looking at my other machines, they’re also using nfs3, so that’s consitent with the rest of my installation. I should look at how to migrate to nfs4, but nfs3 is good enough for now.

Why did I mention that power adaptor? Well… it went poof and blew my fuse after operating for a while. At least, I blaim that thing for my blews fuse, as it was rather hot and smelled burnt, and I had a feeling about it since I got it. Hooray, I had a little mini tiny apocalypse, a blown fuse.

Connecting my other power supply, the one with the switch, which came with this USB->IDE adaptor, everything works fine. This power supply remains at a normal temperature, and has been running for quite a while without problems. However, now I don’t have any power supply for the other USB->IDE/SATA adaptor.

As this post is getting lengthy, this is where I stop. More will follow in a next post, as there are some more things I’ve encountered. I mean, a lot has happened while waiting for the world to end. Also, a package with a 5¼” floppy drive I’d bought on ebay arrived

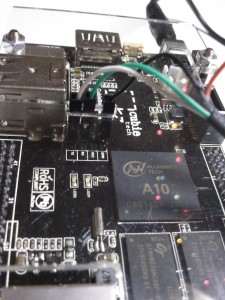
Last friday, my CubieBoard arrived. I only had time today to play around with it. First of all, it turned out to be a 512 MB version. I was under the impression the CubieBoards from the Indiegogo campaign were the 1 GB version.

Anyhow, let’s get started. Since it is an Allwinner A10 based device, it *should* work as follows:
Prepare the SD card as for a Mele A100 and replace the script.bin file with the adequate version.
The script.bin file is a compiled fex file, using the fex2bin tool. It should be somewhere in that git repository as well, but there is an AUR package so just install sunxi-tools-git and there we go.

The package included an USB to 3.3 Volt serial cable. How to connect it however? A little looking around finds me the answer.

DSC_0002

Connected to the serial console… nothing!!! Nothing at all.

Now…. I have been stupid. I had another USB-to-Serial adaptor inserted to my compyter, connected to an (unpowered) BeagleBoard. No wonder I saw nothing
on the serial connection!

So… connected to the correct serial port, I see an u-boot prompt, the usual countdown till boot. And booting the kernel. However…. the kernel isn’t very happy about the board

The ArchLinux kernel is OOPSing… also, it detects 512 MB of RAM. This was supposed to be the 1 GB version of the CubieBoard, wasn’t it?
I have installed the script.bin for the 1 GB version. Perhaps that’s why it is having trouble? Replacing the script.bin file didn’t solve the issue.

I’ve downloaded a cubieboard specific boorloader/kernel from linux-sinxi which boots the board correctly. So, the board boots… however, using a kernel out of repository. I’m not that happy about having files in my filesystem pacman isn’t aware of.
Another issue with using this kernel is there are no kernel headers, so compiling kernel modules will be a problem as well.

So far so good, I’ve got a login prompt at the serial console. The system boots. Connecting the HDMI output to my DVI-D monitor doesn’t give me an output however. I will probably have to configure it somewhere. In the meantime, let’s look at some other stuff.

I’ve bought an HDMI -> VGA adaptor. Since my (second) Raspberry Pi is known to be working with my display, on it’s DVI-D input, I’ve decided to hook it up over VGA with the adaptor. This second Pi is not configured yet, just having (almost) unused image on it.

On boot, the monitor reports Out Of Range. This probably means the EDID information from the screen isn’t correctly passed through the HDMI interface, causing the Pi to select an unsupported resolution/refresh rate.

Of course it is possible to force a specific resolution in the config tile in the boot partition, but I consider this an ugly practice. So, software controlled resolution changing it is. It was a little work to figure this out, as it requires two separate tools to perform this action.

First there is fbset, a tool to configure the framebuffer. (Install package fbset)

Just setting

fbset -xres 1280 -yres 1024

doesn’t work. Therefore I have connected the monitor over DVI-D input again, and tried changing the resolution on a working screen. Even through the tool reports a different resolution, the content of the screen tells otherwise.

A little searching on the internet points me to a tool called tvservice. I have no idea to which package it belongs, it appears to be located in /opt/vc/bin. This directory is not in the path. It’s linked against libraries in /opt/vc/lib, which is also not in the library path. So, to tell ld to also look for libs there. (Note: temporary solution, also LD_LIBRARY_PATH was empty, otherwise I would have been replacing it with the command below)

export LD_LIBRARY_PATH=/opt/vc/lib

To list supported display modes

[root@alarmpi bin]# ./tvservice -m DMT
Group DMT has 8 modes:
mode 4: 640×480 @ 60Hz, progressive
mode 6: 640×480 @ 75Hz, progressive
mode 9: 800×600 @ 60Hz, progressive
mode 11: 800×600 @ 75Hz, progressive
mode 16: 1024×768 @ 60Hz, progressive
mode 18: 1024×768 @ 75Hz, progressive
mode 35: 1280×1024 @ 60Hz, progressive
mode 36: 1280×1024 @ 75Hz, progressive

To change resolution:

[root@alarmpi bin]# ./tvservice -e=”DMT 35″

This, indeed, does chnage the output resolution/refresh rate, however, it just outputs a blank screen. In order for it to work, afther changing the resolution with tvservice, the fbset command is required. Then it appears to work.

In the meantime, I have been thinking about other caused for this behaviour. I have heard about issues with similar adaptors in combination with the BeagleBoard. As the device is powered from the HDMI interface, it draws current from it. The current requirements were too high for the BeagleBoard, requiring a polyfuse to be replaced by a bigger one on the Beagle.

So, in order to test the device, I’ve hooked it up to the HDMI output of my laptop. The laptop (HP EliteBook 8530w) does not see the monitor connected. Not at all. At the moment when I unplugged the device, something funny happened.

Anyhow, seeing the results on the changing resolution on the Pi made me decide to give it another try. Surprisingly, this time it just worked out-of-the-box. I didn’t have to change any settings, the correct resolution was used right away.

I suspect the case was causing trouble again. There is this plastic case around my Pi, and the hole is just big enough for the metal part of the HDMI connector to pass through, however, the part where you hold the plug is against the cover, therefore, not allowing the plug go in as far as it normally would. This can cause some bad connection. Perhaps that’s what went wrong the first time. My usual HDMI->DVI-D cable has also bad contact issues, but it causes no signal.

This no-signal situation is what caused me to look into the online changing the output settings of the screen in the first place, as I don’t feel like rebooting until the damn plug makes contact.

However, I still have not verified the passing through of the EDID code. It could be that this tvservice is playing with me, and storing the resolution in the config file in the boot partition. It would not be neat if it did that, and I could just verify if the config file is untouched. Let’s assume for now, it just passed through the EDID as it should have.

Anyhow…. that was my Pi for today. I will have to look at the CubieBoard again, see how to make it generate some output on that screen. At least it boots, so it’s probably just a matter of configuration. And that’s going to be a little harder on the CubieBoard. The community is a lot smaller then the Raspberry Pi community, and AllWinner isn’t giving away much documentation about its SoC.

If it’s about documentation, a TI SoC is to be recommended I believe. I haven’t been reading much documentation myself, but that’s what I’ve been hearing. I still have that BeagleBoard C3 lying around. It’s that damn USB problem that’s keeping me from using it…. I should have returned it right away… I should… but back in the days I assumed it was a software issue and waited for a new kernel.

Well… the BeagleBoard, BeagleBoard-xM and BeagleBone are a little more expensive then Raspberry Pi and CubieBoard. I guess they’re also targeted at a different audience. Let’s just say, I’ve ordered a Raspberry Pi in the UK, I’ve ordered a CubieBoard in China, and a BeagleBoard in the USA. For the BeagleBoard I had to send a verification about the intended use to the American customs. Seriously!

P.S. Another funny observation: When unplugging the CubieBoard from its power source while connected to the supplied USB to serial cable, the power led remains lit (dimmed, but still emitting light)

So, before I was interrupted by that server hickup, I was about to write about dot-matrix LCD-displays. I have recently ordered a 128×64 LCD display at dx.com. This is more-or-less a cat-in-the-bag, as there is no datasheet provided, and there is no clear brand/type of the display. However, a possible datasheet might be this. This datasheet mentions a serial mode, but shown no clue how the controlling in serial mode is supposed to happen. The customer reviews are even more confusing as one user mentions it supports I²C and another user mentions SPI.

In the past, I have had some experience with a KS0107-based display. However, I have no guarantee which controller this display uses. However, it is likely to be a ST7920-based display. At least, if I have to believe a thread on how to get the display working in combination with an arduino. I am not familiar with the arduino platform, but the thread gives a few useful hints. The ST7920 datasheet tells about a parallel and a serial mode. The serial mode looks like a synchronous serial connection. I should provide a clock signal and data. Apart from some synchronisation bits, the serial data seems equal to the data which should be provided at the parallel interface. There is also a pin for selecting between serial and parallel mode.

The Arduino related discussions appear to be using the SPI to interface with this display in serial mode. I am not familiar with the SPI protocol, but from what I have read from it, it’s send-a-byte, receive-a-byte, but according to what I’ve read controlling this display in serial mode is just sending data. The use of SPI for this seems like a hack to me, however, if it works on an hardware SPI bus, it’s less CPU intensive then just bitbanging the protocol over GPIO.

As mentioned, I have been using a KS0107-based display before. I have been using this in parallel mode. Therefore, parallel mode would be my preferred mode for using this display as well. It’s simpler and faster, but it requires more GPIO pins, but I believe I am a little short of GPIO pins, and that’s what makes the serial mode preferable. Since my hardware also has an SPI bus, interfacing it over the SPI bus sounds like an option. Looking at the datasheet, the display also supports a 4 bit operation mode. So this is another alternative to interface such a display.

However, I still have not received my display yet, so it’s just some reading ahead what I’ve done. But the plan is to interface such a display with my Raspberry Pi. I might also order a 4×4 keypad to be used in combination with that display. Looking at the picture it has 8 pins.

Server hickup

I was about to write some thoughts down about a dot-matrix LCD display…. when my server failed to respond. It did reply to a PING, so the network connectivity was OK. When I was able to log in again a few minutes later, I noticed an insane load.
load average: 47.38, 80.48, 55.56
80?!?!?!?!?! what the fuck is my server doing!?!?!?! What has caused this behaviour? Is it a Denial-of-Service attack? If so, who has interest in bringing my server down?

Anyways, apart from the insane load, and the temporary being unavailable of the server, the real problem is this condition causes the server to run out of memory eventually, causing the kernel to start killing tasks, and when it does so, clamd is most likely the victim. When clamd is down, the mail server will refuse to handle any more mails. The default behaviour in case of out-of-memory is to kill the task using most memory. Clamav is a memory-hungry daemon. Why does it use that much memory? Anyhow, I am wondering if there is a way to exclude a specific process from the list of potential-to-be-killed tasks?

I believe the high load is caused due nearly running out-of-memory, causing heavy swap usage. Anyhow, everytime this event appears, it is caused by apache. So, that raises the question if there is a way to prevent apache (and anything that runs under it, such as php) from using too much memory?

Last this problem occurred, there were 128 instances of apache in memory. I guess, I should reduce this to a way lower value. I have been having problems like this before, and as solution I have started using mpm prefork. Its configuration allows me to set the maximum number of instances, and I have reduced this to a lower value. I hope this prevents this problem from appearing in the future.

So, in the end, it appears to be a simple misconfiguration. No attack whatsoever.