Tag Archive: archlinux


Back in 2011 I used to trade some bitcoins at an exchange called Bitcoin7. This exchange got hacked and I lost all my bitcoins and euros in my account over there and I lost my interest in cryptocurrencies. However, since the exchange rate of the bitcoin got a lot higher then back then, I’ve decided to take a look at it again.

I’m also thinking about doing a bit of mining. I mean… there is a fancy graphics card in my laptop, and I am no gamer, so, mining is the only purpose of the damn thing. However, getting OpenCL working using free software only (free, as in open source. not using proprietary binary blobs as driver) is not a trivial task. The open source nvidia driver, nouveau, does not support OpenCL at all, therefore my HP EliteBook 8530w is out of the question. My HP EliteBook 8570w however, got an ATI/AMD graphics card. With this card, OpenCL should be able to work. However, support is not included in the mesa package available in the repository. In the AUR repository there is a package mesa-cl, however, it fails on compiling a dependency, the libclc-svn package, also from AUR. As I look at the build instructions for GalliumCompute, it seems they compile a llvm/clang with experimental r600 support. I suppose the repository version of llvm/clang misses this configuration option, which may be the cause of this build failure.

Therefore, I am compiling some stuff manually, according to the instructions on http://dri.freedesktop.org/wiki/GalliumCompute/. I usually prefer not to install software which is not managed by pacman. Having files floating around in my root file system that are not managed by any packet seems a little messy to me.

Anyhow. mining… I might have a look at mining both bitcoins and litecoins. Possibly other cryptocurrency as well later, but for now, bitcoins and litecoins will be the thing I will look at. I might possible also have a look at an ASIC for bitcoins. I am considering ordering an USB Block Erupter.

However… synchronising with the bitcoin and litecoin networks takes forever.

Okay, so, I’ve got my ArchLinux installed on my HP EliteBook 8570w. I wish have the same installation on my HP EliteBook 8530w. The way to go, just make a copy of the root file system and put it on the other machine.

cd /
tar  --one-file-system -avpcf /mnt/usb-hard-disk/arch-rootfs-running.tar.xz .

Then boot up the other system, in UEFI mode, from the ArchLinux USB Flash stick, and follow UEFI installation guide up to and including formatting the partitions. (See also my previous post: UEFI Installation guide. Then, in stead of pacstrapping, we’re going to insert the usb-hard-disk where we made a tarball and extract it to the root file system partition.

mkdir /mnt/{hd,usb}
mount /dev/sda3 /mnt/hd
mount /dev/sdc1 /mnt/usb
cd /mnt/hd
tar -xvpf /mnt/usb/arch-rootfs-running.tar.xz

Now, we have a “clone” of the installation of the other machine. A few system specific stept must be performed to make this system ready for use. First, I will arch-chroot into the system:

arch-chroot /mnt/hd

I will set the hostname for this laptop

echo 8530w > /etc/hostname

I will remove the graphics card specific patch (See Glamot Acceleration Problems)

rm /etc/X11/xorg.conf.d/20-radeon

I will remove the ssh keys, such that a new keypair will be generated. The same keys on two machines is a no-go

cd /etc/ssh
rm *key*

Another thing that must be done is generating a new fstab, as we have formatted new partitions, their UUID will be different. It is unique after all. (I am overwriting the file. I will re-add the NFS mounts later)

mount /dev/sda1 /boot/efi
mount /dev/sda4 /home
swapon /dev/sda2

genfstab -U -f / > /etc/fstab 

And finally, setting up the boot loader

grub-install –target=x86_64-efi –efi-directory=/boot/efi –bootloader-id=grub
grub-mkconfig > /boot/grub/grub.cfg

Which works fine on this laptop. The other laptop had an issue with efibootmgr.
However, the system boots up into an emergency console. Looking at the fstab generated, it had some weird entry causing the problem:

/etc/resolv.conf/etc/resolv.conf	/etc/resolv.conf	none      	rw,relatime,bind	0 0

Which is probably a remains from the booting from installation media and using the genfstab inside the arch-chroot, in stead of before.
Just removing the entry solves the problem, and then the system just boots up to the login prompt.

But, we’re not done yet. I have cloned the root file system, and not the home partition, Which means, there will be no home directory for my user.
so, log in as root,

mkdir /home/andre
chown andre:users /home/andre

Then, I can log out as root and log in as myself.

Just for convinience, I’ll copy some files from my other laptop’s home directory over:

scp -r 8570w:.config . 
scp -r 8570w:.thunderbird . 
scp -r 8570w:.mozilla . 

The xfce4-cpufreq-plugin didn’t really like this operation, but removing and re-adding it makes everything work. Also, I have to add the temperature monitor for the GPU again.

To install a new ArchLinux installation from an existing installation, one would generally use the method described on their wiki. https://wiki.archlinux.org/index.php/Install_from_Existing_Linux#Method_1:_Using_the_Bootstrap_Image

However, I am running an x86_64 installation, and I would like to create an i686 bootable USB stick. My first idea was to replace the x86_64 bootstrap image by the i686 bootstrap image. However, the resulting USB stick turned out to be x86_64. So, that’s not quite what I was looking for.

In order to create an i686 installation from an existing x86_64, one needs to adjust the /tmp/root.i686/etc/pacman.conf file ( or /tmp/root.x86_64/etc/pacman.conf for that matter) and change the Architecture line.

Architecture = auto

into

Architecture = i686

then run the pacstrap command as described on the wiki.

After pacstrap is finished, chroot into the installed system, and install the bootloader. I’m using syslinux for this.

sh-4.2# arch-chroot /mnt
sh-4.2# pacman -S syslinux
error: failed to prepare transaction (package architecture is not valid)
:: package syslinux-6.02-4-i686 does not have a valid architecture

The “Architecture” must also be set in the target installation. In the “base” installation, nano is the available editor. Run nano /etc/pacman.conf and modify the file, then we can install syslinux.

sh-4.2# pacman -S syslinux
resolving dependencies...
looking for inter-conflicts...

Packages (1): syslinux-6.02-4

Total Download Size:    1.09 MiB
Total Installed Size:   3.24 MiB

:: Proceed with installation? [Y/n] 
:: Retrieving packages ...

etc. etc. the installation continues normally.

Installing the bootloader can take a few minutes. Be patient.

sh-4.2# syslinux-install_update -i -a -m
Syslinux BIOS install successful
Boot Flag Set - /dev/sdc1
Installed MBR (/usr/lib/syslinux/bios/mbr.bin) to /dev/sdc

Now, we need a little configuration. We still have to create an fstab, and configure the bootloader. Since we’re going to boot from USB, I will be using UUID’s to identify the right volume.

[root@8570w andre]# blkid /dev/sdc1
/dev/sdc1: UUID="a7d9a26e-abb3-461b-aacd-1ae4fe96f2e4" TYPE="ext2" PARTUUID="b71a2cfb-01" 

/etc/fstab becomes

UUID=a7d9a26e-abb3-461b-aacd-1ae4fe96f2e4	/         	ext2      	rw,relatime,data=ordered	0 1

in /boot/syslinux/syslinux.cfg, set the right root device, so it looks like

    MENU LABEL Arch Linux
    LINUX ../vmlinuz-linux
    APPEND root=UUID=a7d9a26e-abb3-461b-aacd-1ae4fe96f2e4 rw
    INITRD ../initramfs-linux.img

I have tried to boot the resulting stick in qemu-system-i386, which fails, but it boots on real hardware. (To test this, I have enabled CSM temporary on my laptop)

Now, we are this far, we can start the second phase of the project.

Yaourt

Yaourt is a wrapper for the pacman package manager, which allows installing from the Arch User Repository, AUR. It also supports installing from a normal user, and then prompts for a password to install through su or sudo. Yaourt is not available in the standard repositories. However, it’s available in the ArchLinux France repository:
Adding the archlinuxfr repository and install yaourt.

Network

In order to have a dynamic network configuration, for example, to easily connect to a WiFi, NetworkManager is a convenient tool.

[andre@8570w ~]$ yaourt -S openntpd networkmanager dnsmasq bluez network-manager-applet gnome-keyring
[root@8570w andre]# systemctl enable NetworkManager 
[root@8570w andre]# systemctl enable NetworkManager-wait-online

Network was previously configures to use DHCP on the ethernet connection, disable this to prevent conflicts:

[root@8570w andre]# systemctl disable dhcpcd@enp0s25

In order to start openntpd once the connection has been established, look here.

NFS

Installing NFS support and enabling the daemons:

[andre@8570w ~]$ yaourt -S nfs-utils
[root@8570w andre]# systemctl enable rpc-statd
[root@8570w andre]# systemctl enable rpc-gssd

NFS3 vs NFS4

On the old laptop, I was running NFS3 as NFS4 gave me some problems. There was a detail I’ve overlooked. Back then, I was like, I’ll come back to this issue later, and never looked into it again. The difference between mounting NFS3 and NFS4 is the fact NFS3 required the full path on the server, while NFS4 requires a relative path to the NFS root. Therefore the corresponding lines in the fstab are

NFS3:

192.168.178.49:/srv/nfs4/1000   /mnt/1000   nfs defaults,user,noauto 0 0

NFS4:

192.168.178.49:/1000   /mnt/1000   nfs4 defaults,user,noauto 0 0

Mounting from thunar

In order to mount removable media, for example, an SD card, “USB stick” or external hard disk through Thunar, we need the gvfs

[andre@8570w ~]$ yaourt -S gvfs

Before I installed gvfs, I had my user mountable NFS mounts from my fstab listed in Thunar, after installing they were gone. To get them back, add x-gvfs-show to the mount options in fstab

192.168.178.49:/1000   /mnt/1000   nfs4 defaults,user,noauto,x-gvfs-show 0 0

Touchpad

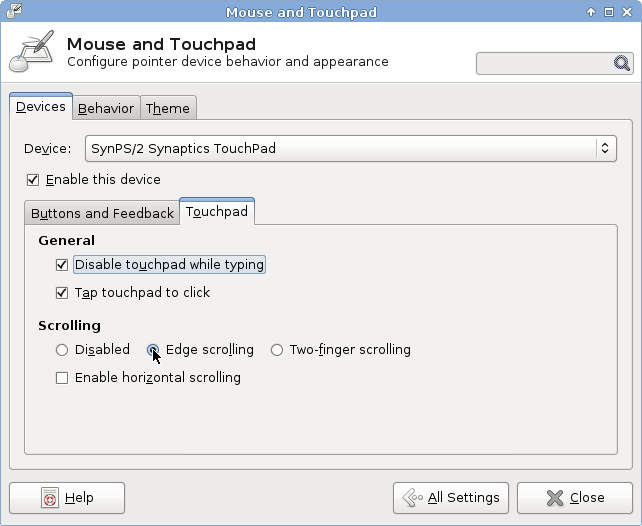
This laptop has a huge touchpad. By default it was set to “two finger scrolling”. Really annoying. This is not a Mac for God’s sake! After a day, I’m getting RSI pains. No good… but fortunately, this is just a configuration option, and can be set to normal edge scrolling.

woohoo --- i can use edge scrolling

Localisation

At first, I didn’t configure a language. Just running in English was fine, but what I didn’t realise is that this meant I was running in “C”, meaning it wasn’t using UTF-8 encoding, which prevented me from listening to Russian music, as their file names contain non-ASCII characters.

[andre@8570w ~]$ echo $LANG
C

Before setting any locale, it has to be generated. Uncomment the desired locales in /etc/locale-gen and run locale-gen

[root@8570w andre]# locale-gen

So, I am going to configure a global setting of UK English with UTF-8,

[root@8570w andre]#  localectl set-locale LANG=en_GB.UTF-8

and set my own profile to Dutch by adding the following to ~/.bashrc

export LANG=nl_NL.UTF-8

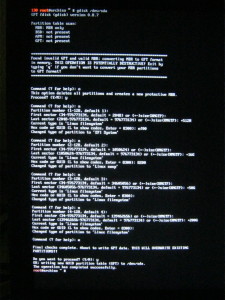
Well, last post I’ve discussed the problems I’ve encountered while trying to boot the ArchLinux installation CD in UEFI mode. As mentioned, it booted fine in legacy (BIOS) mode. Anyhow, let’s have a look at the installation procedure on an UEFI/GPT system.

IMG_1324Since the hard disk was previously partitioned using the MBR partition scheme and booting in legacy (BIOS) mode, we need to start from scratch. This includes creating the UEFI system partition.

When we start the GPT version of fdisk, gdisk, it will give a message about the fact the hard disk is currently using  the MBR partitioning scheme, and converting could possibly be destructive. We are going to repartition the whole disk, so it’s a destructive operation anyways.

So, we create an empty parition table, with the o command, just the way we would do in fdisk, we create a new partition with the n command. Here we notice a little difference, we can enter a number between 1 and 128 here. We’ll proceed with creating a 512 MB partition, and enter HEX code EF00 for EFI BOOT PARTITION.

Since the new laptop got 8 GB of RAM, the size of the Swap partition will be 16 GB. This is the next partition I’m going to create. I will enter 8200 for Linux Swap Parition.

The next two partitions will be the root file system and the home partition, 50 and 200 GB. I have kept left an amount of unpartitioned disk space for potential use with other operating systems. gdisk defaults to code 8300, which is ext2/3/4, so I don’t need to change this. All the same as with fdisk.

Next, will be formatting the partitions. However, attempting to format the partitions immediately after closing gdisk will result in an in-use error message. Re-reading the partition table doesn’t make a difference, a REBOOT is required to proceed. After rebooting, formatting works like a charm. The UEFI BOOT partition MUST be formatted FAT32. The other partitions will be formatted ext4, and the swap partition will have to be initialised with mkswap.

# mkfs.vfat -F32 /dev/sda1
# mkfs.ext4 /dev/sda3
# mkfs.ext4 /dev/sda4
# mkswap /dev/sda2

After formatting the partitions, we can mount them and start the ArchLinux installation process.

# swapon /dev/sda2
# mount /dev/sda3 /mnt
# mkdir /mnt/home
# mount /dev/sda4 /mnt/home
# mkdir -p /mnt/boot/efi
# mount /dev/sda1 /mnt/boot/efi
# pacstrap base /mnt
# genfstab -U -p /mnt >> /mnt/etc/fstab
# arch-chroot /mnt
# ln -s /usr/share/zoneinfo/Europe/Amsterdam /etc/localtime
# mkinitcpio -p linux

So far, the installation procedure itself, has been pretty standard. The next step, setting up the boot loader, has caused me some problems. And this is the step that differentiates UEFI from BIOS booting, the boot process.

First of all, the EFI variables must be mounted. Please note the grub-install is executed inside the arch-chroot.

# mount -t efivarfs efivarfs /sys/firmware/efi/efivars
# pacman -S grub efibootmgr
# grub-install –target=x86_64-efi –efi-directory=/boot/efi –bootloader-id=grub

However, this resulted in an error message show_boot_order() "no such file or directory". The result is the system doesn’t boot automatically, but when I choose to browse the file system, I can load GRUB2 and boot correctly.

Next, I’ve tried to install Gummiboot, and “chainload” GRUB2. This works fine. However, gummiboot assumes the EFI boot partition to be mounted at /boot.

# pacman -S gummiboot
# gummiboot –path=/boot/efi

Now, setting it up to chainload GRUB, in /boot/efi/loader/entries/grub.conf:

title GRUB
efi /EFI/grub/grubx64.efi

And in /boot/efi/loader/loader.conf

default grub

makes the system bootable.

UEFI boot

As I am about to install my new laptop, I am considering using UEFI. The laptop supports UEFI but came with legacy booting enabled as default option. Whether this is the university setting or the factory default I’m not sure, since my father’s HP laptop got UEFI enables as default option.

I haven’t been working with UEFI systems before. Well, I’ve installed Ubuntu on my father’s laptop, on an external (USB) hard disk, so he could dual boot Windows and Linux. And that’s one of the advantages of UEFI. No boot manager is required. This is built in into UEFI.

My new laptop, the HP EliteBook 8570w has three options, legacy boot, uefi hybrid (both legacy and uefi / with csm), and native uefi (without csm).

I have selected the compatible mode. Now, as I try to boot from the ArchLinux installation CD. I am still using my external (USB) optical drive, since the laptop was delivered without internal optical drive. Well… so I boot from the CD, a menu shows, where I can choose between booting Arch, an UEFI shell (version 1 and 2) and to return to the firmware.

So, I select to boot Arch. The screen goes black. The USB optical drive appears to be reading slowly, but nothing happens. When I reboot, the uefi firmware does not detect the USB optical drive. Something is not going right. ArchLinux boot media are a hybrid case. The ISO contains both SYSLINUX and UEFI booting, but can also be dd’d to an USB flash medium. I believe this is the reason why I have had experienced booting ArchLinux installation media on my EliteBook 8530w. I have made an UEFI bootable USB flash drive according to the instructions on the ArchWiki.Using this I can boot normally. This appears to confirm my hypothesis the hybrid boot medium confuses the HP firmware.

So, creating partitions. Since I am using GPT, I will use gdisk in stead of fdisk. Creating partitions will be similar to fdisk. Partitions have numbers from 1 to 128. There are no concepts like extended and logical partitions. They’re a dirty hack of the MBR partitioning scheme anyways. I am still overthinking how I need to partition this system. This is the first time I am working an UEFI based system and GPT style partitioning. I still haven’t decided what boot loader I will be using, either SYSLINUX or GRUB2.

Server migration

As I’ve been mentioning before, the content is this server (ks26301.kimsufi.com) will be migrated to a new server (ks3291437.kimsufi.com). These are dedicated servers from http://www.isgenoeg.nl. The ks26301 server, which I have been using since April 2009, is their 2008 model. Back in 2009, their services got introduced in the Netherlands, and the first 1000 subscribers got a year free. I was one of the lucky.

Anyhow, this is a server from 2008, and the price hasn’t changed (apart from the taxes, that is). The point is, for the same price they offer much better specs. So, it makes sense to migrate. Also, over the past years I am hosting services for certain people, which makes the configuration I’ve been using since 2011 less optimal. I never enticipated the fact I would be offering hosting services to third parties, so even more reason to migrate my services to a new server.

At this point, I would like to highlight one of the issues that arrises during such a migration, and provide a solution for it. The problem is the way DNS works. When I change my DNS entries, it takes a while to propagate through the internet. The old IP address might be cached at some DNS server and so on. Therefore, during the migration, requests may arrive at both the old and the new server. So, how to make this situation transparant to the user?

First, let’s have a look at Apache. We’re going to use the mod_proxy for this purpose. I had this module already installed on my system, therefore, in my /etc/httpd/conf/httpd.conf I have

LoadModule proxy_module modules/mod_proxy.so
LoadModule proxy_connect_module modules/mod_proxy_connect.so
LoadModule proxy_ftp_module modules/mod_proxy_ftp.so
LoadModule proxy_http_module modules/mod_proxy_http.so
LoadModule proxy_scgi_module modules/mod_proxy_scgi.so
LoadModule proxy_ajp_module modules/mod_proxy_ajp.so
LoadModule proxy_balancer_module modules/mod_proxy_balancer.so

I might check later on a different (non-production) server which of these are actually required for this purpose.

Anyhow, in my /etc/httpd/conf/extra/httpd-vhosts.conf, I use the following to proxy the connection to the new server. Please note my old server resolved the domain.tld to the new server. Just to be sure it won’t get caught up in a loop, I might add it to /etc/hosts as well. (I’ve kept the DocumentRoot in there, but it has no real purpose anymore. Merely a fallback in case the mod_proxy isn’t loaded)

<VirtualHost *:80>
  ServerAdmin webmaster@domain.tld
  DocumentRoot "/path/to/documentroot"
  ServerName domain.tld
  ServerAlias www.domain.tld
  ErrorLog "/var/log/httpd/domain.tld-error_log"
  CustomLog "/var/log/httpd/domain.tld-access_log" combined

  <IfModule mod_proxy.c>
    <Proxy *>
      Order deny,allow
      Allow from all
    </Proxy>
    ProxyRequests off
    ProxyPassInterpolateEnv On
    ProxyPass / http://www.domain.tld/ interpolate
  </IfModule>

</VirtualHost>

Next issue, is incoming mail. For now, I start at migrating the websites, and later I will migrate the mail. But as a proof-of-conecpt, I have tested this for one domain which only has a catch-all-forward.

The ks26301 runs exim as smtp server, well, basically, we’re going to tell it to forward mail for the specific domain to the ks3291437 server.

Just below begin routers in the /etc/mail/exim.conf file, we add

send_to_new_server:
  driver = manualroute
  domains = "domain.tld"
  transport = remote_smtp
  route_list = * ks3291437.kimsufi.com

These configurations should make the transition to the new server transparant to the end-user.

As I’ve been telling before, due the increased number of sites on my server, I’m hitting its limits. Mainly the fact the server got only 1 GB of RAM is putting limitations. Recently the server was acting up again, and I assumed it was caused by resource limits, therefore I attempted to tune the configuration a little more to use less resources, without any luck.

I started to notice this problem showed different characteristics the problems I’ve been experiencing before. Mainly because it seemed also to influence the mail system rather then just the webserver. The problem seemed to be linked to the mysql server. Restarting the server didn’t work as it should. Defenately something with mysql…. So I decided to start mysql in a console to look and I saw

mysqld: Disk is full writing './mysql-bin.~rec~' (Errcode: 28). Waiting for someone to free space... (Expect up to 60 secs delay for server to continue after freeing disk space)

The problem: the root file system was full: In all the time the server was running, of course I have frequently been upgrading the system. During all this time, packages were downloaded to /var/cache/pacman/pkg and never removed. So… it was eating a couple of gigabytes…. and the root file system is just a small filesystem, just for the OS. The data is elsewhere.

Another mystery solved.

My server Pi, well… it still needs some server stuff to be installed. Installing git has been forever on my TODO list. One of the things that are supposed to be handles by this git server is nightly backups of my dedicated server, which hosts this blog among a number of other sites. Originally, my BeagleBoard was supposed to have this role, but due its instabilities, I have never set it us as a git server. At some point in time, Eileen wanted to set up a server at her place, and asked me to help her with configuring it. So I asked if I could have some space on that server for backup purposes. Unfortunately, that machine was unstable as well, so it shut down as well.

To manage git, we’re going to use gitosis. The very same way as is done on my dedicated server (at ovh). But we’re going to use a different configuration. The ovh server exports all repositories, while here we’re going to set up private repositories. But we also want to have the possibility to have public repositories. We will also configure gitweb to have a nice interface to those public repositories.

This configuration is performed on a Raspberry Pi running ArchLinuxARM. However, this guide could be applied to regular ArchLinux on i386 or x86_64 as well.

Let’s get started, shall we?

[andre@rpi-server ~]$ yaourt -S gitosis-git

We have to create set the home directory for the git user manually:

[root@rpi-server home]# mkdir /srv/gitosis
[root@rpi-server home]# usermod -d /srv/gitosis/ git

Since we’re hosting this on a raspberry pi, and don’t want to store the repository on the SD Card, we’re going to apply the same method as we’re dong during the setup of the NFS shares: We add the following line to our fstab

/home/gitosis   /srv/gitosis    none    bind    0   0

Which basically means we mount the /home/gitosis directory to /srv/gitosis. Of course we could simple have made a symlink as well. Anyhow, let’s continue.
***** TODO **** use a symlink after all???

[root@rpi-server home]# mkdir /srv/gitosis
[root@rpi-server home]# mkdir /user/gitosis
[root@rpi-server home]# mkdir /srv/gitosis
[root@rpi-server home]# chown git:git /srv/gitosis
[root@rpi-server home]# chown git:git /home/gitosis/
[root@rpi-server home]# mount /srv/gitosis

Now, I am going to initialise gitosis. I will do this as the git user. So, I su to root and then to git, like this:

[andre@hplaptop ~]$ su
Wachtwoord: 
[root@hplaptop andre]# su git
[git@hplaptop andre]$ cd
[git@hplaptop /]$ 

I have placed a file in the home folder containing my public key. I will try to initialise gitosis using this key:

[git@rpi-server gitosis]$ gitosis-init < andre\@hp.pub 
fatal: unable to access '/home/andre/.config/git/config': Permission denied
Traceback (most recent call last):
  File "/usr/bin/gitosis-init", line 9, in 
    load_entry_point('gitosis==0.2', 'console_scripts', 'gitosis-init')()
  File "/usr/lib/python2.7/site-packages/gitosis/app.py", line 24, in run
    return app.main()
  File "/usr/lib/python2.7/site-packages/gitosis/app.py", line 38, in main
    self.handle_args(parser, cfg, options, args)
  File "/usr/lib/python2.7/site-packages/gitosis/init.py", line 136, in handle_args
    user=user,
  File "/usr/lib/python2.7/site-packages/gitosis/init.py", line 75, in init_admin_repository
    template=resource_filename('gitosis.templates', 'admin')
  File "/usr/lib/python2.7/site-packages/gitosis/repository.py", line 54, in init
    raise GitInitError('exit status %d' % returncode)
gitosis.repository.GitInitError: exit status 128

Apparently, it tries to access file in my (andre) home directory, while its running as git. It shouldn’t know about me, right? Well….

[git@rpi-server gitosis]$ set | grep andre
MAIL=/var/mail/andre
XDG_CACHE_HOME=/home/andre/.cache
XDG_CONFIG_HOME=/home/andre/.config
XDG_DATA_HOME=/home/andre/.local/share

So, there is still a reference to my config directory in the enviorement, lets unset this shit and continue:

[git@rpi-server gitosis]$ unset XDG_CACHE_HOME
[git@rpi-server gitosis]$ unset XDG_CONFIG_HOME
[git@rpi-server gitosis]$ unset XDG_DATA_HOME

Now, we can initialise gitosis:

[git@rpi-server gitosis]$ gitosis-init < andre\@hp.pub 
Initialized empty Git repository in /srv/gitosis/repositories/gitosis-admin.git/
Reinitialized existing Git repository in /srv/gitosis/repositories/gitosis-admin.git/

Now, we're going to install and configure the web server:

[andre@rpi-server ~]$ yaourt -S apache

We're going to do the mount bind again

/home/http   /srv/http    none    bind    0   0
[root@rpi-server ~]# mkdir /home/http
[root@rpi-server ~]# mount /srv/http/
[root@rpi-server ~]# chown http:http /srv/http/
[root@rpi-server ~]# chmod g+w /srv/http/

I'm going to add myself to the http group.

[root@rpi-server http]# groupmems -a andre -g http

As I've mentioned before, I wish to host gitweb as well. Gitweb is in the git package, so it's already installed, just making a symlink is enough, which I can do as myself, as I am in the group http. I've also downloaded the "unknown" folder from my ovh server, which is the page that displays the "domain not served as this server" page in case an unknown vhost is requested. I will move this as well:

[andre@rpi-server ~]$ ln -s /usr/share/gitweb /srv/http/gitweb
[andre@rpi-server ~]$ mv unknown /srv/http

As the fact I am putting my "unknown vhost" page on this server, it will be supporting vhosts. If a requested domain doesn't match any VirtualHost in the apache config file, it will serve the first entry in the config file, therefore we will edit the config file /etc/httpd/conf/extra/httpd-vhosts.conf and put the following in

NameVirtualHost *:80

<VirtualHost *:80>
    DocumentRoot "/srv/http/unknown"
    ErrorLog "/var/log/httpd/unknown-error_log"
    CustomLog "/var/log/httpd/unknown-access_log" combined
</VirtualHost>

However, Virtual Hosts aren't enabled yet. We need to edit the main config file in order to include the vhosts config file. We need to open /etc/httpd/conf/httpd.conf and uncomment the virtual hosts line:

# Virtual hosts
Include conf/extra/httpd-vhosts.conf

The "unkown vhost" page is written in php, so we're also going to install php:

[andre@rpi-server ~]$ yaourt -S php-apache 

And add it to the apache main configuration file again: we need to load the library, and include the configuration file:

LoadModule php5_module modules/libphp5.so
Include conf/extra/php5_module.conf

We also have to add something for the gitweb configuration to the config file

<Directory "/srv/http/gitweb">
   DirectoryIndex gitweb.cgi
   Allow from all
   AllowOverride all
   Order allow,deny
   Options ExecCGI
   <Files gitweb.cgi>
   SetHandler cgi-script
   </Files>
   SetEnv  GITWEB_CONFIG  /etc/conf.d/gitweb.conf
</Directory>

To finish the configuration, we're going to add an actual virtual host to the config, which also serves the gitweb. So we're going to edit the vhosts config again:

<VirtualHost *:80>
    ServerName ehv.blaatschaap.be
    Alias /gitweb "/srv/http/gitweb" 
    DocumentRoot /srv/http/blaatschaap.be/ehv
    ErrorLog "/var/log/httpd/blaatschaap.be-ehv-error_log"
    CustomLog "/var/log/httpd/blaatschaap.be-ehv-access_log" combined
    <Directory /var/www/gitweb>
       Options ExecCGI +FollowSymLinks +SymLinksIfOwnerMatch
       AllowOverride All
       order allow,deny
       Allow from all
       AddHandler cgi-script cgi
       DirectoryIndex gitweb.cgi
   </Directory>
</VirtualHost>

Now, this part of the server is configured. What still has to be done is putting the backup repository so far on the Pi server, and adjusting the script on the ovh server to make backups to this server.

Also, pretty soon I will be getting a new OVH server, as they're offering much better specs for the same price, and I am going to convert to Debian for a server. ArchLinux is great for desktops, but the changed in a rolling distribution such as ArchLinux are not convinient for a machine that's supposed to be always up. Especially the transition from sysvinit to systemd is giving me a headache, as sysvinitscripts are no longer supported... and I am a bit uncomfortable about chaging stuff in the boot loader as I don't have any serial console or anything. If it reboots, I just have to wait till it comes up, if it doesn't.... bad luck.

Besides, I am hosting a few sites for third parties. In order to keep overview, and offer my users a convenient interface I am considering usingISPconfig on my new server. As I have paid for the current server till 15 April, I should have finished the transition by then. I have paid till April since I have renewed my contract just one day before the VAT was increased from 19% to 21%. Anyhow. I plan to order the new server in February, so I have plenty of time for testing.

Just a few things left do configure on my server Pi. One of them is setting up the scanner server. This is quite straight forwards, and it just takes a couple of minutes to set it up. (See ArchLinux wiki) The first step is to install sane and xinetd on the server:

[andre@rpi-server ~]$ yaourt -S sane xinetd

The next step is setting the allowed clients in /etc/sane.d/saned.conf


# required
localhost
# allow local subnet
192.168.178.0/24

And configuring xinetd. The file /etc/xinetd.d/sane already exists, and all that needs to be changed is setting disable to no. On the clients, add the ip address of the server to /etc/sane.d/net.conf and it just works! Awesome!

Another thing still on the TODO list is the IPv6 tunnel. Unfortunately, the ArchLinux wiki still only lists a configuration for the classical initscripts, and not for systemd. Twice, even: IPv6 – Tunnel Broker Setup and IPv6 – 6in4 Tunnel are describing the same thing.

So.. I guess let’s have a closer look at systemd, how to add custom services to it, right? So… there is a link to Systemd/Services which actually provides what I am looking for. No need to write a custom script. Just adjust it to the settings for the XS4ALL tunnel.

/etc/systemd/system/xs4all-ipv6.service


[Unit]
Description=XS4ALL IPv6 tunnel
After=network.target

[Service]
Type=oneshot
RemainAfterExit=yes
ExecStart=/sbin/ip tunnel add xs4all-ipv6 mode sit remote 194.109.5.241 local 83.160.145.152 ttl 255
ExecStart=/sbin/ip link set xs4all-ipv6 up mtu 1472
ExecStart=/sbin/ip addr add 2001:888:10:590::2/64 dev xs4all-ipv6
ExecStart=/sbin/ip -6 route add ::/0 dev xs4all-ipv6
ExecStop=/sbin/ip -6 route del ::/0 dev xs4all-ipv6
ExecStop=/sbin/ip link set xs4all-ipv6 down
ExecStop=/sbin/ip tunnel del xs4all-ipv6

[Install]
WantedBy=multi-user.target

So… let’s try it:


[root@rpi-server system]# systemctl start xs4all-ipv6
Job for xs4all-ipv6.service failed. See 'systemctl status xs4all-ipv6.service' and 'journalctl -xn' for details.
[root@rpi-server system]# systemctl status xs4all-ipv6.service
xs4all-ipv6.service - XS4ALL IPv6 tunnel
Loaded: loaded (/usr/lib/systemd/system/xs4all-ipv6.service; disabled)
Active: failed (Result: exit-code) since Thu, 2013-01-03 14:50:02 GMT; 8s ago
Process: 15926 ExecStart=/sbin/ip tunnel add xs4all-ipv6 mode sit remote 194.109.5.241 local 83.160.145.152 ttl 255 (code=exited, status=1/FAILURE)
CGroup: name=systemd:/system/xs4all-ipv6.service

[root@rpi-server system]# /sbin/ip tunnel add xs4all-ipv6 mode sit remote 194.109.5.241 local 83.160.145.152 ttl 255
add tunnel sit0 failed: No such device

No worky yet… there is no sit0 device. Sounds like a missing kernel module to me, which makes sense, as I did a full system upgrade ( pacman -Syu) yesterday, which included a new firmware and kernel, but I didn’t reboot yet. So… I think that’s the problem. And indeed it was, after reboot it doesn’t display the error message anymore. However, it doesn’t work yet.

[root@rpi-server andre]# systemctl start xs4all-ipv6
[root@rpi-server andre]# ifconfig
eth0: flags=4163 mtu 1500
inet 192.168.178.49 netmask 255.255.255.0 broadcast 192.168.178.255
inet6 fe80::ba27:ebff:fe89:f248 prefixlen 64 scopeid 0x20 ether b8:27:eb:89:f2:48 txqueuelen 1000 (Ethernet)
RX packets 1614 bytes 167190 (163.2 KiB)
RX errors 0 dropped 0 overruns 0 frame 0
TX packets 1464 bytes 217606 (212.5 KiB)
TX errors 0 dropped 0 overruns 0 carrier 0 collisions 0

lo: flags=73 mtu 16436
inet 127.0.0.1 netmask 255.0.0.0
inet6 ::1 prefixlen 128 scopeid 0x10
loop txqueuelen 0 (Local Loopback)
RX packets 8 bytes 560 (560.0 B)
RX errors 0 dropped 0 overruns 0 frame 0
TX packets 8 bytes 560 (560.0 B)
TX errors 0 dropped 0 overruns 0 carrier 0 collisions 0

xs4all-ipv6: flags=209 mtu 1472
inet6 fe80::53a0:9198 prefixlen 128 scopeid 0x20 inet6 2001:888:10:590::2 prefixlen 64 scopeid 0x0
sit txqueuelen 0 (IPv6-in-IPv4)
RX packets 0 bytes 0 (0.0 B)
RX errors 0 dropped 0 overruns 0 frame 0
TX packets 0 bytes 0 (0.0 B)
TX errors 0 dropped 0 overruns 0 carrier 0 collisions 0

[root@rpi-server andre]# ping6 google.com
PING google.com(wi-in-x64.1e100.net) 56 data bytes
From tunnel1424.ipv6.xs4all.nl icmp_seq=1 Destination unreachable: Address unreachable
From tunnel1424.ipv6.xs4all.nl icmp_seq=2 Destination unreachable: Address unreachable
From tunnel1424.ipv6.xs4all.nl icmp_seq=3 Destination unreachable: Address unreachable
From tunnel1424.ipv6.xs4all.nl icmp_seq=4 Destination unreachable: Address unreachable
From tunnel1424.ipv6.xs4all.nl icmp_seq=5 Destination unreachable: Address unreachable
^C
--- google.com ping statistics ---
5 packets transmitted, 0 received, +5 errors, 100% packet loss, time 4005ms

So.. what’s wrong here? The Sever is set as the exposed host, therefore it should receive the tunnel packets. So that can’t be the problem. Also, using the old initscripts script it works. So… I guess I’ll have to look at the the differences. At first glance they look the same, so the difference got to be in the details. (note: the error messages are due the fact my system is no longer having support scripts for the old style initscripts)

[root@rpi-server andre]# /etc/rc.d/6in4-tunnel start
/etc/rc.d/6in4-tunnel: line 13: /etc/rc.conf: No such file or directory
/etc/rc.d/6in4-tunnel: line 14: /etc/rc.d/functions: No such file or directory
/etc/rc.d/6in4-tunnel: line 18: stat_busy: command not found
/etc/rc.d/6in4-tunnel: line 36: add_daemon: command not found
/etc/rc.d/6in4-tunnel: line 37: stat_done: command not found
[root@rpi-server andre]# ping6 google.com
PING google.com(wi-in-x65.1e100.net) 56 data bytes
64 bytes from wi-in-x65.1e100.net: icmp_seq=1 ttl=56 time=23.8 ms
64 bytes from wi-in-x65.1e100.net: icmp_seq=2 ttl=56 time=23.0 ms
64 bytes from wi-in-x65.1e100.net: icmp_seq=3 ttl=56 time=23.4 ms
64 bytes from wi-in-x65.1e100.net: icmp_seq=4 ttl=56 time=26.4 ms
^C
--- google.com ping statistics ---
4 packets transmitted, 4 received, 0% packet loss, time 3004ms
rtt min/avg/max/mdev = 23.044/24.208/26.488/1.355 ms

The problem was rather stupid. A mistake I was struggling with last time I had to set this up. The “local” IP is supposed to LAN (internal) ip not my WAN (external) ip.

[root@rpi-server andre]# systemctl start xs4all-ipv6
[root@rpi-server andre]# ifconfig
eth0: flags=4163 mtu 1500
inet 192.168.178.49 netmask 255.255.255.0 broadcast 192.168.178.255
inet6 fe80::ba27:ebff:fe89:f248 prefixlen 64 scopeid 0x20 ether b8:27:eb:89:f2:48 txqueuelen 1000 (Ethernet)
RX packets 834 bytes 81976 (80.0 KiB)
RX errors 0 dropped 0 overruns 0 frame 0
TX packets 790 bytes 118486 (115.7 KiB)
TX errors 0 dropped 0 overruns 0 carrier 0 collisions 0

lo: flags=73 mtu 16436
inet 127.0.0.1 netmask 255.0.0.0
inet6 ::1 prefixlen 128 scopeid 0x10
loop txqueuelen 0 (Local Loopback)
RX packets 8 bytes 560 (560.0 B)
RX errors 0 dropped 0 overruns 0 frame 0
TX packets 8 bytes 560 (560.0 B)
TX errors 0 dropped 0 overruns 0 carrier 0 collisions 0

xs4all-ipv6: flags=209 mtu 1472
inet6 fe80::c0a8:b231 prefixlen 128 scopeid 0x20 inet6 2001:888:10:590::2 prefixlen 64 scopeid 0x0
sit txqueuelen 0 (IPv6-in-IPv4)
RX packets 0 bytes 0 (0.0 B)
RX errors 0 dropped 0 overruns 0 frame 0
TX packets 0 bytes 0 (0.0 B)
TX errors 0 dropped 0 overruns 0 carrier 0 collisions 0

[root@rpi-server andre]# ping6 google.com
PING google.com(wi-in-x71.1e100.net) 56 data bytes
64 bytes from wi-in-x71.1e100.net: icmp_seq=1 ttl=56 time=23.4 ms
64 bytes from wi-in-x71.1e100.net: icmp_seq=2 ttl=56 time=22.8 ms
^C
--- google.com ping statistics ---
2 packets transmitted, 2 received, 0% packet loss, time 1001ms
rtt min/avg/max/mdev = 22.897/23.150/23.403/0.253 ms

Now we got that working, the routing part. To configure the system as a IPv6 router, we add net.ipv6.conf.all.forwarding = 1 to /etc/sysctl.conf. Next we enable radvd. It appears I’ve already installed radvd, otherwise install it with pacman -S radvd.

The /etc/radvd.conf file contains tons of examples. So, we’ll have to a new file for this. We can use the XS4ALL auto create config file for this, as this is not distro specific. (ArchLinux isn’t on their list, they offer Debian, Redhat, FreeBSD, and some commercial Operating Systems like Mac OSX, Windows XP and Windows Vista)


interface eth0 {
AdvSendAdvert on;
AdvHomeAgentFlag off;

prefix 2001:888:1590::/64 {
AdvOnLink on;
AdvAutonomous on;
AdvRouterAddr off;
};
};

Looking at their config file, they’ve disabled Mobile IPv6 support (AdvHomeAgentFlag off;), which is an interesting feature of IPv6. I attended a presentation about this when I was in Sweden, back in 2008. I wish features like this would be widely implemented by now. I mean… if the mobile phone networks supported this…. Think about it. Just keeping your TCP connections open while switching networks. The technology is out there… and has been for years, but no dog uses it.

Anyhow…. back to the configuration. On the other machines, IPv6 connectivity is not yet working. It seems, the system is not acting as a router yet. It appears the /etc/sysctl.conf is not parsed, as when I run sysctl -p it starts working. Some more things that have changed since the old initscripts days. Looking at the ArchLinux Wiki, we’re supposed to create a config file in /etc/sysctl.d/, and if we click the link on there, we see the file needs extension .conf, so, let’s create this file, reboot, and see if it just works.

[root@rpi-server sysctl.d]# echo net.ipv6.conf.all.forwarding = 1 > ipv6_router.conf

Unfortunately, after reboot, it’s still not working…

[andre@rpi-server sysctl.d]$ sysctl net.ipv6.conf.all.forwarding
net.ipv6.conf.all.forwarding = 0

Getting this to work is always a pain in the ass. And why isn’t it parsing the damn config files…. grrr, they are where they should be. Sysctl seem to be started, so it should parse the damn config file.

andre@rpi-server ~]$ systemctl status systemd-sysctl
systemd-sysctl.service - Apply Kernel Variables
Loaded: loaded (/usr/lib/systemd/system/systemd-sysctl.service; static)
Active: active (exited) since Thu, 1970-01-01 01:00:02 BST; 43 years and 0 months ago
Docs: man:systemd-sysctl.service(8)
man:sysctl.d(5)
Process: 49 ExecStart=/usr/lib/systemd/systemd-sysctl (code=exited, status=0/SUCCESS)
CGroup: name=systemd:/system/systemd-sysctl.service

Please note it says 1970 as the Raspberry Pi doesn’t have a RTC, and this is executing early in the boot process (btw. I’ve ordered a I²C RTC to solve this problem)

Some more searching on the internet gave me some french blog. My french is very rusty, and when I had french class in high school, I totally sucked at is, so I won’t even try to read it, and just to the command to restart. After this the config file seems to be parsed. (Does it cache it or what?)

[root@rpi-server sysctl.d]# systemctl restart systemd-sysctl.service
[root@rpi-server sysctl.d]# sysctl net.ipv6.conf.all.forwarding
net.ipv6.conf.all.forwarding = 1

Let’s reboot. After reboot it is not set. So, even though systemctl says it got an active status, somehow, it is not. I’m tired of this, I will just hack it in. Adding systemctl restart systemd-sysctl.service to my tunnel script…. no change. trying sysctl net.ipv6.conf.all.forwarding=1 No change either. Ok. it seems systemctl config files require full paths. Now the hack works. So, the /usr/lib/systemd/system/xs4all-ipv6.service ended up looking like:


[Unit]
Description=XS4ALL IPv6 tunnel
After=network.target

[Service]
Type=oneshot
RemainAfterExit=yes
ExecStart=/sbin/ip tunnel add xs4all-ipv6 mode sit remote 194.109.5.241 local 192.168.178.49 ttl 255
ExecStart=/sbin/ip link set xs4all-ipv6 up mtu 1472
ExecStart=/sbin/ip addr add 2001:888:10:590::2/64 dev xs4all-ipv6
ExecStart=/sbin/ip -6 route add ::/0 dev xs4all-ipv6
ExecStart=/sbin/sysctl net.ipv6.conf.all.forwarding=1
ExecStop=/sbin/ip -6 route del ::/0 dev xs4all-ipv6
ExecStop=/sbin/ip link set xs4all-ipv6 down
ExecStop=/sbin/ip tunnel del xs4all-ipv6

[Install]
WantedBy=multi-user.target

Still, I would prefer to see the sysctl files parsed as it should. This is just a hack. So, I am not happy about this yet… however, the basic configuration is done now. I will have an image of the current content of the SD card (first 2 GB only) and then grow the file system to occupy the complete SD card.

Making the image of the card:

[root@hplaptop raspberrypi]# dd if=/dev/mmcblk0 of=rpi-server.img bs=1M count=1886
1886+0 records gelezen
1886+0 records geschreven
1977614336 bytes (2,0 GB) gekopieerd, 207,126 s, 9,5 MB/s

The original image was 1977614336 bytes, which is 1886 MiB. So, that’s the size of used part, before resizing. Please note, even though dd says MB and GB, it actually means MiB and GiB. I am creating this image in its original size, so I can write it to a different (size) SD card later if necessary.

Growing the file system I’ve already explained when I was discussing my other Pi.

At this stage, other stuff can be added to the installation. (And I should also take another look at qmeu userspace emulation) But also some server software meant for exposure to the internet, such as http, irc, and more. Thinking about my Media Center Project, perhaps the server Pi should run the tvheadend, and connect to the XBMC Pi over the network. It’s just… I am not that comfortable with running soft real time applications on a machine which can receive unknown load from the internet (and also my local network, but I have control over that)