Tag Archive: ATMEGA32U4


I would like to tell you about the various microcontrollers out there. There are many out there, and I can impossibly describe them all. However, I will point out some interesting ones, especially for hobby projects, which also means, affordable. Quite a while ago I wrote about the Teensy 2.0. This is an Atmel ATMega32u4 based microcontroller. This board is available for US$ 16.00 at the official store. For a single board, this is still affordable but if you want a bunch of them, it’s getting costly. So, I went looking on eBay for ATMega32u4 boards. Results show up, starting at US$ 2.15 (at least, today… back then… I don’t know what the price was) Well… it’s an Arduino Pro Mini clone. I’ve never looked at the Arduino platform, not then, not now. But don’t mind the Arduino in the title, it’s just an ATMega32u4 soldered to a board. But this gave me the idea to search for Arduino in stead, leading me to Arduino Mini Pro boards. These are ATMega328p chips soldered to a board. They start at US$ 1.86 at eBay and US$ US $1.50 at AliExpess.

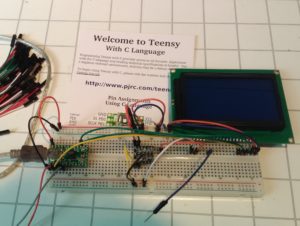
Now… let’s have a look at the hardware. Both microcontrollers are part of the Atmel AVR family. This is an 8 bit microcontroller. The first time I came in contact with this family of microcontrollers was during my education at Fontys University of Applied Science. I did a project involving an AT90USB1287 microcontroller. This project involved USB communication, controlling an KS108 based LCD display, and passing data to an FPGA. This project is also the thing that made me distrust abstraction layers. The thing was, I’ve implemented the KS108 display, working as a charm, then I added the USB support, using a library provided by Atmel, and the display stopped working, the timing was way off. This all happened many years ago, 2008 or something, I don’t know. But the thing is…. it messed with my timings… and that made me distrust abstraction layers, and this is the reason why I keep away from the Arduino environment. It’s not specific against Arduino, but I’m just afraid such an abstraction is doing stuff behind my back, writing to some register values I am not aware off, breaking stuff I am trying to do.

Well… let’s have a look at the hardware. For both ATMega32u4 and ATMega328p we have a core that can run at multiple speeds. It can run up to 8 MHz when powered at 3.3 Volts and up to 16 MHz when powered at 5 Volts. The boards sold at eBay are generally configured to run at 5 Volts and are equipped with a 16 MHz crystal. A divisor can be configured, thus it is possible to run the board at a lower speed, thus operation at 3.3 Volt is possible. As setting this divisor is a run time operation, it will power up at 16 MHz in default state. However, an ATMEL AVR microcontroller has so called fuses, these are configuration bits that determine the power up sequence. One of the options is to start the MCU with a divisor of 8. This will bring up the board at 2 MHz, which is fine for 3.3 Volt operation. Teensy boards ship with this option enabled by default, however boards from eBay generally come with this option disabled.

To program an ATMEL AVR microcontroller, there are several options. A chip can have a bootloader installed, allowing it to program itself. The microcontrollers from the Teensy series, which USB, come with a proprietary boot loader. However, this bootloader implements the USB DFU protocol, the bootloader protocol according to the USB specifications, allowing it to be used with standard programming tools. Back at the project at Fontys, I had a microcontroller boards directly from AVR, which shipped wit the Atmel FLIP bootloader, another proprietary bootloader, also implementing the standard DFU protocol. The ATMega32u4 microcontrollers from eBay implement some USB CDC protocol. They enumerate as a serial port, implementing an Arduino-specific protocol. (Yuck…. use the fucking standard protocols, damnit). I don’t use the Arduino enviorement, and even though avrdude (a software to program Atmel AVR chips) is supposed to implement this protocol, I haven’t been able to communicate through this USB Serial port it provides. The ATMega328p based boards, obviously, don’t offer USB support as they lack an USB port. (There are boards out there which have an USB to serial converter on boards, but I am not considering those.) When using those with my own USB-to-serial-TTL-boards, I am able to program them using avrdude and the arduino protocol I mentioned.

There is also a way to program an Atmel AVR board using an external programmer, implementing the Atmel ISP protocol. There are open source projects to turn an ATMega328p into such a programmer. An ATMega328p programming another ATMega328p, quite nice to see the programmer is equal to the device being programmed. All the projects I’ve seen so far use the Arduino environment, so, this is the one and only time I’ve used the Arduino IDE, to compile an Atmel ISP programmer. The programmer is connected to an USB-to-serial-TTL board, and then avrdude is used to program the target board. The connection between the programmer board and the target goes over the SPI pins of both boards, and uses an Atmel proprietary protocol. One thing to keep in mind, the ISP protocol only allows programming, but not debugging.

Another search on eBay lead me to STM32F103C8T6 boards. eBay sellers also mention “Arduino” in their titles, but don’t be distracted by that. We are talking about an ARM. This is a ARM Cortex-M3 microcontroller, 20 KiB RAM, 64 KiB Flash, running at 72 MHz. And these boards are selling for US$2.13 at eBay, and even less at AliExpress, US$ 1.67 at the time of writing. Dirt cheap, and free shipping, no kiddin’. I would like to add a note about free shipping when ordering at AliExpress. It seems, when ordering 3 or more, they do charge shipping costs, but 1 or 2, they don’t. So I suggest to place multiple orders at different sellers if you like to order more then two boards.

To program these boards, an SWD programmer is required. (Stricly speaking, it is not, there exists a built-in bootloader, which enables programming over a serial interface, this requiring an USB to Serial (TTL level) adaptor. I have not tried this method). For about US$2, you can get a “ST Link V2” on eBay or AliExpress. (The price is similar…. but so is the hardware, another case of the same hardware being both programmer and target)

Basically, in the same price range, we have a 16 MHz 8 bit microcontroller and a 72 MHz, 32 bit microcontroller. So, I would say, this looks definitely interesting. Another thing to keep in mind, the SWD protocol does not only allow programming, but also debugging. SWD is an industry standard protocol, meaning many debuggers are available, ranging from the $2 to professional programmers which can cost a couple of hundreds, or even over a thousand dollars. But well, I’m talking about hobby usage so let’s stick to a $2 ST-Link for now. Programming and in circuit debugging.

There is much more to say about these chips, their programming environments, their debugging environments, properties of their architectures, etc. etc. There are more architectures and chips I would like to discuss, there is more coming in follow up articles, thanks for reading so far,

cheers,

André

So the adventures with my Teensy 2.0 continue. I wasn’t really pleased with the DS18B20 library I found. Too simple, no support for multiple sensors, and it just didn’t work when the CPU was clocked at 16 MHz. Therefore I went to look for other libraries. I’ve found a library that seems more complete. Support for multiple sensors, reading their serial numbers, determining how they are powered, etc. The complete list. It can be found here.

As expected, the specific ATMEGA32U4 I have, was not supported out of the box. This Teensy 2.0, is it using such a rare chip no projects I encounter have support for it. So, again, the issue was the UART. I tried modding the defines in the UART library in their example project, but I gave up on that route, and decide to add the UART library I already got working to the project, and compensate for the API differences. Which resulted in a project running, capable of reading out multiple sensors connected. Tres bien. If I only knew where I put the waterproof sensor after moving… but for now, I can do experiments with the TO-92 versions.

Next thing to look at is some Real Time Clock. I’ve got two of those laying around, a PCF8563 and a DS1307. Looking at the capabilities, the PCF8563 also has timers and alarms, which could be rather useful in this setting: making measurements at regular intervals, preferably aligned with the clock time. The DS1307, it’s good if you just need to know the time. Back when I ordered them, that was the idea, to add an RTC to a Raspberry Pi. I bought two different models to evaluate them and see the differences. These RTCs have been laying around for years, and the batteries are completely depleted (0,4 Volt remaining in a 3,0 Volt battery) . Perhaps I should replace them. But for now, let’s see if we can communicate with the PCF8563.

I’ve found a library here and it seems to work as-is. No changed needed, it just works. At least, as far as reading the current time, which, the RTC thinks is 1900, due the empty battery.

Okay, so, we can have the PCF8563 generate a signal on the interrupt pin. How to handle that on the ATMEGA32U4. It seems, it has four interrupt pins, but those are in use by the UART and I²C bus. The ATMEGA32U4 also has “pin change interrupts”, which are all mapped to pins on Port B. The interrupt pin from the PCF8563 required a pull up resistor. I am using the internal pull up resistor in the ATMEGA32U4.

ISR (PCINT0_vect){
   // When PIN 7 on Port B is low
   if (!(PINB & 1<<7)) {
        uint8_t flags = PCF_GetAndClearFlags();
        printf("Interrupt!!!!!");
    }
}

void setup_pb7_int(){
        DDRB &= ~(1  << PB7); /* Set PB7 as input */
        PORTB |= (1 << PB7); /* Activate PULL UP resistor */
        PCMSK0 |= (1 << PCINT7); /* Enable PCINT0 */
        PCICR |= (1 << PCIE0); /* Activate interrupt on enabled PCINT7-0 */
        sei (); /* Enables interrupt */
}

Quite a while ago, I believe it was back in January 2013, I ordered some Teensy microcontrollers. I ordered a Teensy 2.0, a Teensy++ 2.0 and a Teensy 3.0. Now, three and a half year, I finally started to play around with them. Yesterday I started with the Teensy 2.0. This is an Atmel ATMEGA32U4 micro controller.

The project, an idea that is almost as old as my microcontrollers, is basically a temperature logger. Log the temperature measured using a DS18B20 to an SD card. However, that’s the final goal. My first idea was to interface with an LCD screen. I’ve got a model 128×64 pixels, which appears to be ST7920 based. These can be addressed in parallel or serial mode.

IMG_20160716_171341I’ve found a library to control LCD displays on microcontrollers: u8glib. This library has support for many LCD displays. So it would make switching to a different type of display as simple as changing one line of code, and everything works again.

However…. I didn’t get this thing to work. Basically, what I am trying to do is to compile the ATMEGA “Hello World” example. I have changed the Makefile to reflect that I am using an ATMEGA32U4, and added the initialisation code for a 128×64 pixel ST7920. However, nothing appeared on my screen.

I have tried to address both parallel and serial mode. Note that my display was hard wired to parallel mode using a solder bridge. Well, that’s easily fixed, but still nothing appears on the screen. There is a pot meter on the back to set the contrast, but spinning that thing around doesn’t help either.

Well… the purpose was getting some output. Next thing, the UART. I googled around and found a simple uart with avr libc. However, after adjusting the Makefile to reflect I am using an ATMEGA32U4, the thing doesn’t compile. It seems, the ATMEGA32U4 only has an UART1 and no UART0. After changing the numbers, the code compiles just fine.

Now, trying the make upload fails. It turns out, the Teensy uses a bootloader not supported by avrdude. The Teensy comes preprogrammed with the HalfKay bootloader. The code is closed and proprietary. (Some info about bootloaders) For now, I use the flashing tool supplied by PJRC. A precompiled binary, which required me to install an old version of libpng.

Nevertheless, I can upload the compiled hex file to the microcontroller, and attach an USB TTL serial device. But at his point, all I got was mojibake. At least something shows up. IMG_20160717_005547Well…. mojibake on a serial connection usually means the incorrect bitrate has been used. After tweaking around in the code, I got readable output when loading the program from the bootloader, but when I powercycled, the output was mojibake again.

What’s going on? I made incorrect assumptions on the CPU speed of this device. As the device specs say 16 MHz, I assumed it was running at 16 MHz. However, it turns out, the device is configured to boot at 2 MHz. This solved a lot of mysteries. This also made me check the LCD code, but the hello world example did configure the clock speed so it wouldn’t have suffered from incorrect timing due this fact.

So, after having established serial communication, the DS18B20 sensor is to be added. Please be carefull when wiring it up. The middle pin is the data pin, for sure, but the outer pins, when looking at the datasheet, it has bottom view, so it’s quite easy to make the mistake to swap them around. The thing gets HOT when you swap them, but it seems, the part survived it. A library to communicate with this sensor can be found here. I changed the connection setup in the header file and compiled the code. At first, I could only get a readout of a constant -0.063. In one of the comments someone mentioned clocking down to 1 MHz solves the problem, and indeed it does. So, this looks like some sort of timing bug. I suppose I don’t need 16 MHz for this project anyways, so, for the time being, let it run at 1 MHz. There are other modifications I would like to make to this library as well, such as support for multiple sensors on the bus.

IMG_20160717_005552Next thing, adding an SD card. Now, one thing to keep in mind. SD cards require 3.3 Volt I/O. The Teensy 2.0 comes with a default configuration of 5 Volt. (The microcontroller can run at 3.3 Volt, but is speed limited to 8 MHz in that case). So, for the purpose of interfacing with an SD card, I use a level shifter. At this moment I don’t have a 3.3 Volt regulator I can solder to my board. Furthermore, I intend to interface with that LCD display I mentioned before, which requires 5 Volt I/O. Either way I would require such a level shifter.

So, looking around for SD support on ATMEL microcontrollers, by first hit was SdFat. However, this required the Arduino libraries and is written in C++. I don’t intent to use C++ on a microcontroller. On a microcontroller I want plain flat C. On a microcontroller speed and size are limited, so I wouldn’t want to write C++ code for a microcontroller. So, the search continues, and gives me sd-reader. This implementation looks better suited for my purposes. However, it has no support for the specific microcontroller I have. First of all, the mentioned UART1 in stead of UART0, and probably some other register changes. There is a patch available against an old version of this code. I suppose I should analyse the changes and apply them to the latest code. However, with the patch, the example code runs and is able to read and write to my SD card.