Category: English


Since I’ve been running ArchLinux I have been experiencing certain problems. When I try to log out from XFCE4, the system appears to hang. Then, I should switch to another tty, and switch back. Then the logout window is displayed, however, the background is scrambled.

I am also experiencing trouble taking screenshots. Also now, when I run xfce4-screenshooter, it hangs until I switch to another tty and back. This makes me think the problem is related to grabbing the content of the screen.

It seems, with the particular graphics chip that is in my new laptop, a new acceleration method called “glamor”

https://wiki.archlinux.org/index.php/ATI#Glamor:

Since xf86-video-ati driver-1:7.2.0-1, glamor is automaticaly enabled with radeonsi drivers (Southern Island and superior GFX cards)

My graphics chip turns out to be such a “Southern Island” chip. From my /var/log/Xorg.0.log

[  3682.989] (--) RADEON(0): Chipset: "VERDE" (ChipID = 0x682d)

It says “VERDE”, which is, according to theRadeon Feature Matrixa Southern Island chip. The “marketing name” however, seems to be different, as the chip inside my laptop is called “FirePro M4000”. Whatever it’s called, it’s causing me trouble.

The Wiki page is even mentioning how to enable this “glamor” thing on older cards, but I wish to disable it. Looking at the man page of “radeon”, it reveals an option, “AccelMethod”, which can be either “EXA” or “glamor”.

Creating a /etc/X11/xorg.conf.d/20-radeon.conf file with

Section "Device"
    Identifier "Radeon"
    Driver "radeon"
    Option "AccelMethod" "EXA"
EndSection

solves the problem. I can now log out without having to switch to a different tty, and take screenshots. Also, the problem of the missing/blank icons in my system tray has been resolved by this.

The WYSE S30 is a thin client. It’s CPU is an AMD Geode GX500. (It identifies itself as National Semiconductor). It’s based on an CPU design by Cyrix. Anyhow, the default kernel doesn’t boot on this CPU. I’ve tried to run the installation image on this machine. In this situation, the kernel gives a message about an unknown CPU manufacturer and says the system might be unstable. After this, the system hangs. The bootable ArchLinux installation I’ve just created, it gets stuck in a reboot loop.

I have tried to compile a kernel optimised for this specific CPU, but I still get inside this reboot loop. I am wondering if the problem is caused by the bootloader. As said, I’ve been using SYSLINUX. In stead I’ve tried GRUB2, but that doesn’t even display the menu. Seeing these symptoms, it appears there are some more incompatibilities about this particular device.

Looking at the CPU, from what I’ve read, it’s basically an 686-class CPU with some AMD extentions such as 3dnow! However, it is lacking one i686 instruction. However, as I’ve created a custom kernel, that should not be the problem. Therefore I am blaming the bootloader now. So… I might have to look at some alternative boot loaders. But…. not today…. been working at this for hours. It’s enough for today.

To install a new ArchLinux installation from an existing installation, one would generally use the method described on their wiki. https://wiki.archlinux.org/index.php/Install_from_Existing_Linux#Method_1:_Using_the_Bootstrap_Image

However, I am running an x86_64 installation, and I would like to create an i686 bootable USB stick. My first idea was to replace the x86_64 bootstrap image by the i686 bootstrap image. However, the resulting USB stick turned out to be x86_64. So, that’s not quite what I was looking for.

In order to create an i686 installation from an existing x86_64, one needs to adjust the /tmp/root.i686/etc/pacman.conf file ( or /tmp/root.x86_64/etc/pacman.conf for that matter) and change the Architecture line.

Architecture = auto

into

Architecture = i686

then run the pacstrap command as described on the wiki.

After pacstrap is finished, chroot into the installed system, and install the bootloader. I’m using syslinux for this.

sh-4.2# arch-chroot /mnt
sh-4.2# pacman -S syslinux
error: failed to prepare transaction (package architecture is not valid)
:: package syslinux-6.02-4-i686 does not have a valid architecture

The “Architecture” must also be set in the target installation. In the “base” installation, nano is the available editor. Run nano /etc/pacman.conf and modify the file, then we can install syslinux.

sh-4.2# pacman -S syslinux
resolving dependencies...
looking for inter-conflicts...

Packages (1): syslinux-6.02-4

Total Download Size:    1.09 MiB
Total Installed Size:   3.24 MiB

:: Proceed with installation? [Y/n] 
:: Retrieving packages ...

etc. etc. the installation continues normally.

Installing the bootloader can take a few minutes. Be patient.

sh-4.2# syslinux-install_update -i -a -m
Syslinux BIOS install successful
Boot Flag Set - /dev/sdc1
Installed MBR (/usr/lib/syslinux/bios/mbr.bin) to /dev/sdc

Now, we need a little configuration. We still have to create an fstab, and configure the bootloader. Since we’re going to boot from USB, I will be using UUID’s to identify the right volume.

[root@8570w andre]# blkid /dev/sdc1
/dev/sdc1: UUID="a7d9a26e-abb3-461b-aacd-1ae4fe96f2e4" TYPE="ext2" PARTUUID="b71a2cfb-01" 

/etc/fstab becomes

UUID=a7d9a26e-abb3-461b-aacd-1ae4fe96f2e4	/         	ext2      	rw,relatime,data=ordered	0 1

in /boot/syslinux/syslinux.cfg, set the right root device, so it looks like

    MENU LABEL Arch Linux
    LINUX ../vmlinuz-linux
    APPEND root=UUID=a7d9a26e-abb3-461b-aacd-1ae4fe96f2e4 rw
    INITRD ../initramfs-linux.img

I have tried to boot the resulting stick in qemu-system-i386, which fails, but it boots on real hardware. (To test this, I have enabled CSM temporary on my laptop)

Now, we are this far, we can start the second phase of the project.

So… I am a little very frustrated at gitosis. But first things first…

Yesterday I’ve been finishing the configuration on my new laptop. Installing some software and such. I will post a report on that later. This afternoon, I’ve been backupping my old laptop. I took an imagine of the Windows partition, and made a tarball of the linux root file system. Earlier I’ve already made a backup of the home partition.

So, I can start opening the old laptop, and remove all the dust from it. When that’s done, it will be completely reinstalled. Actually, I was thinking about just putting a copy of the root file system from my new laptop on the old one, and then just make two required modifications: setting the hostname and creating a new fstab (as it’s UUID based)

But that’s not what my frustrations are about. This afternoon, I wanted to work on my OAuth WordPress plugin. Still a few things to be done before it can be released. Well… in order to work on my source I need to access the git. I am using gitosis to manage access to my repository. Therefore I need to add the SSH public key from my new laptop into it’s access control list. Since all my computers are in the gitosis system, I logged into my raspberry pi server, and attempted to add the said key.

[andre@rpi-server keydir]$ git push
Counting objects: 5, done.
Compressing objects: 100% (3/3), done.
Writing objects: 100% (3/3), 338 bytes | 0 bytes/s, done.
Total 3 (delta 1), reused 0 (delta 0)
remote: WARNING:gitosis.ssh:Unsafe SSH username in keyfile: 'andre@8570w.pub'
To gitosis@blaatschaap.be:gitosis-admin.git
   345de48..f110208  master -> master

Unsafe SSH username, and the key is not added. What the fuck. I started googling, and it suggested the “username” gitosis complains about is the past part of the keyfile. (This is just an arbitrary string, a comment, to identify the key to a user looking at the string, and it not used by the machine.)

ssh-rsa AAAAB3NzaC1yc2EAAAADAQABAAABAQCbkYGFFpgrYZKy2eJIdSIebvuqaBhW96owRD7WT5MgwUXVtv76NeTJHgoZbUM7/zex+DV4tZwxkTZMQ8yXUmmqdrjYdHSlkxekcE7uvX0Xul0sRywm/Qfbdlu/DQeuTorhY5zb/Zx6TNXR+zw5KKlTPbnTEIXDwqh9kpenQR0auWL24/UQjoC9hTZavxY3cQlMEABGyfyTx7xnxQFZZGZ7h5x+OOWraXY6eYw2eHV53M+eSEIqFJz3LTD4tSl4svWNHTMz7EEfKpO5FmGjwJKIz8RYQiutCmz4bfziIbZvGYJGnUl/u/UlgtdkxaMjvPkZCmnWB+nqtLre2RFKQOWz andre@8570w

But even changing that to, for example andre@hpnew.blaatschaap.be or whatever I tried. (Trying a FQDN formatted hostname as last attempt) Everything I tried, it kept complaining. As last resort I simply disabled the checking for the name. This is done in /usr/share/pyshared/gitosis/ssh.py
I have replaced

def isSafeUsername(user):
    match = _ACCEPTABLE_USER_RE.match(user)
    return (match is not None)

by

def isSafeUsername(user):
    return (True)

So, my key would be accepted regardless this “username”. But really, I’ve tried anything… I don’t get it.

Well… looking at what _ACCEPTABLE_USER_RE.match(user) is:

_ACCEPTABLE_USER_RE = re.compile(r'^[a-zA-Z][a-zA-Z0-9_.-]*(@[a-zA-Z][a-zA-Z0-9.-]*)?$')

I am not familiar with python, but, it looks like a regluar expression saying the hostname should start with a letter, which was not the case for my hostname. But, I’ve tried many variants, including plenty that should just pass this little test. So… I don’t get the problem, and I’ve been pulling my hair out. Well… I just disabled the silly little test and got access to my reposiroty.

The crazy thing is, I’ve not only added my laptop, but also another ssh account at my server, which I use for development, right in the shell, which got accepted without a complaint. Really…. what the fuck.

Update: ran this test, and expected, hpnew.blaatschaap.be is accepted just fine by this test.

andre@blaatschaap:~$ cat test.py 
import re

_ACCEPTABLE_USER_RE = re.compile(r'^[a-zA-Z][a-zA-Z0-9_.-]*(@[a-zA-Z][a-zA-Z0-9.-]*)?$')

def isSafeUsername(user):
    match = _ACCEPTABLE_USER_RE.match(user)
    return (match is not None)


if isSafeUsername("andre@blaatschaap.be"):
    print "ok"
else:
    print "nak"

if isSafeUsername("andre@hpnew.blaatschaap.be"):
    print "ok"
else:
    print "nak"

if isSafeUsername("andre@8570w"):
    print "ok"
else:
    print "nak"

andre@blaatschaap:~$ python test.py 
ok
ok
nak

Therefore I wonder, is this “username” it complains about something else? Encoded in the base64 string? I thought that was the key only….

Well, last post I’ve discussed the problems I’ve encountered while trying to boot the ArchLinux installation CD in UEFI mode. As mentioned, it booted fine in legacy (BIOS) mode. Anyhow, let’s have a look at the installation procedure on an UEFI/GPT system.
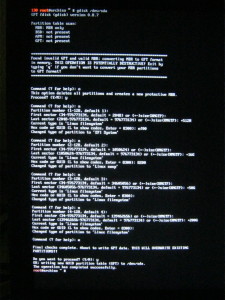
IMG_1324Since the hard disk was previously partitioned using the MBR partition scheme and booting in legacy (BIOS) mode, we need to start from scratch. This includes creating the UEFI system partition.

When we start the GPT version of fdisk, gdisk, it will give a message about the fact the hard disk is currently using  the MBR partitioning scheme, and converting could possibly be destructive. We are going to repartition the whole disk, so it’s a destructive operation anyways.

So, we create an empty parition table, with the o command, just the way we would do in fdisk, we create a new partition with the n command. Here we notice a little difference, we can enter a number between 1 and 128 here. We’ll proceed with creating a 512 MB partition, and enter HEX code EF00 for EFI BOOT PARTITION.

Since the new laptop got 8 GB of RAM, the size of the Swap partition will be 16 GB. This is the next partition I’m going to create. I will enter 8200 for Linux Swap Parition.

The next two partitions will be the root file system and the home partition, 50 and 200 GB. I have kept left an amount of unpartitioned disk space for potential use with other operating systems. gdisk defaults to code 8300, which is ext2/3/4, so I don’t need to change this. All the same as with fdisk.

Next, will be formatting the partitions. However, attempting to format the partitions immediately after closing gdisk will result in an in-use error message. Re-reading the partition table doesn’t make a difference, a REBOOT is required to proceed. After rebooting, formatting works like a charm. The UEFI BOOT partition MUST be formatted FAT32. The other partitions will be formatted ext4, and the swap partition will have to be initialised with mkswap.

# mkfs.vfat -F32 /dev/sda1
# mkfs.ext4 /dev/sda3
# mkfs.ext4 /dev/sda4
# mkswap /dev/sda2

After formatting the partitions, we can mount them and start the ArchLinux installation process.

# swapon /dev/sda2
# mount /dev/sda3 /mnt
# mkdir /mnt/home
# mount /dev/sda4 /mnt/home
# mkdir -p /mnt/boot/efi
# mount /dev/sda1 /mnt/boot/efi
# pacstrap base /mnt
# genfstab -U -p /mnt >> /mnt/etc/fstab
# arch-chroot /mnt
# ln -s /usr/share/zoneinfo/Europe/Amsterdam /etc/localtime
# mkinitcpio -p linux

So far, the installation procedure itself, has been pretty standard. The next step, setting up the boot loader, has caused me some problems. And this is the step that differentiates UEFI from BIOS booting, the boot process.

First of all, the EFI variables must be mounted. Please note the grub-install is executed inside the arch-chroot.

# mount -t efivarfs efivarfs /sys/firmware/efi/efivars
# pacman -S grub efibootmgr
# grub-install –target=x86_64-efi –efi-directory=/boot/efi –bootloader-id=grub

However, this resulted in an error message show_boot_order() "no such file or directory". The result is the system doesn’t boot automatically, but when I choose to browse the file system, I can load GRUB2 and boot correctly.

Next, I’ve tried to install Gummiboot, and “chainload” GRUB2. This works fine. However, gummiboot assumes the EFI boot partition to be mounted at /boot.

# pacman -S gummiboot
# gummiboot –path=/boot/efi

Now, setting it up to chainload GRUB, in /boot/efi/loader/entries/grub.conf:

title GRUB
efi /EFI/grub/grubx64.efi

And in /boot/efi/loader/loader.conf

default grub

makes the system bootable.

UEFI boot

As I am about to install my new laptop, I am considering using UEFI. The laptop supports UEFI but came with legacy booting enabled as default option. Whether this is the university setting or the factory default I’m not sure, since my father’s HP laptop got UEFI enables as default option.

I haven’t been working with UEFI systems before. Well, I’ve installed Ubuntu on my father’s laptop, on an external (USB) hard disk, so he could dual boot Windows and Linux. And that’s one of the advantages of UEFI. No boot manager is required. This is built in into UEFI.

My new laptop, the HP EliteBook 8570w has three options, legacy boot, uefi hybrid (both legacy and uefi / with csm), and native uefi (without csm).

I have selected the compatible mode. Now, as I try to boot from the ArchLinux installation CD. I am still using my external (USB) optical drive, since the laptop was delivered without internal optical drive. Well… so I boot from the CD, a menu shows, where I can choose between booting Arch, an UEFI shell (version 1 and 2) and to return to the firmware.

So, I select to boot Arch. The screen goes black. The USB optical drive appears to be reading slowly, but nothing happens. When I reboot, the uefi firmware does not detect the USB optical drive. Something is not going right. ArchLinux boot media are a hybrid case. The ISO contains both SYSLINUX and UEFI booting, but can also be dd’d to an USB flash medium. I believe this is the reason why I have had experienced booting ArchLinux installation media on my EliteBook 8530w. I have made an UEFI bootable USB flash drive according to the instructions on the ArchWiki.Using this I can boot normally. This appears to confirm my hypothesis the hybrid boot medium confuses the HP firmware.

So, creating partitions. Since I am using GPT, I will use gdisk in stead of fdisk. Creating partitions will be similar to fdisk. Partitions have numbers from 1 to 128. There are no concepts like extended and logical partitions. They’re a dirty hack of the MBR partitioning scheme anyways. I am still overthinking how I need to partition this system. This is the first time I am working an UEFI based system and GPT style partitioning. I still haven’t decided what boot loader I will be using, either SYSLINUX or GRUB2.

Time to test my Raspberry Pi with my new “Power Board”. In order to do so, I’m writing a clean image to my SD card.

[root@hplaptop raspberry_pi]# dd of=/dev/mmcblk0 if=archlinux-hf-2013-07-22.img bs=1M
1870+0 records gelezen
1870+0 records geschreven
1960837120 bytes (2,0 GB) gekopieerd, 317,354 s, 6,2 MB/s
[root@hplaptop raspberry_pi]# sync

Now, something weird is going on. It appears nothing has been written, as when I boot it up, it boots my previous image. It is set to it’s hostname and accepting my username and password. But this is supposed to be a clean, unconfigured instance of ArchLinuxARM. Now, I have been experiencing problems with my laptop’s SD card slot when the laptop is running hot. Now my laptop has been running for hours, but it’s not that hot I think. Anyhow. I’ll remove the existing partitions before I am going to write the image:


[root@hplaptop raspberry_pi]# fdisk /dev/mmcblk0
Opdracht (m voor hulp): o
Aanmaken van een nieuw DOS-schijflabel met schijf-ID 0x67404a92.

Opdracht (m voor hulp): w
De partitietabel is gewijzigd!

Aanroepen van ioctl() om partitietabel opnieuw in te lezen…
Leegmaken van schijfbuffers…
[root@hplaptop raspberry_pi]# ls /dev/mmcblk0*
/dev/mmcblk0 /dev/mmcblk0p1 /dev/mmcblk0p2 /dev/mmcblk0p5

What is going on here? Looking at my dmesg output, there indeed appears to be a problem with my SD slot

[12272.101180] WARNING: at drivers/mmc/host/sdhci.c:838 sdhci_send_command+0xa35/0xd90 [sdhci]()
[12272.101184] Modules linked in: nfsv3 nfs_acl rpcsec_gss_krb5 auth_rpcgss oid_registry nfsv4 fuse cpufreq_powersave uvcvideo videobuf2_vmalloc videobuf2_memops vide
obuf2_core videodev media pata_pcmcia joydev iTCO_wdt coretemp iTCO_vendor_support kvm_intel hp_wmi ppdev sparse_keymap kvm arc4 r852 sm_common nand nand_ecc nand_ids
mtd iwldvm snd_hda_codec_analog mac80211 pcmcia microcode nouveau pcspkr r592 psmouse yenta_socket memstick pcmcia_rsrc serio_raw pcmcia_core evdev mxm_wmi lpc_ich t
tm drm_kms_helper iwlwifi cfg80211 drm i2c_algo_bit i2c_core snd_hda_intel snd_hda_codec snd_hwdep snd_pcm snd_page_alloc snd_timer snd rfkill soundcore parport_pc pa
rport hp_accel fan lis3lv02d e1000e ptp thermal wmi intel_agp acpi_cpufreq input_polldev mperf button pps_core intel_gtt processor ac battery video
[12272.101283] nfs lockd sunrpc fscache ext4 crc16 mbcache jbd2 sd_mod sr_mod cdrom mmc_block sdhci_pci ahci sdhci libahci mmc_core libata firewire_ohci scsi_mod fir
ewire_core crc_itu_t ehci_pci uhci_hcd ehci_hcd usbcore usb_common
[12272.101319] CPU: 1 PID: 7658 Comm: mmcqd/0 Tainted: G W 3.10.6-2-ARCH #1
[12272.101323] Hardware name: Hewlett-Packard HP EliteBook 8530w/30E7, BIOS 68PDV Ver. F.0E 07/31/2009
[12272.101327] 0000000000000009 ffff88013934bbc8 ffffffff814c239c ffff88013934bc00
[12272.101335] ffffffff81055881 ffff8800a26e78e8 ffff8800a26e7958 0000000000000001
[12272.101342] ffff880138b954c0 0000000000000001 ffff88013934bc10 ffffffff8105595a
[12272.101350] Call Trace:
[12272.101359] [] dump_stack+0x19/0x1b
[12272.101366] [] warn_slowpath_common+0x61/0x80
[12272.101373] [] warn_slowpath_null+0x1a/0x20
[12272.101389] [] sdhci_send_command+0xa35/0xd90 [sdhci]
[12272.101396] [] ? strlcpy+0x42/0x60
[12272.101402] [] ? elv_rb_del+0x2a/0x40
[12272.101417] [] sdhci_request+0x147/0x1d0 [sdhci]
[12272.101433] [] mmc_start_request+0x124/0x250 [mmc_core]
[12272.101440] [] ? sg_init_table+0x1a/0x40
[12272.101457] [] mmc_start_req+0x325/0x400 [mmc_core]
[12272.101471] [] mmc_blk_issue_rw_rq+0xe1/0xb50 [mmc_block]
[12272.101487] [] ? __mmc_claim_host+0x131/0x1c0 [mmc_core]
[12272.101501] [] mmc_blk_issue_rq+0x1d3/0x540 [mmc_block]
[12272.101509] [] ? blk_dequeue_request+0x88/0xd0
[12272.101522] [] mmc_queue_thread+0xc3/0x1c0 [mmc_block]
[12272.101535] [] ? mmc_blk_compat_ioctl+0x20/0x20 [mmc_block]
[12272.101543] [] kthread+0xc0/0xd0
[12272.101550] [] ? kthread_create_on_node+0x120/0x120
[12272.101558] [] ret_from_fork+0x7c/0xb0
[12272.101565] [] ? kthread_create_on_node+0x120/0x120
[12272.101570] ---[ end trace c0b8a10a2230b2df ]---
[12272.104585] DMA: Out of SW-IOMMU space for 4096 bytes at device 0000:86:09.1

It seems, nothing is being written to this SD card. Is it my laptop’s SD slot, or is there something wrong with the SD card? Well…. I’ll attempt to use an USB Card Reader in stead. But that thing also refuses with stange messages in smesg

[12585.412195] usb 6-2: new full-speed USB device number 13 using uhci_hcd
[12585.412716] DMA: Out of SW-IOMMU space for 8 bytes at device 0000:00:1d.2
[12585.615960] DMA: Out of SW-IOMMU space for 8 bytes at device 0000:00:1d.2
[12585.818833] usb 6-2: device not accepting address 13, error -11
[12585.818876] hub 6-0:1.0: unable to enumerate USB device on port 2

Rebooting the system doesn’t solve the problem. Even though no SD/MMC related error messages appear in the dmesg output, nothing is being written to the card. The USB card reader appears to be working after reboot. However, I am not sure if the image was written correctly this time. After writing the 2 GB image it appears to be hanging and dmesg shows


[ 1680.563508] INFO: task systemd-udevd:1853 blocked for more than 120 seconds.
[ 1680.563518] "echo 0 > /proc/sys/kernel/hung_task_timeout_secs" disables this message.
[ 1680.563524] systemd-udevd D 0000000000000246 0 1853 127 0x00000004
[ 1680.563535] ffff88004bb8db10 0000000000000086 0000000000014340 ffff88004bb8dfd8
[ 1680.563545] ffff88004bb8dfd8 0000000000014340 ffff88012232b2a0 7fffffffffffffff
[ 1680.563552] ffff88004bb8db18 ffff88004bb8db10 ffff88012232b2a0 ffff88004bb8dad0
[ 1680.563559] Call Trace:
[ 1680.563578] [] ? wait_for_common+0x136/0x180
[ 1680.563588] [] ? wake_up_process+0x40/0x40
[ 1680.563595] [] ? wait_for_completion+0x1d/0x20
[ 1680.563603] [] schedule+0x29/0x70
[ 1680.563610] [] schedule_preempt_disabled+0x23/0x30
[ 1680.563617] [] __mutex_lock_slowpath+0x168/0x3b0
[ 1680.563656] [] mutex_lock+0x12/0x30
[ 1680.563664] [] __blkdev_get+0x6b/0x4e0
[ 1680.563671] [] blkdev_get+0x1c5/0x330
[ 1680.563677] [] blkdev_open+0x5b/0x80
[ 1680.563685] [] do_dentry_open+0x190/0x2b0
[ 1680.563693] [] ? __inode_permission+0x41/0xb0
[ 1680.563700] [] ? blkdev_get_by_dev+0x50/0x50
[ 1680.563707] [] finish_open+0x31/0x40
[ 1680.563714] [] do_last+0x2fa/0xf10
[ 1680.563721] [] path_openat+0xb0/0x4f0
[ 1680.563730] [] ? handle_mm_fault+0x2bd/0x650
[ 1680.563739] [] do_filp_open+0x38/0x80
[ 1680.563748] [] ? __alloc_fd+0xa7/0x130
[ 1680.563755] [] do_sys_open+0xe9/0x1c0
[ 1680.563762] [] SyS_open+0x1e/0x20
[ 1680.563771] [] system_call_fastpath+0x1a/0x1f

However, dd unfroze and appears to have completed normally.
[root@hplaptop raspberry_pi]# dd of=/dev/sdb if=archlinux-hf-2013-07-22.img bs=1M
1870+0 records gelezen
1870+0 records geschreven
1960837120 bytes (2,0 GB) gekopieerd, 367,65 s, 5,3 MB/s
1870+0 records gelezen
1870+0 records geschreven
1960837120 bytes (2,0 GB) gekopieerd, 612,42 s, 3,2 MB/s

Please note the multiple output due running

[root@hplaptop 1000]# while true; do kill -USR1 `pidof dd`; sleep 1; done

in another terminal window.

Anyways, I’m will obtain a new laptop soon. But that doesn’t mean this one has my permission to fall apart now. Well… it has some overheating issues, but I believe a little dusting will solve that. I just don’t feel like opening up this laptop before I have a working spare.

I mean… I have been writing about SD card problems in the past. I believe they’ve appeared especially when my laptop was running hot. But since I’m running it at 800 MHz, heat should not be an issue. However…. the problems with the USB card reader, I don’t know.

A known XSS attack is using echo $_SERVER[‘PHP_SELF’] in forms. More about this problem on stack overflow. Anyhow, recently I have been working on a project, where I was to extend existing PHP code, and I noticed this vulnerability to be present in the code. As this is a case of “replace string in all files”, this can be solved with a single command.

However, it sounded much simpler then it was. I must admit I have little experience with regular expressions, or the differences between the regular expressions in perl and sed, as the following expression worked in sed but not in perl. Another problem was escaping, especially in my previous failed attempt that was using -exec as find parameter.(As recommended here) That would need double escaping and such. Way too messy, therefore, xargs looks much cleaner. Anyhow, the following code is working:


$ find directory -name "*.php" -print | xargs sed -i  "s/<?php echo \$_SERVER\['PHP_SELF'\]; ?>/<?php echo htmlspecialchars\(\$_SERVER\['PHP_SELF'\], ENT_QUOTES, 'utf-8'); ?>/g;"

I have been complaining about file system corruption on the SD card of my Raspberry Pi’s before. A suggested cause for this problem was a faultly power supply, delivering a too low voltage. Thinking about it, a faulty power supply might also be at the root of the stability issues I’ve always experienced with my BeagleBoard.


Jul 20 00:20:42 rpi kernel: [45414.541554] EXT4-fs error (device mmcblk0p5): ext4_ext_check_inode:462: inode #36100: comm pacman: bad header/extent: invalid eh_entries - magic f30a, entries 513, max 4(4), depth 0(0)

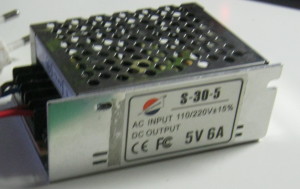
IMG_1287Anyways, I’ve decided to try to power the Raspberry Pi with a fat power supply. A 5 Volt 6 Ampère power supply should not suffer from any voltage drops by the load of a Raspberry Pi, BeagleBoard or CubieBoard for that matter.

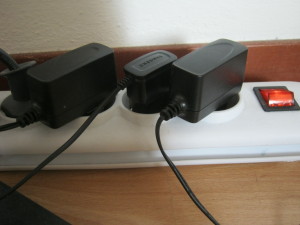
IMG_1289Apart from hooking up just an ARM board, there are more reasons for purchasing this power supply. Having a full extension socket with just power adapters that all output 5 Volts is just insane. It would be far more efficient to just have one supply to power all my devices, such as a network switch and USB hub. It could also be used to charge a phone. Think about it, a Raspberry Pi power supply is just a phone charger with Micro USB connector anyways.

Since this power supply just outputs it’s 5 Volts on a terminal block I will of course have to fix some connectivity:

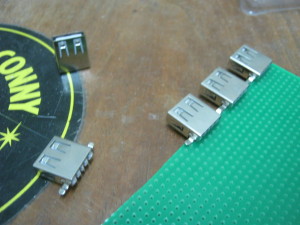
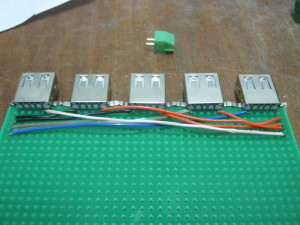
IMG_1256IMG_1261IMG_1270IMG_1254IMG_1271IMG_1262

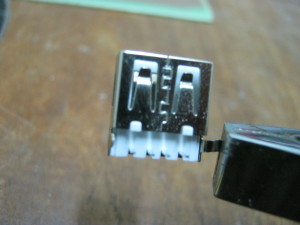
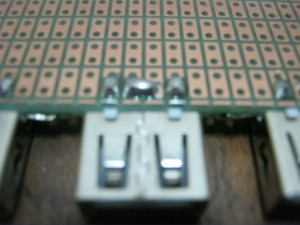
Since I am using regular female USB connectors, the part where I solder the connector itself to the PCB does not fit in my holes PCB, and I have to fold it away. The actual USB pins are soldered to the PCB. The middle pins are the data pins. I’ve short circuited the data pins to indicate being a charging port. (This is according to the USB specs.) I’ve connected some wires to the outer pins, being the plus and minus of the 5 Volt power pins. The idea was to solder some PCB terminal blocks, one to be connected to the power supply, and the others to provide power to devices, such as a network switch or my BeagleBoard, that require 5 Volt but come with some other power connected.

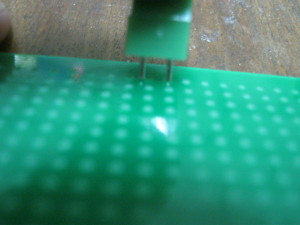
But then I discovered a problem. The distance between the pins of the connector blocks I’ve ordered is not an e-multiple. 1 e is 2,54 mm, a unit commonly used in electronics. It’s derived from American units (as 1 American inch is 2,54 cm) It is the distance between the holes on an PCB holes board. Components usually have a multiple of this. But not my connectors. So… a problem. Causing my little project to catch dust for several weeks.

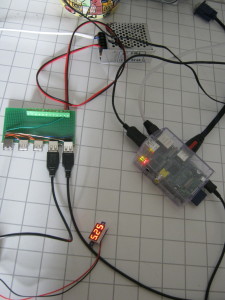
IMG_1288But thanks to Dean I’ve got some connectors that do fit by holes PCB, and I’ve continued my project. I’ve only wired two positions from my connector block, just hooking up the power supply. I’ve connected my Raspberry Pi, and a voltage meter to it now. This is just a prototype, far from the ideal situation I am aiming for. I want to built in some protection. Thinking about some over-voltage protection. I am using some cheap-ass Chinese power supply after all. Better safe then sorry, right? Same goes for over-current protection. When hooking all kinds of devices up, it might be wise. (P.S. I also have a 5 Volts 20 Ampère version…. a current like that could easily start a fire)

Anyhow, I got some 1 Ampère polyfuses. I suppose I could just put two of them in parallel to obtain a 2A polyfuse, right?

What’s going on here? I cannot SSH to my raspberry pi. SSH claims it cannot resolve the hostname, however, when I use host, it resolves the hostname just fine.

[andre@hplaptop ~]$ ssh ehv.blaaschaap.be
ssh: Could not resolve hostname ehv.blaaschaap.be: Name or service not known
[andre@hplaptop ~]$ host ehv.blaatschaap.be
ehv.blaatschaap.be has address 83.160.145.152
ehv.blaatschaap.be has IPv6 address 2001:980:55e0:1:ba27:ebff:fe89:f248